# M365 Tenant to Tenant Migration - Native Method
## Perform Office 365 Tenant to Tenant Migration Step by Step
Tenant to Tenant migration is needed when we want to move mailboxes from one tenant to another tenant in Microsoft Office 365 and this is also called cross-tenant migration. In this article, we will describe the complete process for Office365 to Office365 migration and provides complete steps to prepare the source and target tenant for the cross-tenant or [tenant to tenant migration](https://www.cloudbik.com/solutions/microsoft-365-tenant-migrations/) to move mailboxes. First Let’s discuss about this in detail.
{% hint style="warning" %}
### Licensing
**Important**
Cross-Tenant migrations require a per user license (one-time fee) and can be assigned either on the source or target user object. This license also covers [OneDrive migration](https://learn.microsoft.com/en-us/microsoft-365/enterprise/cross-tenant-onedrive-migration?view=o365-worldwide). Cross Tenant User Data Migration is available as an add-on to the following Microsoft 365 subscription plans: Microsoft 365 Business Basic, Standard, and Premium; Microsoft 365 F1/F3/E3/E5/; Office 365 F3/E1/E3/E5; Exchange Online; SharePoint in Microsoft 365; OneDrive and EDU.
**Warning**
You must purchase, or verify you can purchase, cross-tenant user data migration licenses before the next steps. Migrations fail if this step isn't completed. Microsoft doesn't offer exceptions for this licensing requirement.
If you don't have the proper license assigned to the user being migrated, the migration fails, and you receive an error that is similar to the following example:
```code
Error: CrossTenantMigrationWithoutLicensePermanentException: No license was found for the source recipient, '65c3c3ea-2b9a-44d0-a685-9bfe300f8c87', or the target recipient, '65c3c3ea-2b9a-44d0-a685-9bfe300f8c87'. A Cross-tenant User Data Migration license is required to move a mailbox between tenants.
```
{% endhint %}
**Table of Content:**
* [What is Tenant to Tenant Migration and How to Perform Office 365 Tenant Migration?](https://www.cloudbik.com/resources/blog/perform-office-365-tenant-to-tenant-migration/#section1)
* [Some Prerequisites for Source and Target Tenants](https://www.cloudbik.com/resources/blog/perform-office-365-tenant-to-tenant-migration/#section2)
* [Create a mail enabled security group in the source tenant](https://www.cloudbik.com/resources/blog/perform-office-365-tenant-to-tenant-migration/#section3)
* [Find and copy the Tenant ID of the source and target tenant](https://www.cloudbik.com/resources/blog/perform-office-365-tenant-to-tenant-migration/#section4)
* [Create the migration application and secret value in the target (destination) tenant](https://www.cloudbik.com/resources/blog/perform-office-365-tenant-to-tenant-migration/#section5)
* [Create or register a application](https://www.cloudbik.com/resources/blog/perform-office-365-tenant-to-tenant-migration/#section6)
* [Provide API Permission](https://www.cloudbik.com/resources/blog/perform-office-365-tenant-to-tenant-migration/#section7)
* [Add new Client Secret](https://www.cloudbik.com/resources/blog/perform-office-365-tenant-to-tenant-migration/#section8)
* [Grant Admin Consent for MSFT](https://www.cloudbik.com/resources/blog/perform-office-365-tenant-to-tenant-migration/#section9)
* [Create the Exchange Online migration endpoint and organization relationship in the Target (destination) Tenant](https://www.cloudbik.com/resources/blog/perform-office-365-tenant-to-tenant-migration/#section10)
* [Accept the migration application and configuring the organization relationship in the Source Tenant](https://www.cloudbik.com/resources/blog/perform-office-365-tenant-to-tenant-migration/#section11)
* [Create Mail Users in Target Tenant](https://www.cloudbik.com/resources/blog/perform-office-365-tenant-to-tenant-migration/#section12)
* [Find ExchangeGuid and ExchangeLegacyDN of source mailbox](https://www.cloudbik.com/resources/blog/perform-office-365-tenant-to-tenant-migration/#section13)
* [Add ExchangeGuid and ExchangeLegacyDN in Target Tenant](https://www.cloudbik.com/resources/blog/perform-office-365-tenant-to-tenant-migration/#section14)
* [Test migration server availability](https://www.cloudbik.com/resources/blog/perform-office-365-tenant-to-tenant-migration/#section15)
* [Assign License to the mail users in Target Tenant](https://www.cloudbik.com/resources/blog/perform-office-365-tenant-to-tenant-migration/#section16)
* [Create Migration Batch in Target Tenant](https://www.cloudbik.com/resources/blog/perform-office-365-tenant-to-tenant-migration/#section17)
### What is Tenant to Tenant Migration and How to Perform Office 365 Tenant Migration?
When we want to move our mailboxes to another tenant, or we can say to another domain who are using Office 365 with all our data like emails, contacts, calendars and rules. then we need to perform tenant to tenant migration or cross-tenant migration. The process is quite lengthy and requires prior knowledge of Windows PowerShell. In this process we will require Windows PowerShell, Microsoft 365 admin center and Azure AD Web Portal to perform some tasks.
Please read each and every instruction and step carefully to avoid any error in the cross-tenant Migration process. If at any point you make some mistake and get error, maybe you will need to perform everything from starting. Therefore, I suggest you do not miss any steps or instructions.
First you need to make sure you are provided Global Admin access. You can check this in the Microsoft 365 admin center. If not provided, then you need to provide Global Admin access to the email id from which you will be performing Office 365 Tenant to Tenant Migration.
> ***Note:** You will be required to assign **cross-tenant user data migration license** either on the source mailbox or target mailbox. Earlier it was not needed but now Microsoft made it compulsory for tenant-to-tenant migration. So, if you need hassle free migration without the need of user data migration license, we are here to help you. **Reach out to us** at* [*manoj@cloudbik.com*](mailto:manoj@cloudbik.com)*.*
**Some Prerequisites for Source and Target Tenants**
In the beginning, we will need to perform some tasks in the source and target tenant. I am going to show you some tasks with the steps below.
#### **First: Create a mail enabled security group in the source tenant.**
See the steps below to learn how to create a mail enabled security group.
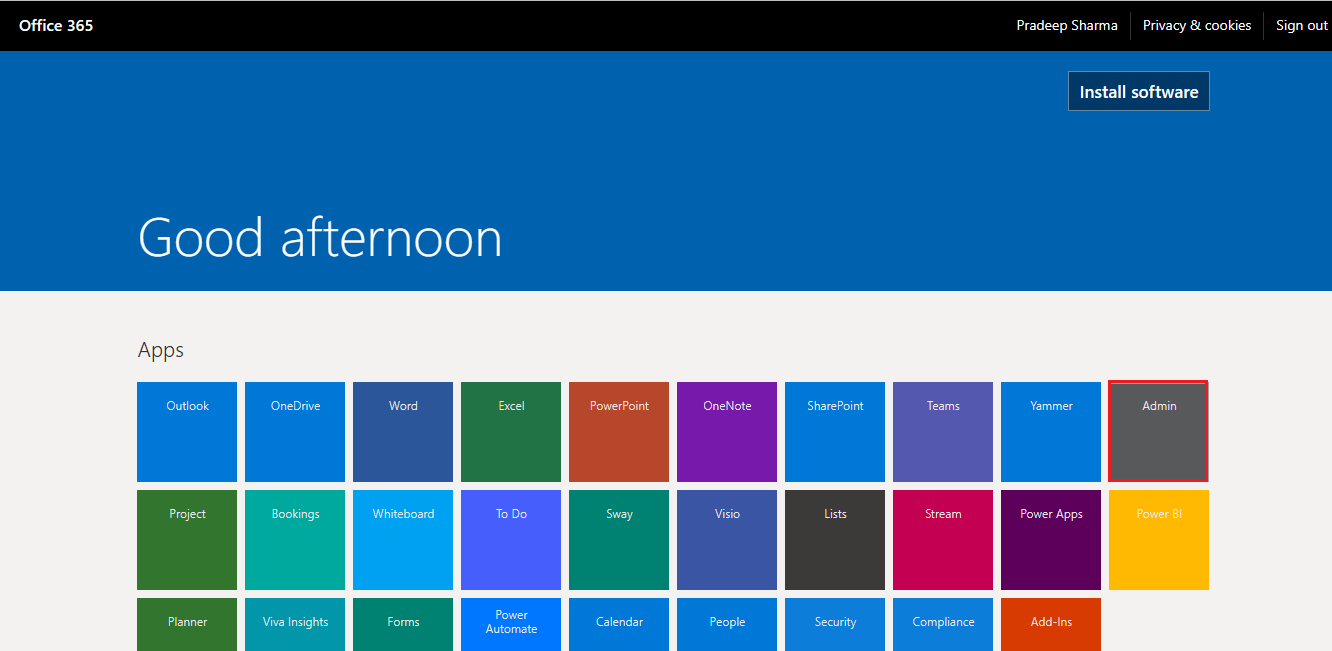
* Login to **Office.com** using Admin login credentials.
* Go to the Admin center by clicking on the **admin** from the apps panel.
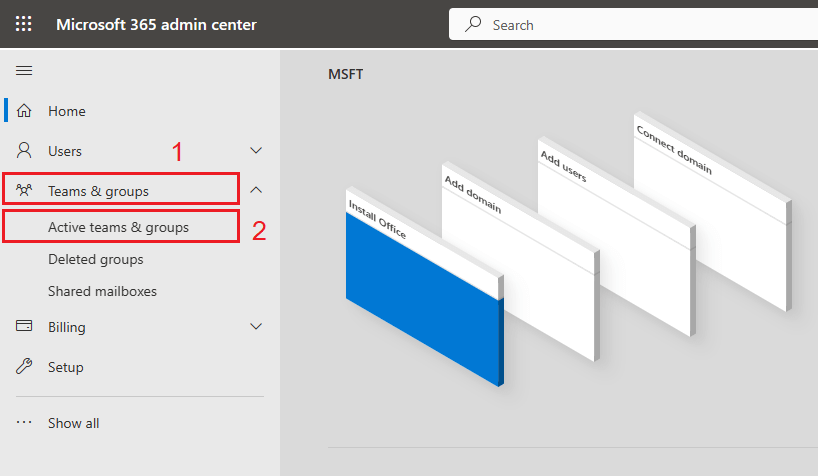
* Now select **teams and groups**, then **active teams and groups** in the left sidebar.
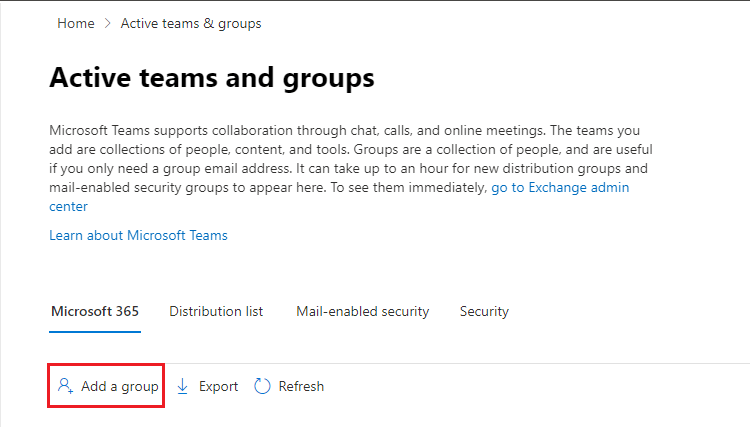
* Active Teams and Group window will open click on the **Add a Group** option.
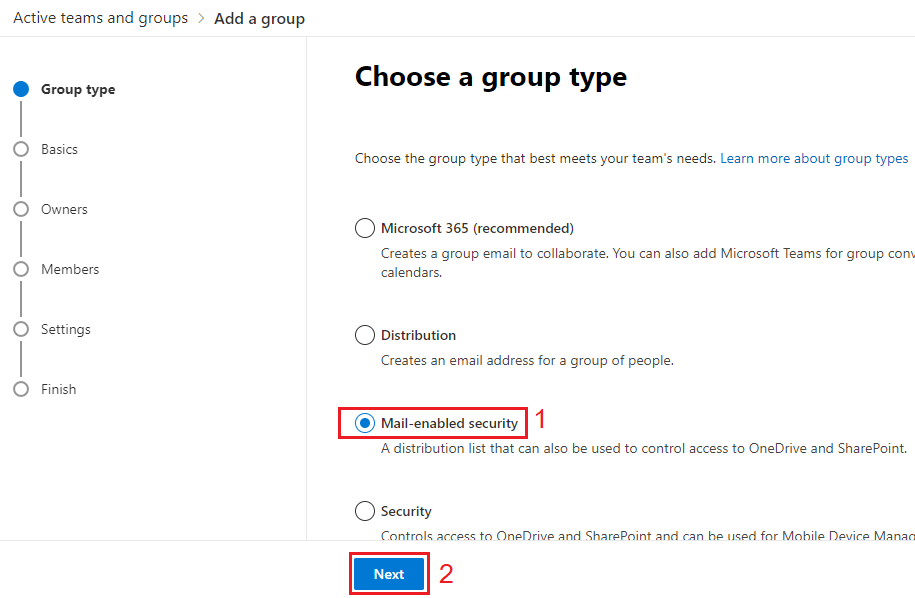
* A new window will open, asking for the Group type. Choose **Mail-enabled security** and click on the **next** button.
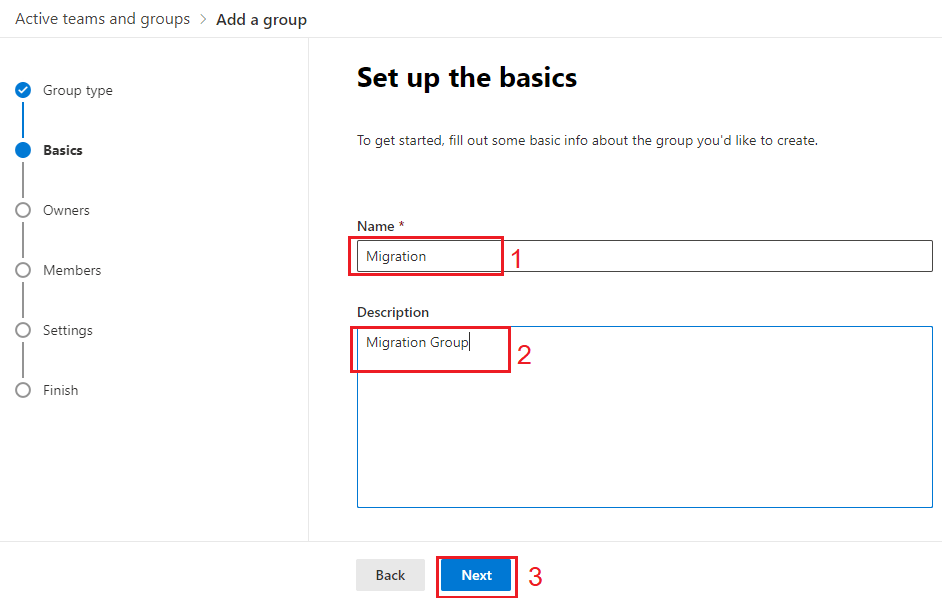
* Now Type the **name and description** for the Group and click on the **next** button.
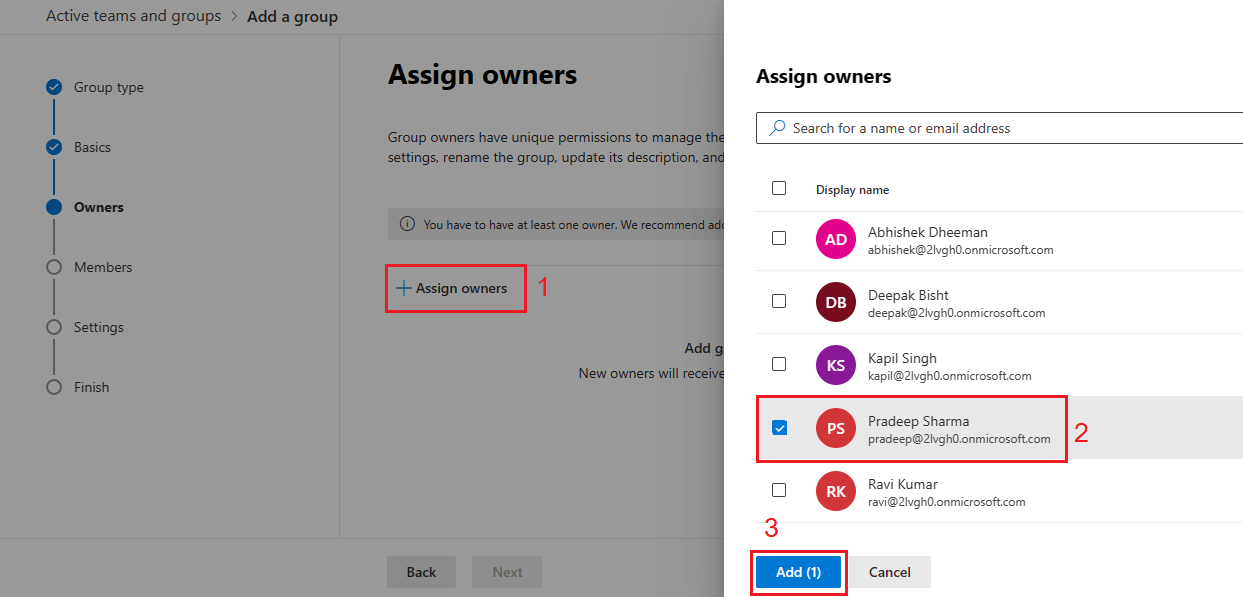
* Now you need to assign group owners. You can add single or multiple group owners. Click on the **Assign Owners** to set the group owners. Select the owner and click on the **Add** button.
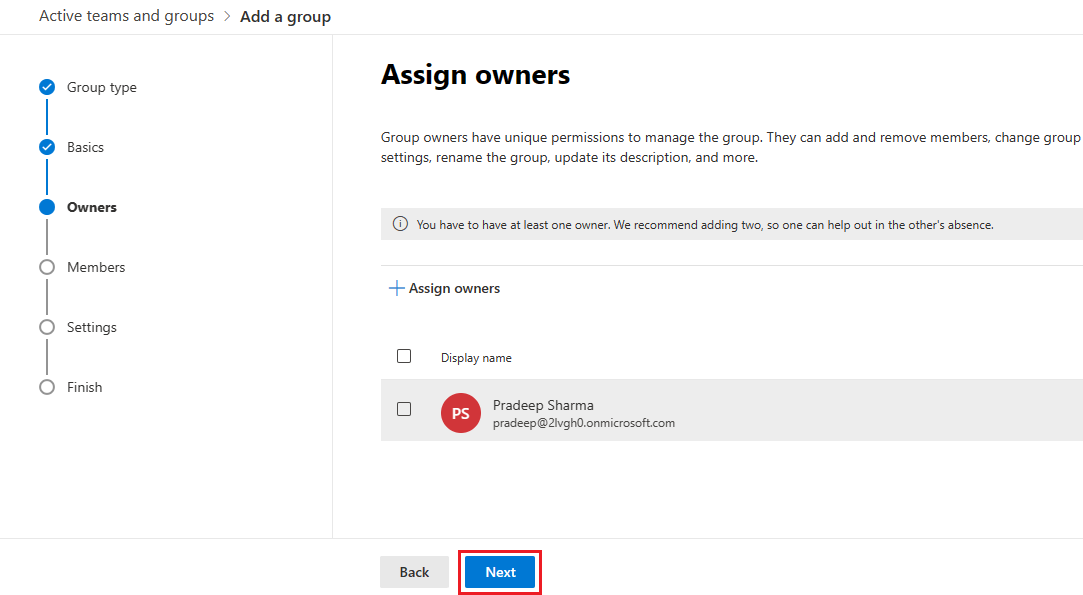
* You can see the assigned owner in the list. Click **next** for further steps.
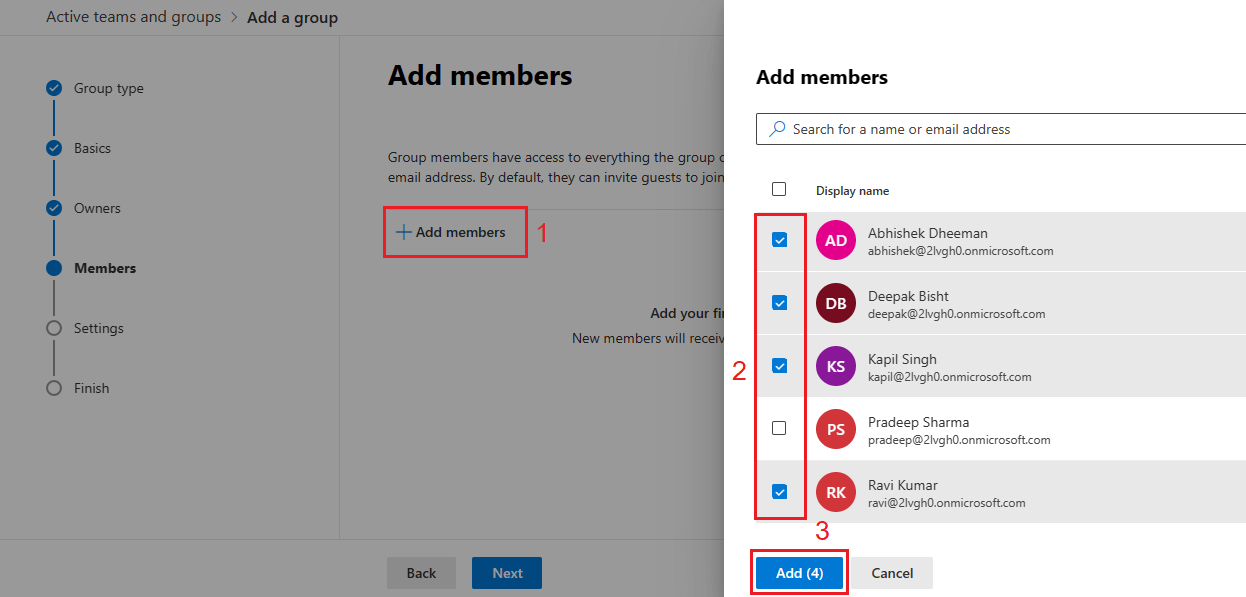
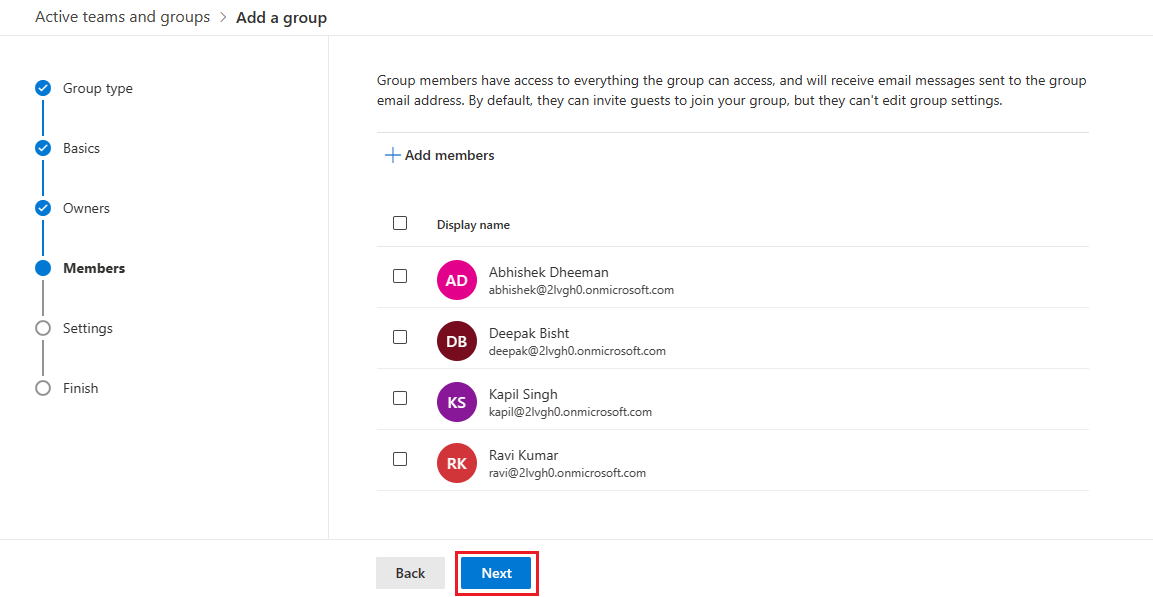
* Now you have to add members for migration. Click on the **add members** button to add the members whom mailboxes you want to migrate. A window will open on the right side, showing the users list. **Select the members** and click on **Add** button.
* Now it will show you a list of all the added members. Click **next** to proceed further.
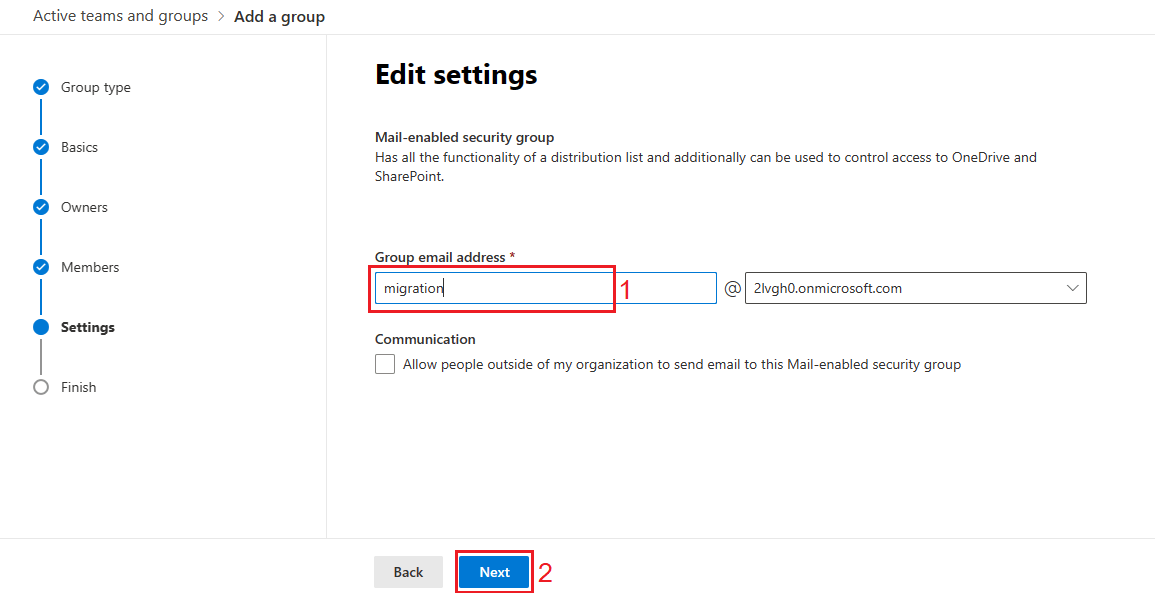
* Now it will ask for Group email address. In this window, enter the **group email address** and click **next** to proceed further.
* Now review window will appear. Review your details and click on **create group** button to add the group.
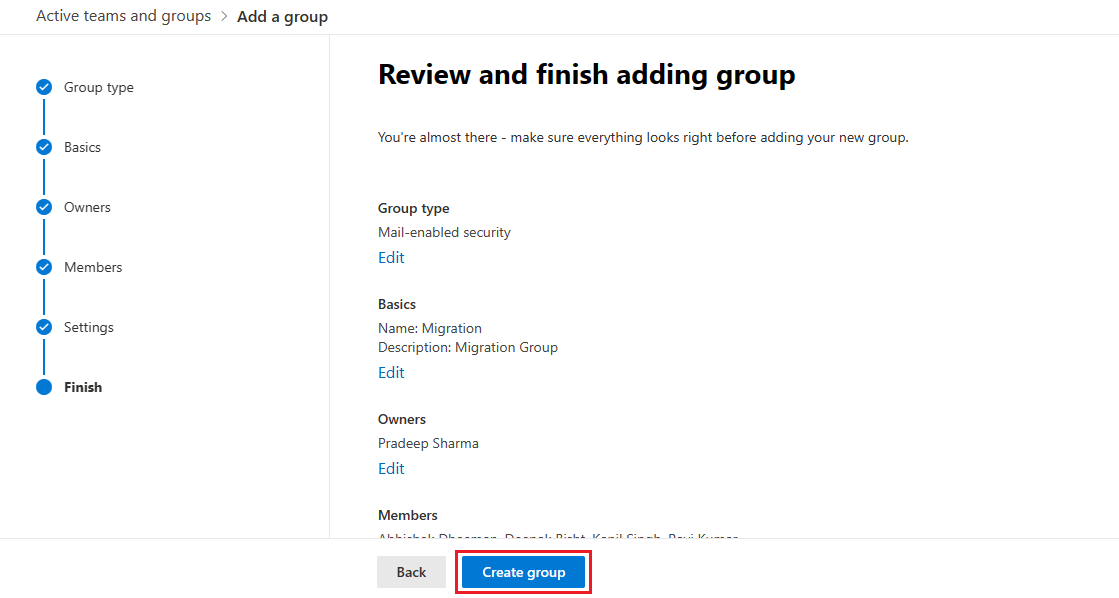
Your Mail enabled security Group has been created.
Copy the Group Name and email address and save it as it will be needed later.
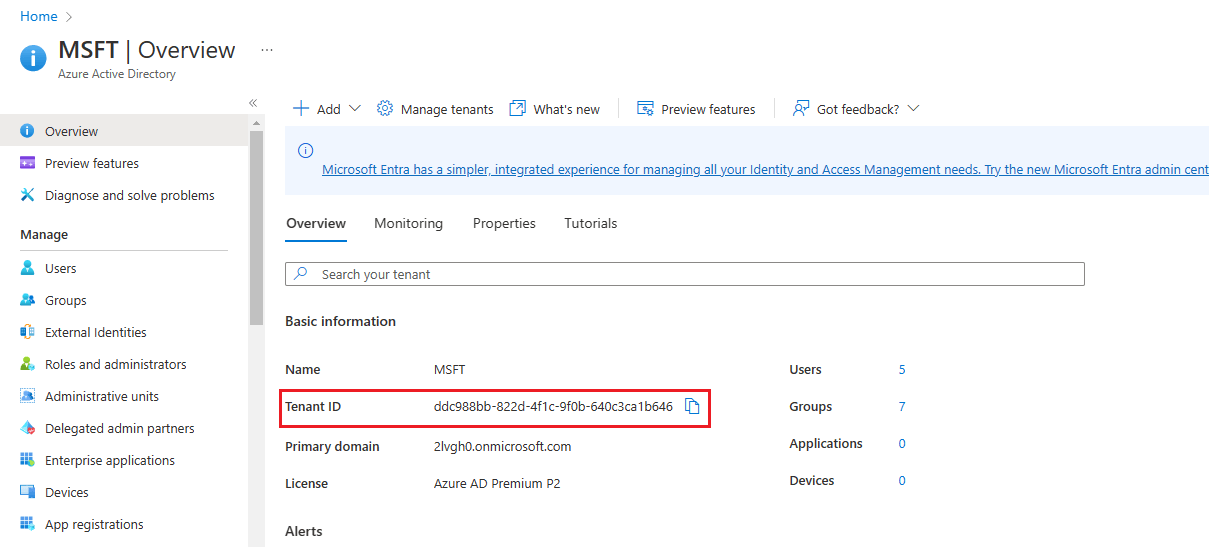
#### **Second: Find and copy the Tenant ID of the source and target tenant.**
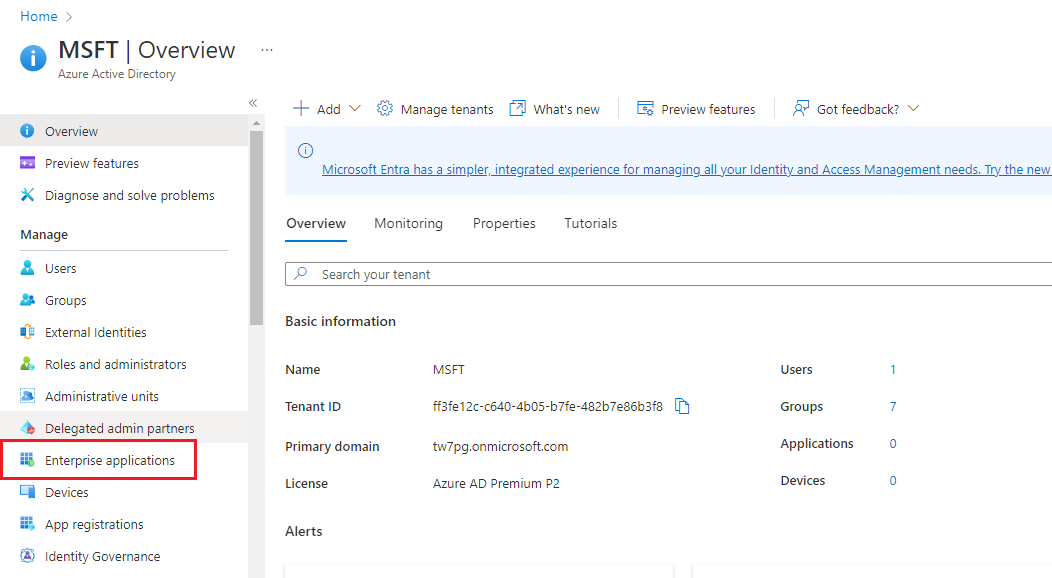
You need to copy and save the tenant ID of both source and target tenant.
* Visit the below URL in the target and the source account.
* Copy the **tenant ID** under the Basic Information and save it.
### **Create the migration application and secret value in the target (destination) tenant**
#### **First: Create or register a application**
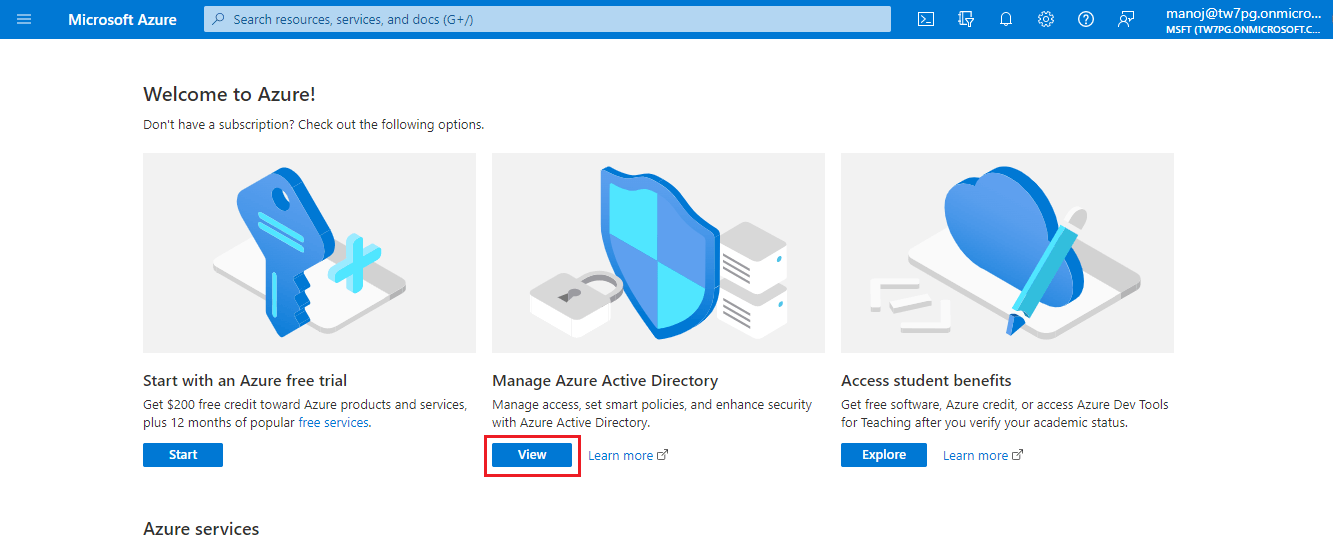
* Visit [https://portal.azure.com](https://portal.azure.com/) and login using target tenant admin credentials to enter into the Azure AD portal.
* Now click on the **view** button under Manage Azure Active Directory.
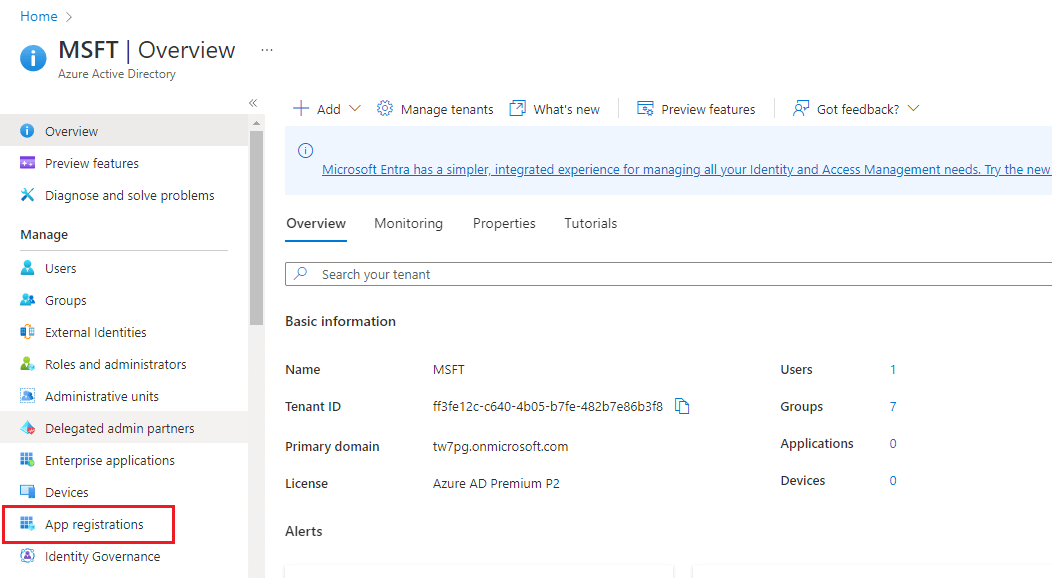
* Click on the **app registration** in the left sidebar to create an application.
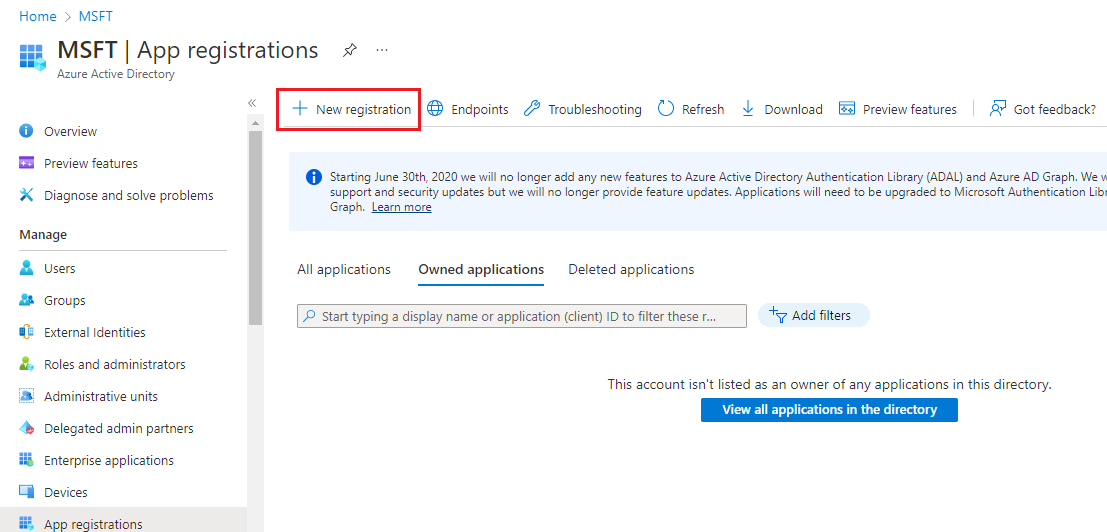
* Now click on the **new registration** to register a new application.
* Register an application window will open. Type the **name for the application**. In the Supported Account Type choose “**Accounts in any organizational directory (Any Azure AD directory – Multitenant)**”. Under the Redirect URI options, in select a platform, select **Web**, and in the URL option type \*\*. After this click on the **register app**.
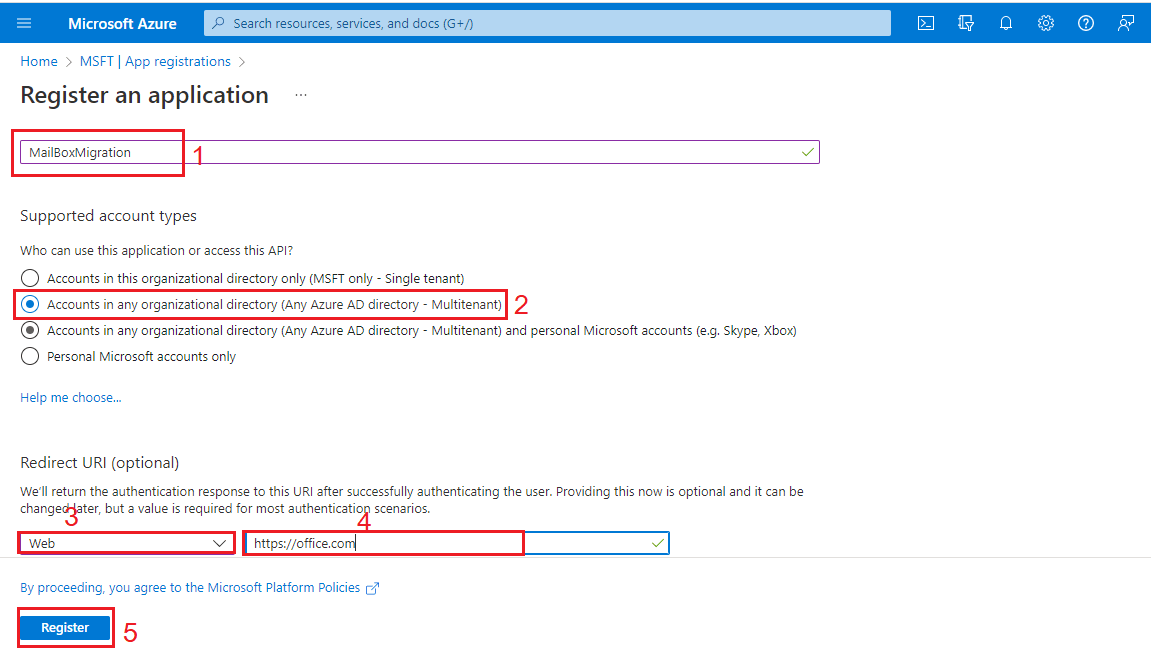
You can see on the top right side that application is creating.
Once completed, it will take you to your application page. **Save** the Application name and Application (client) ID as it will be needed later.

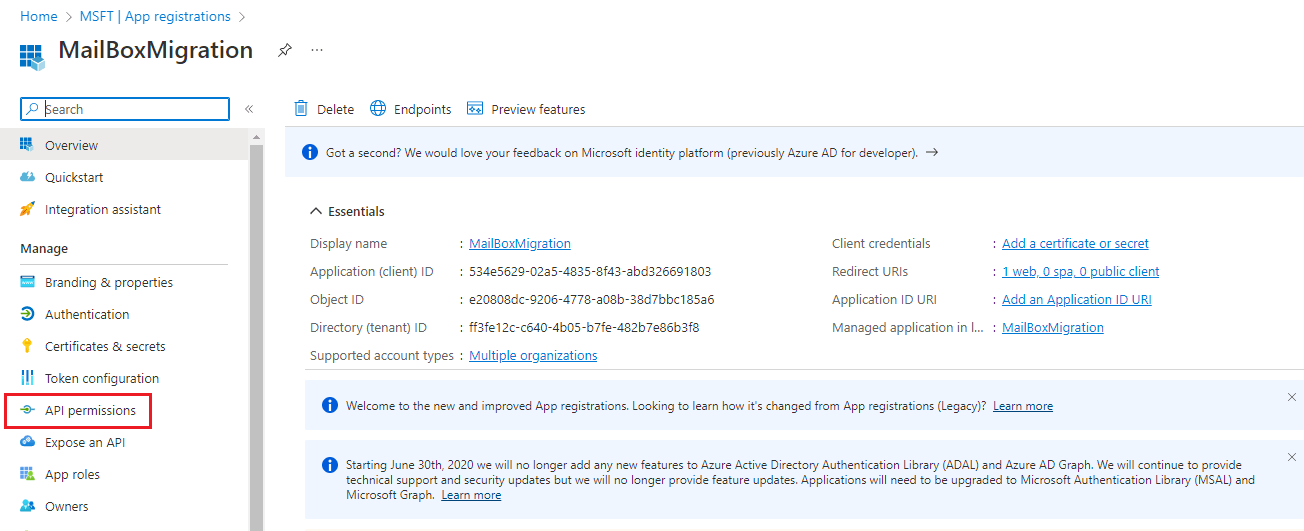
#### **Second: Provide API Permission**
* Now **click on API Permissions** in the left sidebar.
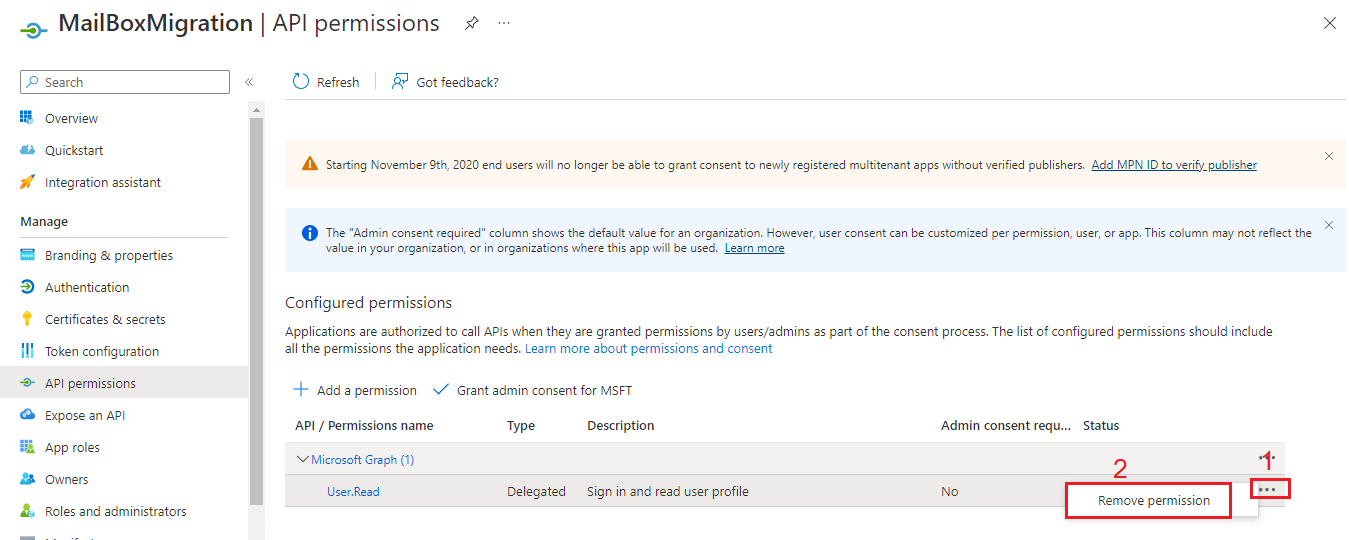
* API Permission window will open on the right side. By default, User Read permission is assigned and it is not needed. Click on the **three dots** and **remove** User Read permission.
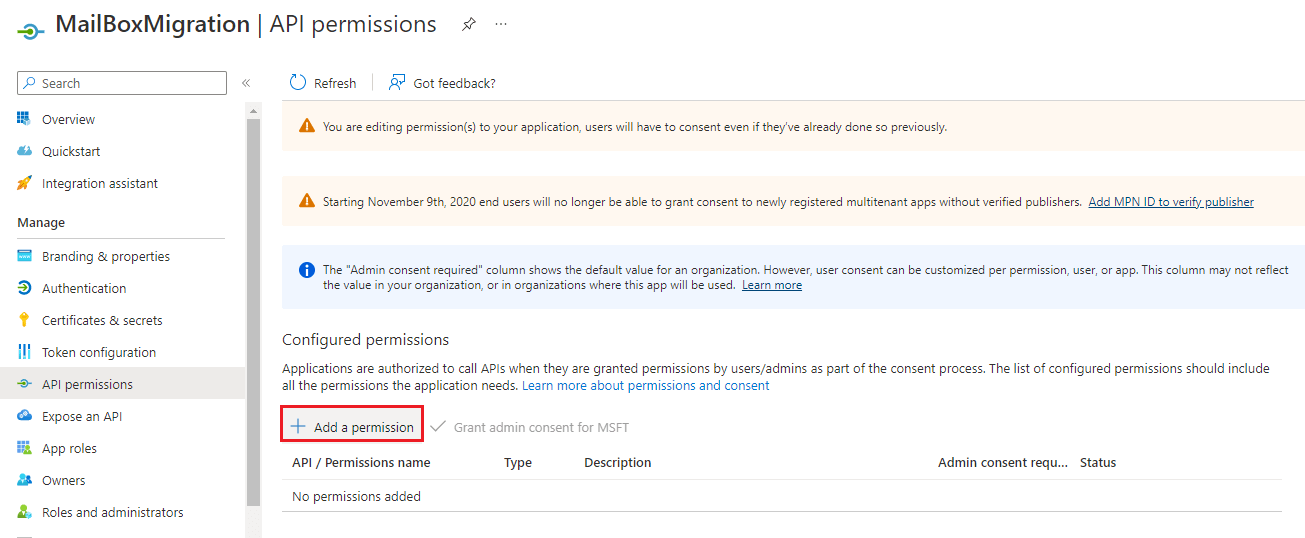
* Now we need to provide mailbox migration permission. Click on **Add a permission**.
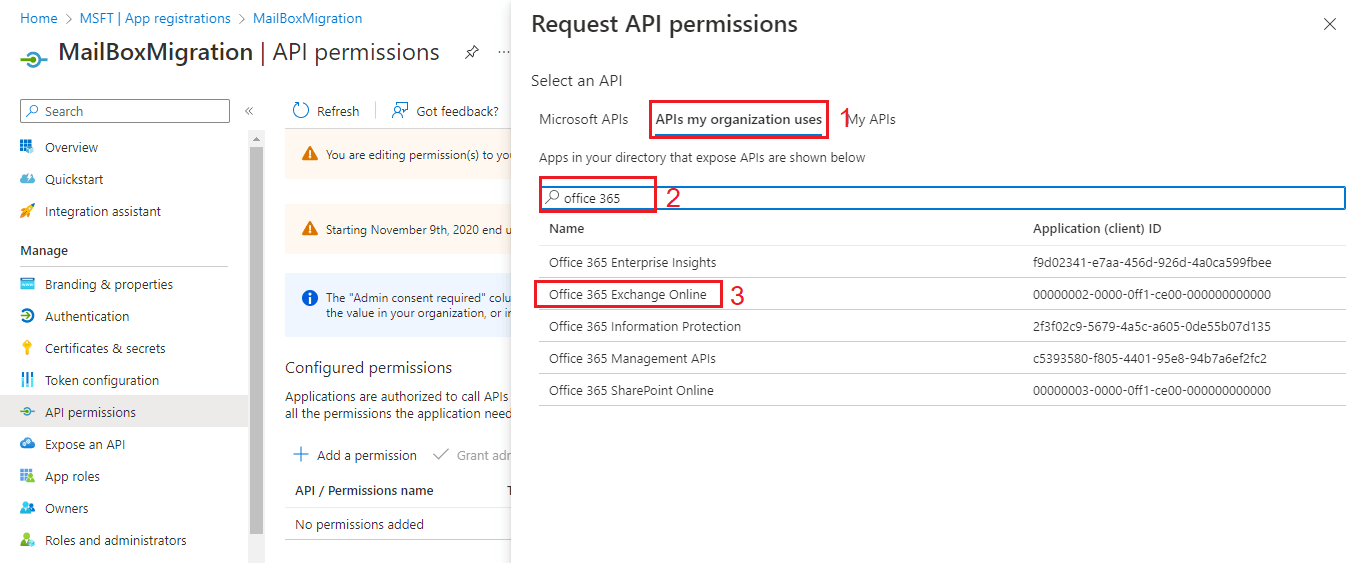
* Request API permissions window will appear on the right side. Click on the **APIs my organization uses** and search for office 365 and select **Office 365 exchange online**.
* Now settings for Office 365 exchange online will open, click on the **application permissions**.
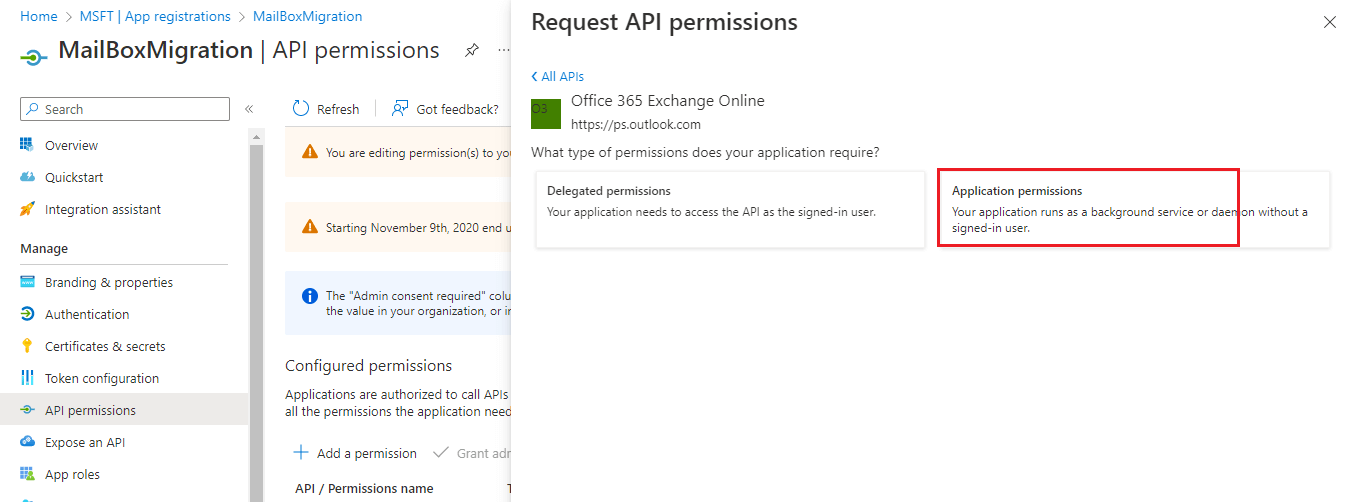
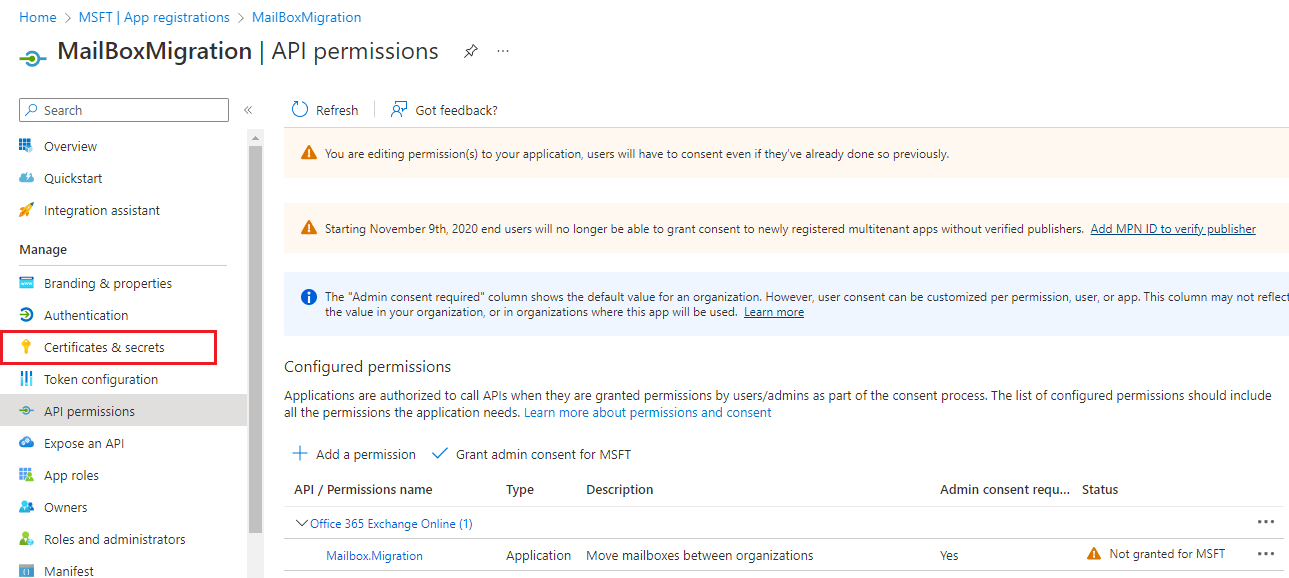
* Search for the mailbox. Click on the **mailbox** and select **Mailbox.Migration** permission and click on the **add permission** button.

Now you can see mailbox migration permission is assigned.
#### **Third: Add new Client Secret**
* Click on the **certificates and secrets**.
* Now click on the **new client secret** to create secret value for the application. Add a Client Secret window will open on the right side. **Add the description** for the client secret and click on the **add** button.
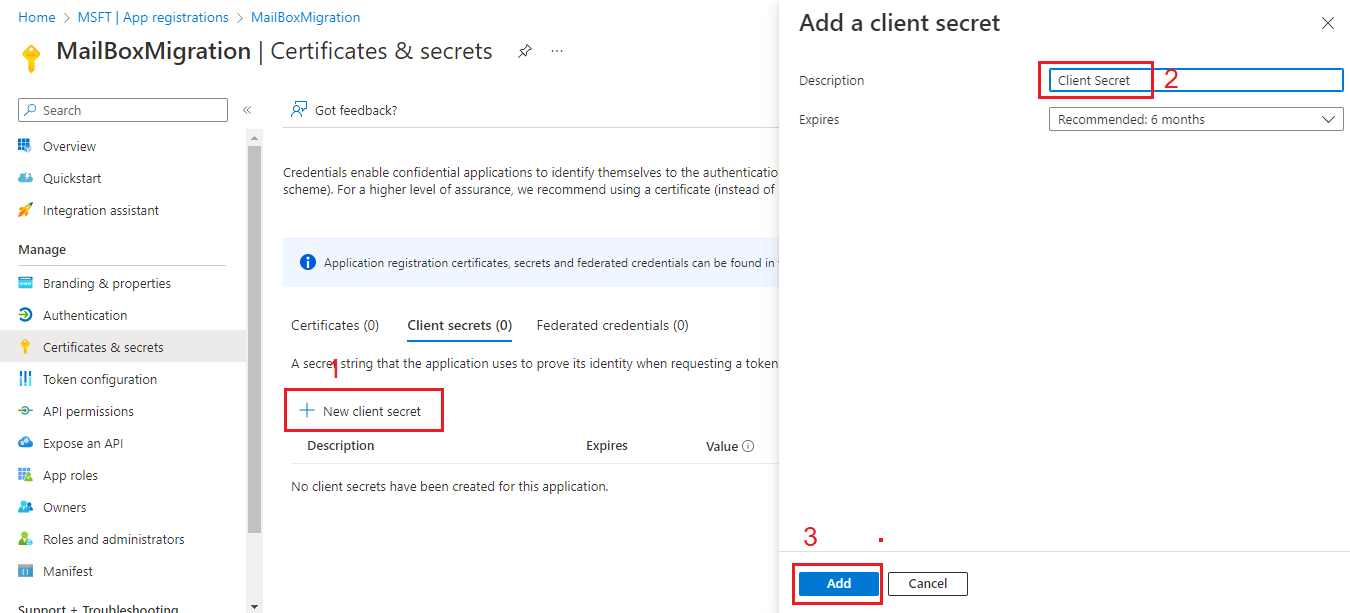
* Now a client secret has been created. Copy the secret value and save it.
#### **Fourth: Grant Admin Consent for MSFT**
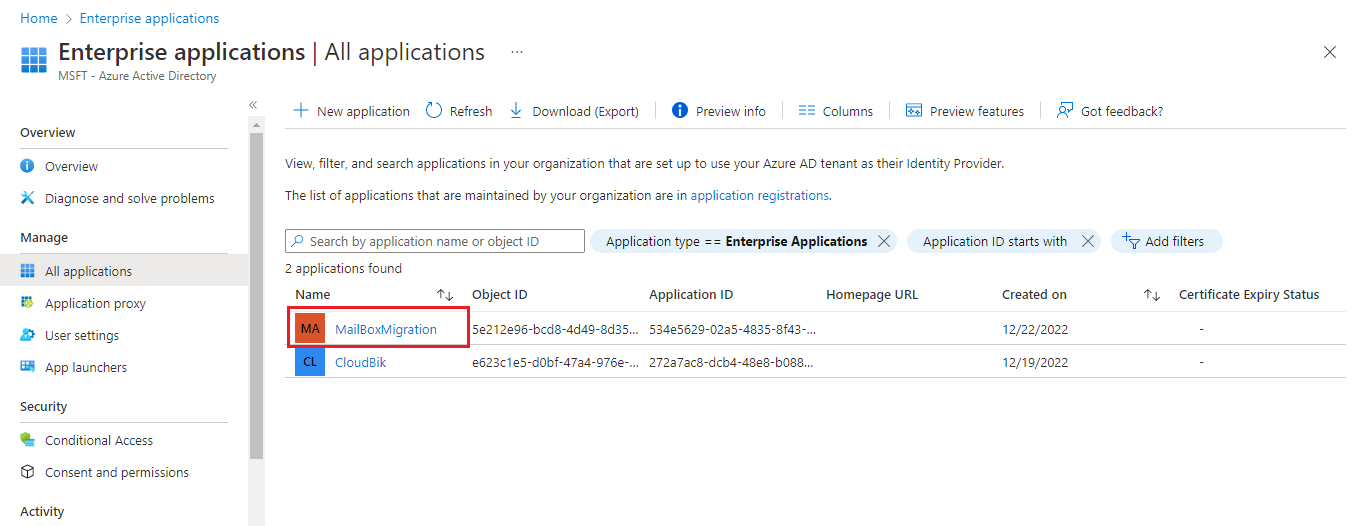
* This mailbox move permission requires admin consent. Now you need to Grant Admin Consent, for that go to back azure active directory. Click on the **enterprises applications**.
* Now **select the application** which we created earlier.
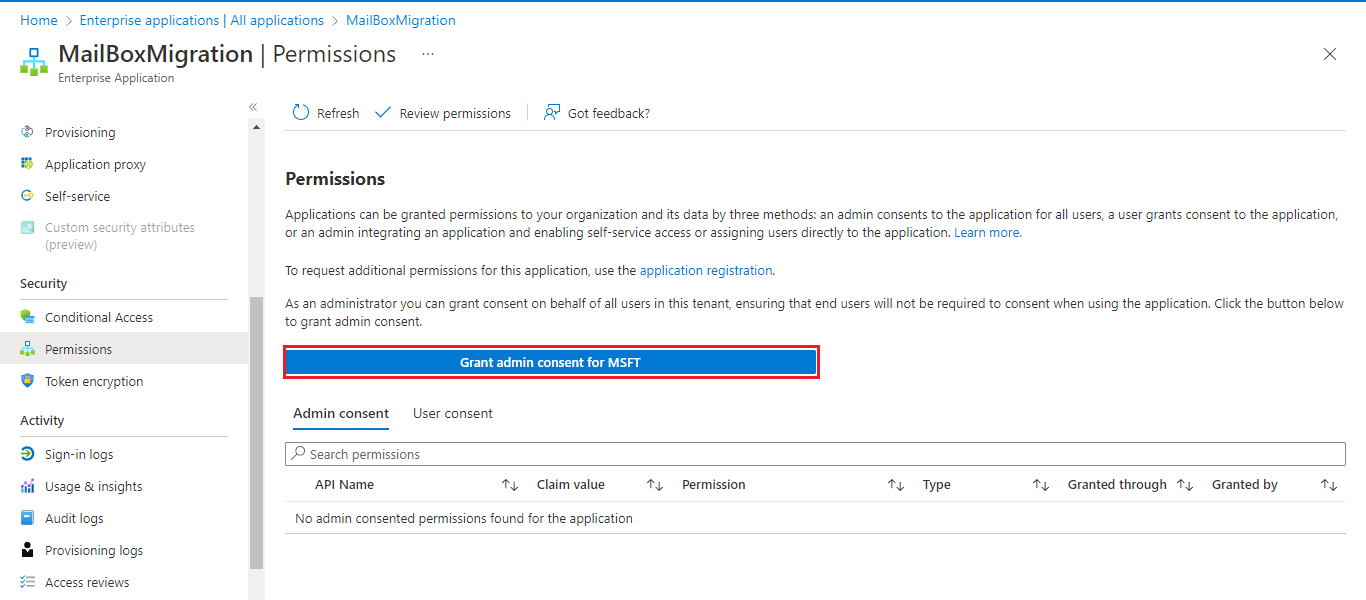
* Click on the **permissions** in the left sidebar and click on **Grant Admin Consent for MSFT**.
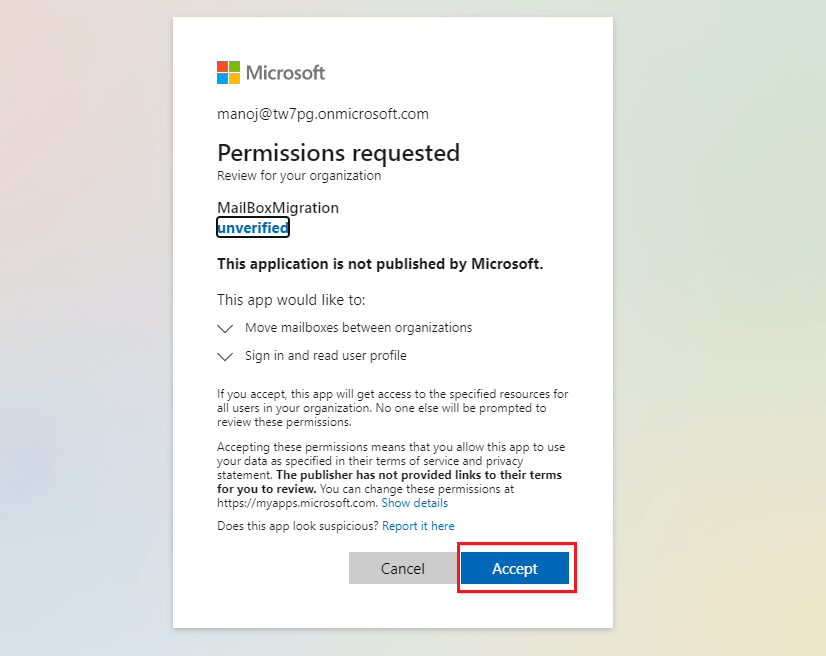
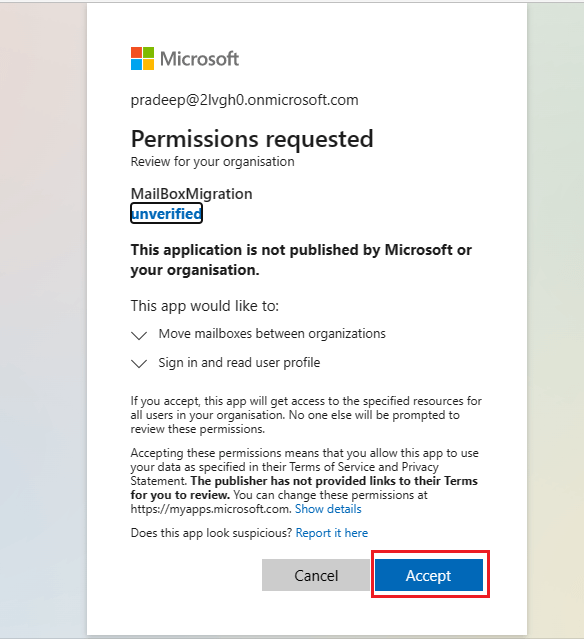
* A new window will appear asking for the confirmation. Click on the **Accept** button.
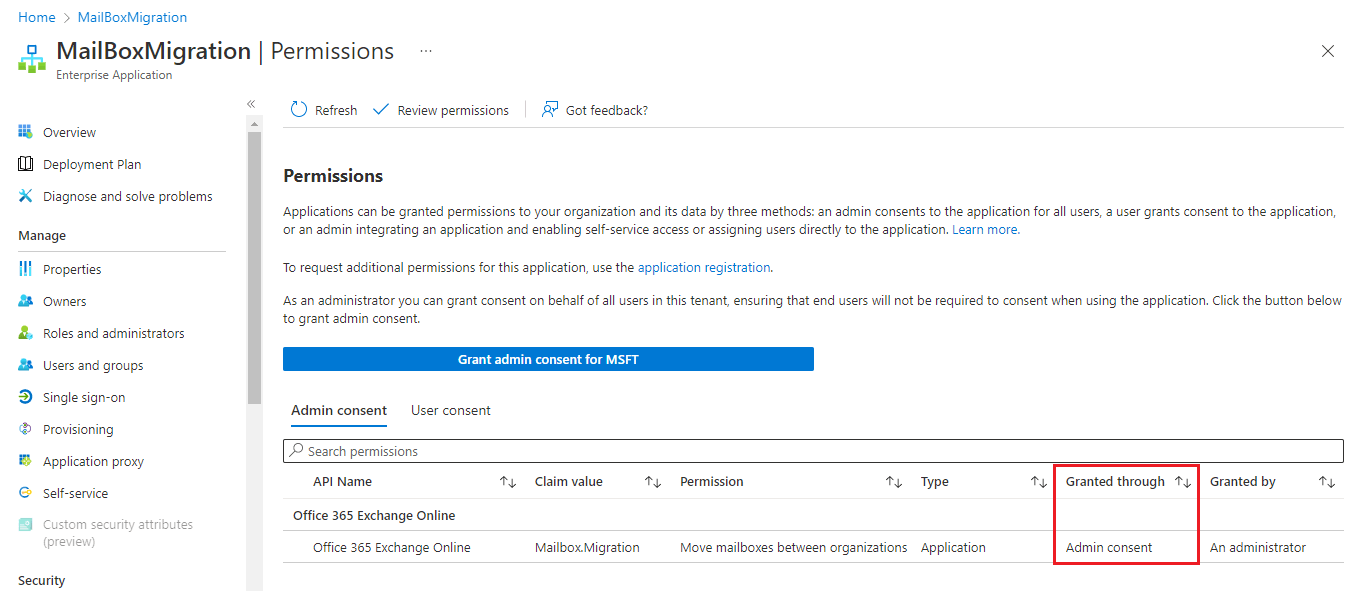
* Refresh the page. Now you can see the permission granted through admin consent.
#### **Create the Exchange Online migration endpoint and organization relationship in the Target (destination) Tenant.**
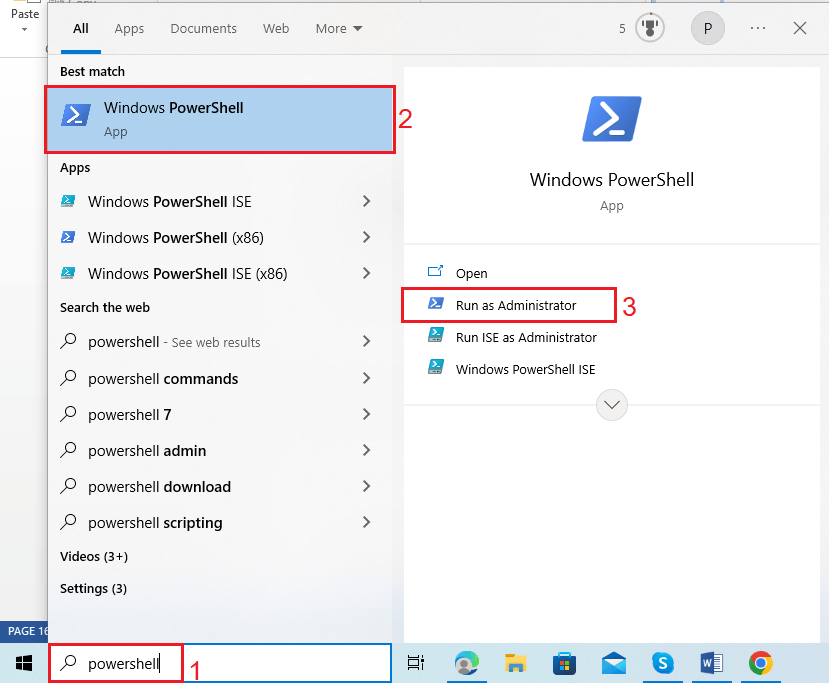
* Search for **Windows PowerShell** and click on **run as administrator**.
* The execution policy in Windows PowerShell is set as restricted by default. To Change to execution policy to Unrestricted to run any PowerShell scripts, users should execute the following command.
| 1 | `Set-ExecutionPolicy Unrestricted` |
| - | ---------------------------------- |
Type Y and press enter when asking for permission.

{% hint style="warning" %}
### Create an enterprise application
1. Run `connect-MgGraph -Scopes "Application.ReadWrite.All"` and sign in with at least a Cloud Application Administrator role.
2. Run the following command to create the enterprise application:
```powershell
New-MgServicePrincipal -AppId 00001111-aaaa-2222-bbbb-3333cccc4444
```
3. To delete the enterprise application you created, run the command:
```powershell
Remove-MgServicePrincipal
-ServicePrincipalId bbbbbbbb-1111-2222-3333-cccccccccccc
```
{% endhint %}
* Now[ **Connect to Exchange Online PowerShell**](https://www.cloudbik.com/resources/blog/connect-to-exchange-online-powershell/) using target tenant login credentials.
* Create a **new migration endpoint** for tenant to tenant mailbox migration by executing the **below PowerShell script**.
| 123456 | `# Enable customization if tenant is dehydrated$dehydrated=Get-OrganizationConfig \| select isdehydratedif ($dehydrated.isdehydrated -eq $true) {Enable-OrganizationCustomization}$AppId = "[guid copied from the migrations app]"$Credential = New-Object -TypeName System.Management.Automation.PSCredential -ArgumentList $AppId, (ConvertTo-SecureString -String "[this is your secret password you saved in the previous steps]" -AsPlainText -Force)New-MigrationEndpoint -RemoteServer outlook.office.com -RemoteTenant "[sourcetenant.onmicrosoft.com]" -Credentials $Credential -ExchangeRemoteMove:$true -Name "[the name of your migration endpoint]" -ApplicationId $AppId` |
| ------ | --------------------------------------------------------------------------------------------------------------------------------------------------------------------------------------------------------------------------------------------------------------------------------------------------------------------------------------------------------------------------------------------------------------------------------------------------------------------------------------------------------------------------------------------------------------------------------------------------------------------------------------------------------------------------------------- |
**Note:** Paste application id in place of \[guid copied from the migration app] and client secret value in place of \[this is your secret password you saved in the previous steps]. Type the migration endpoint name in place of \[the name of your migration endpoint]. Save the endpoint name as we need it later.

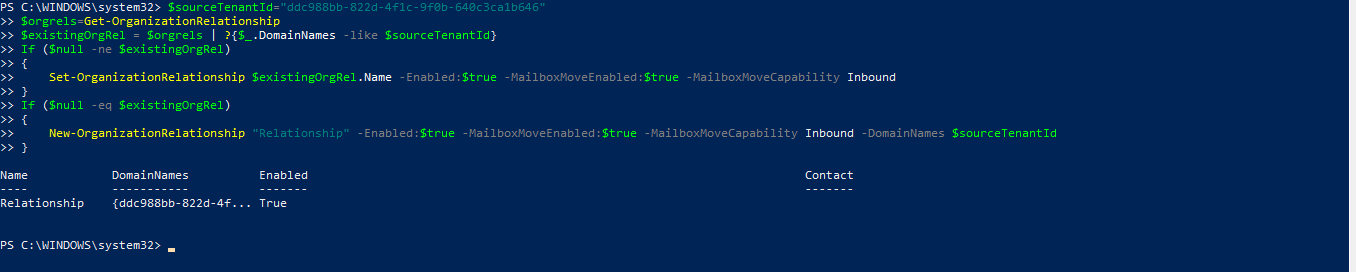
* Now **Create or edit organization relationship object** to your source tenant by executing below script in PowerShell in target tenant account.
[?](https://www.cloudbik.com/resources/blog/perform-office-365-tenant-to-tenant-migration/)
| 1234567891011 | `$sourceTenantId="[tenant id of your trusted partner, where the source mailboxes are]"$orgrels=Get-OrganizationRelationship$existingOrgRel = $orgrels \| ?{$_.DomainNames -like $sourceTenantId}If ($null -ne $existingOrgRel){Set-OrganizationRelationship $existingOrgRel.Name -Enabled:$true -MailboxMoveEnabled:$true -MailboxMoveCapability Inbound}If ($null -eq $existingOrgRel){New-OrganizationRelationship "[name of the new organization relationship]" -Enabled:$true -MailboxMoveEnabled:$true -MailboxMoveCapability Inbound -DomainNames $sourceTenantId}` |
| ------------- | ------------------------------------------------------------------------------------------------------------------------------------------------------------------------------------------------------------------------------------------------------------------------------------------------------------------------------------------------------------------------------------------------------------------------------------------------------------------------------------------------------------------------------------------------------------------------- |
**Note:** Place Source Tenant ID that we copied earlier in place of \[tenant id of your trusted partner, where the source mailboxes are]. Type Name for the Organization Relationship in place of \[name of the new organization relationship]. Also save this relationship name as we need it later.
#### **Accept the migration application and configuring the organization relationship in the Source Tenant**
* First login into Source Tenant account using Admin login credentials.
* Now copy and paste the below URL.
**Note:** Type your source tenant in the place of (sourcetenant.onmicrosoft.com). Type application ID in place of \[application\_id\_of\_the\_app\_you\_just\_created].
* Now after editing **open this URL** in the browser where you are logged in with source tenant account.
* **Accept** the application invitation when the pop up appears.
* Now [**Connect to Exchange Online PowerShell**](https://www.cloudbik.com/resources/blog/connect-to-exchange-online-powershell/) using the source tenant account details.
* Once connected, **create a new organization relationship** or edit your existing organization relationship object to your target (destination) tenant **using PowerShell script**:
[?](https://www.cloudbik.com/resources/blog/perform-office-365-tenant-to-tenant-migration/)
| 123456789101112 | `$targetTenantId="[tenant id of your trusted partner, where the mailboxes are being moved to]"$appId="[application id of the mailbox migration app you consented to]"$scope="[email address of the mail enable security group we created]"$existingOrgRel = $orgrels \| ?{$_.DomainNames -like $targetTenantId}If ($null -ne $existingOrgRel){Set-OrganizationRelationship $existingOrgRel.Name -Enabled:$true -MailboxMoveEnabled:$true -MailboxMoveCapability RemoteOutbound -OAuthApplicationId $appId -MailboxMovePublishedScopes $scope}If ($null -eq $existingOrgRel){New-OrganizationRelationship "[name of your organization relationship]" -Enabled:$true -MailboxMoveEnabled:$true -MailboxMoveCapability RemoteOutbound -DomainNames $targetTenantId -OAuthApplicationId $appId -MailboxMovePublishedScopes $scope}` |
| --------------- | ------------------------------------------------------------------------------------------------------------------------------------------------------------------------------------------------------------------------------------------------------------------------------------------------------------------------------------------------------------------------------------------------------------------------------------------------------------------------------------------------------------------------------------------------------------------------------------------------------------------------------------------------------------------------------------------------------------------------------------------------------------------------------------------------------------------------------- |
**Note:** Type Tenant ID of the target tenant in place of \[tenant id of your trusted partner, where the mailboxes are being moved to]. Put application id in place of \[application id of the mailbox migration app you consented to]. Type email address of the mail enabled security group in place of \[email address of the mail enable security group we created]. Put the organization name that we created in the target tenant in place of \[name of your organization relationship].

Once these steps are done. We need to create mail users in the target tenant for the cross-tenant migration. Lets see how to perform this.
#### **Steps to Create Mail Users in Target Tenant**
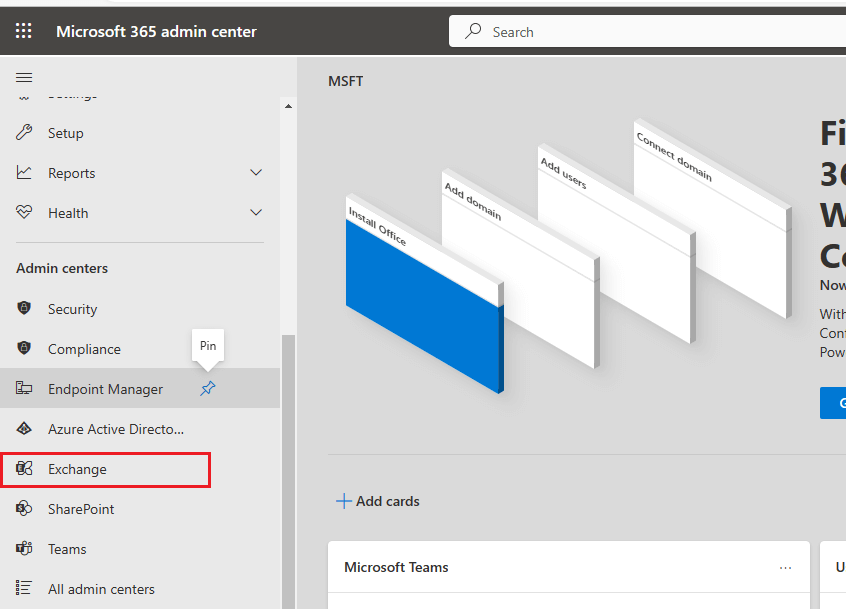
* Go to the **Admin Center** in Office 365 Target Tenant account. Once you enter into the admin center, click on the **exchange** in the left sidebar to go into the exchange admin center.
* Now click on the **recipient** and then select **contacts** from the drop-down menu. Contacts window will open, click on the **Add a mail user** tab.
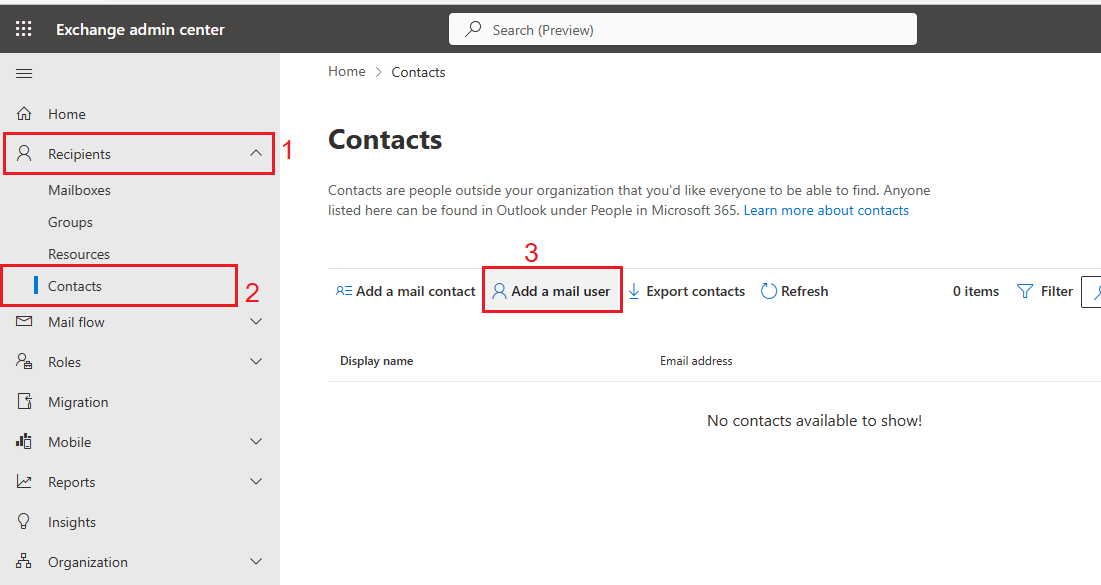
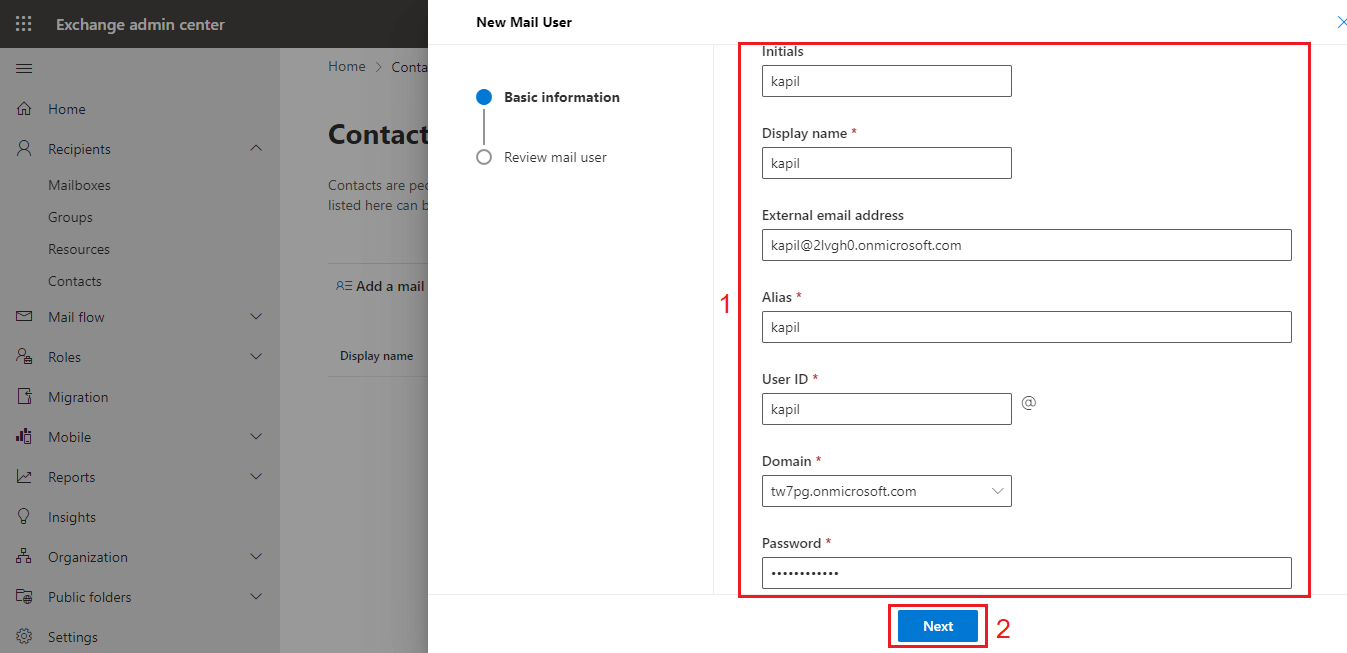
* New mail user window will open on the right side. Fill all the details like first name, last name, etc. In External email address put your source user email address. Click on the **next** button.
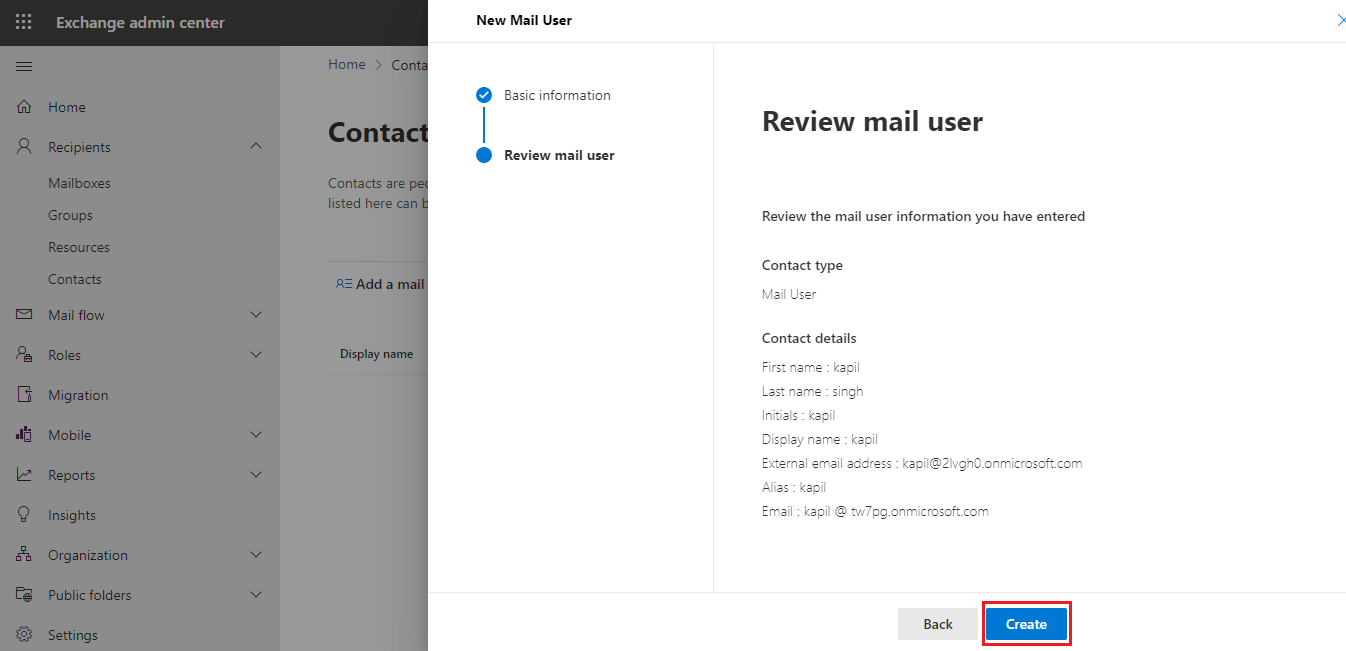
* Now review your details and click on the **create** button.
**Note:** You will have to create mail user for each mailbox you want to move in the target tenant.
Once you have created mail users in the target (destination) tenant, you need to add ExchangeGuid and ExchangeLegacyDn of the source mailbox into the target mail user.
#### **Steps to find ExchangeGuid and ExchangeLegacyDN of source mailbox**
* Run the below command for every user in the PowerShell on your **source tenant account**.
[?](https://www.cloudbik.com/resources/blog/perform-office-365-tenant-to-tenant-migration/)
| 1 | `Get-Mailbox [Source Tenant Mailbox Address] \| fl Name,ExchangeGuid,LegacyExchangeDN` |
| - | -------------------------------------------------------------------------------------- |
**Note:** Put email address of the source mailbox user in place of \[Source Tenant Mailbox Address] and run this command for each users to get their ExchangeGuid and ExchangeLegacyDn.
* Once you run this command it will show the details. Copy and save the ExchangeGuid and ExchangeLegacyDN of the users one by one.

**Add ExchangeGuid and ExchangeLegacyDN in Target Tenant**
Now you need to enter ExchangeGuid and ExchangeLegacyDN of the source user mailbox in the **target tenant users**.
* To **add ExchangeGuid**, enter the below command in the **Target PowerShell user**.
[?](https://www.cloudbik.com/resources/blog/perform-office-365-tenant-to-tenant-migration/)
| 1 | `Set-MailUser -Identity [email address of the Target user] -ExchangeGuid [ExchangeGuid of the source user]` |
| - | ----------------------------------------------------------------------------------------------------------- |

* To **add ExchangeLegacyDN**, enter the below command in the **Target PowerShell user**.
[?](https://www.cloudbik.com/resources/blog/perform-office-365-tenant-to-tenant-migration/)
| 1 | `Set-MailUser -Identity [email address of the Target user] –EmailAddresses @{add="x500:[LegacyExchangeDN of the Source user]"}` |
| - | ------------------------------------------------------------------------------------------------------------------------------- |

**Note:** Perform this step for every user in the Target Tenant PowerShell.
#### **Test the Migration Server Availability**
* Type the below command in the target tenant PowerShell
[?](https://www.cloudbik.com/resources/blog/perform-office-365-tenant-to-tenant-migration/)
| 1 | `Test-MigrationServerAvailability -EndPoint "[the name of your migration endpoint]" -TestMailbox "[Primary SMTP of Mail User object in target tenant]"` |
| - | ------------------------------------------------------------------------------------------------------------------------------------------------------- |
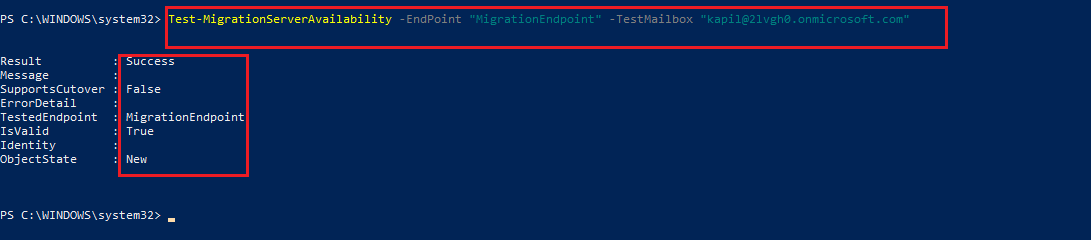
If you miss anything, it will show the status as failed.
**Assign License to the mail users in Target Tenant**
* Go to the **Admin Center** in the Target Tenant. Click on the **users** and then click on the **active users**.
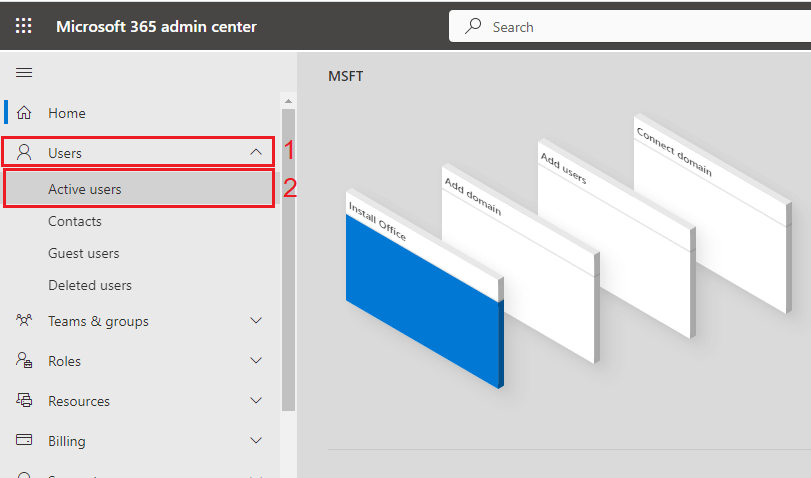
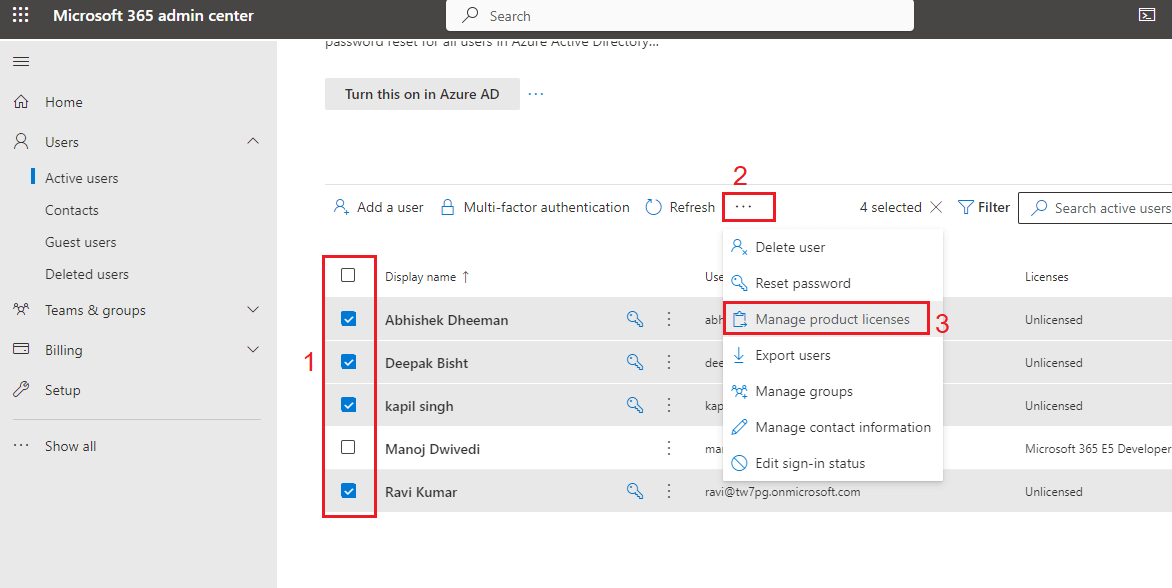
* Select all the users which we have created earlier and click on the **three dots** and select **manage product licenses** from the dropdown menu.
* Now a window will open on the right side. Choose **replace option** and under license, **select the license** and click on the **save changes**.
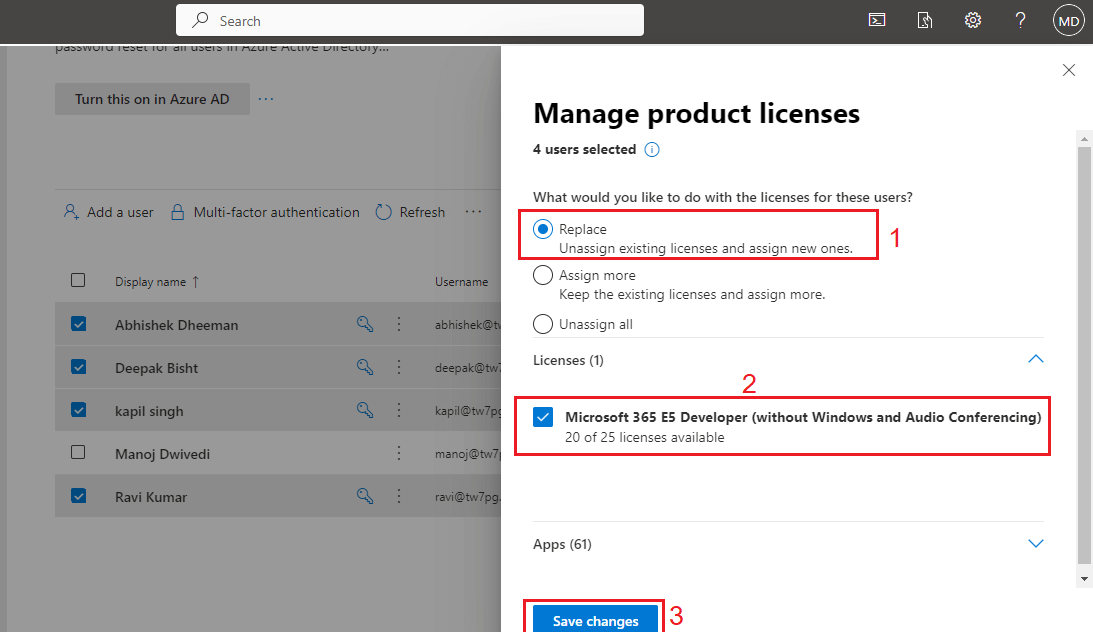
It will take some time and assign the licenses to all the users.
Now it is the time to create the migration batch to perform cross-tenant migration.
**Steps to Create Migration Batch in Target Tenant**
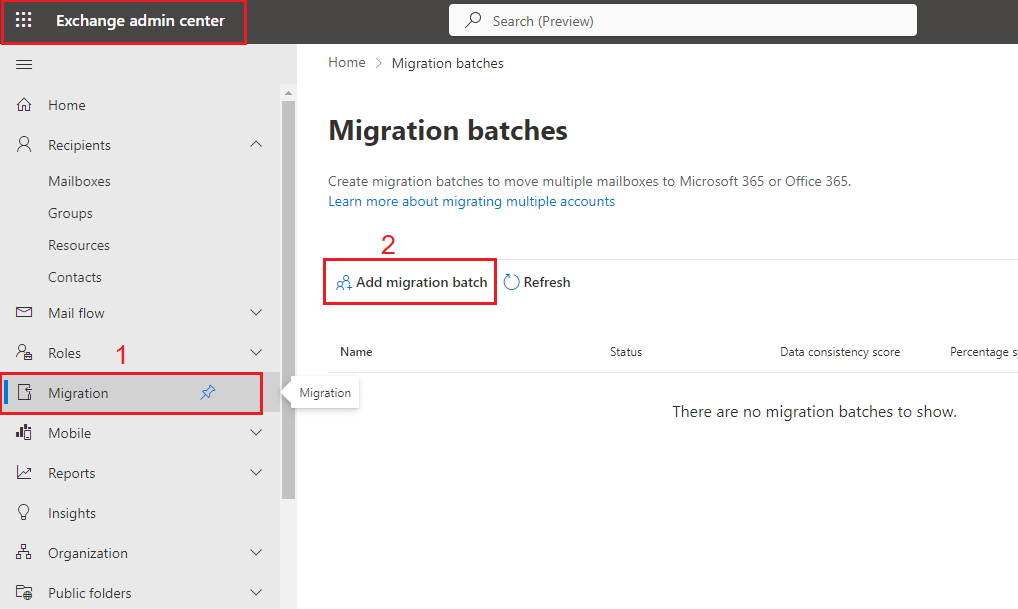
* Open **admin center** in the target tenant. After entering into the Admin center. Click on **show all**, scroll down and select **exchange** from the left sidebar.
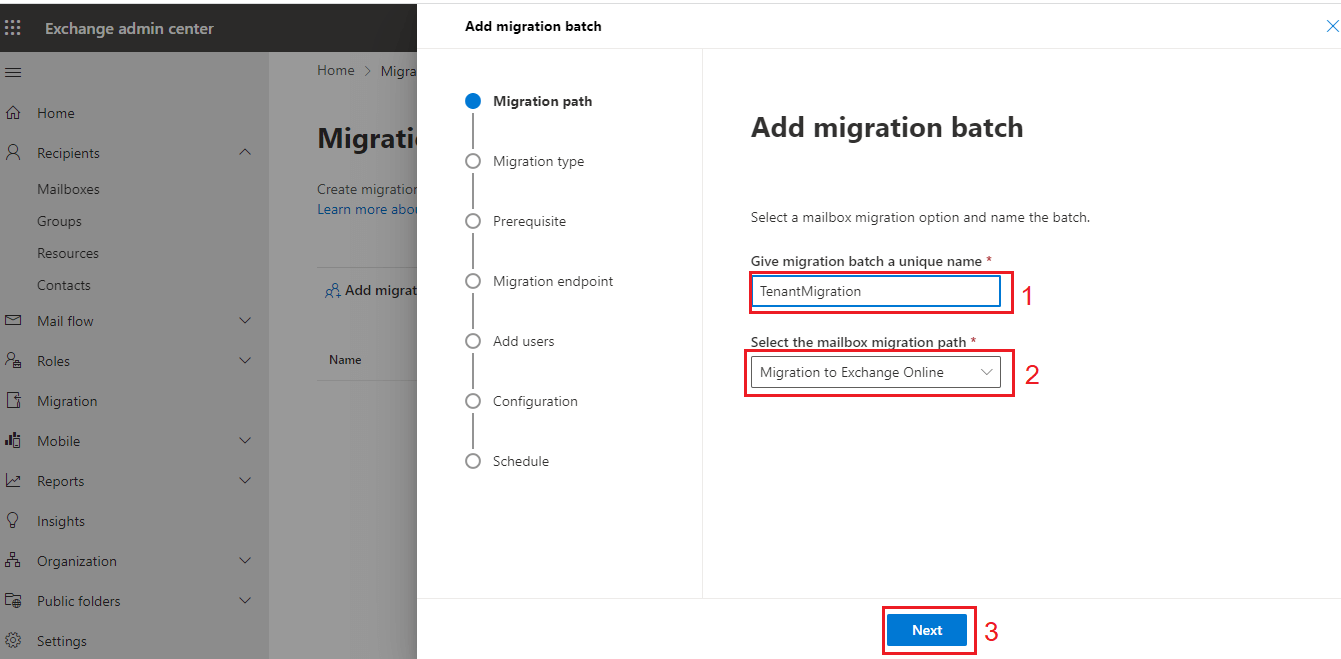
* Now click on the **migration** in the left sidebar. Migration batches window will open. Click on the **add migration batch** to add the migration batch.
* Now **type a name** for the migration batch, select **Migration to Exchange Online** in the mailbox migration path and click **next**.
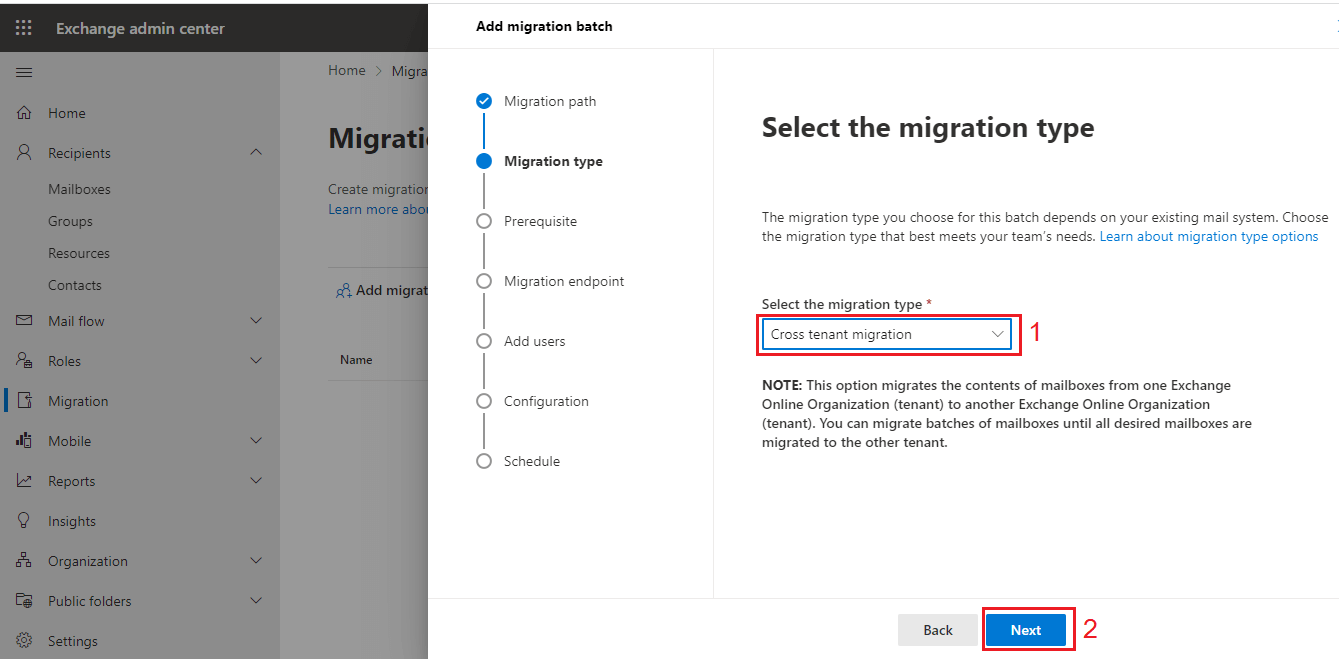
* Now select **Cross Tenant migration** in the migration type and click **next** to proceed further.
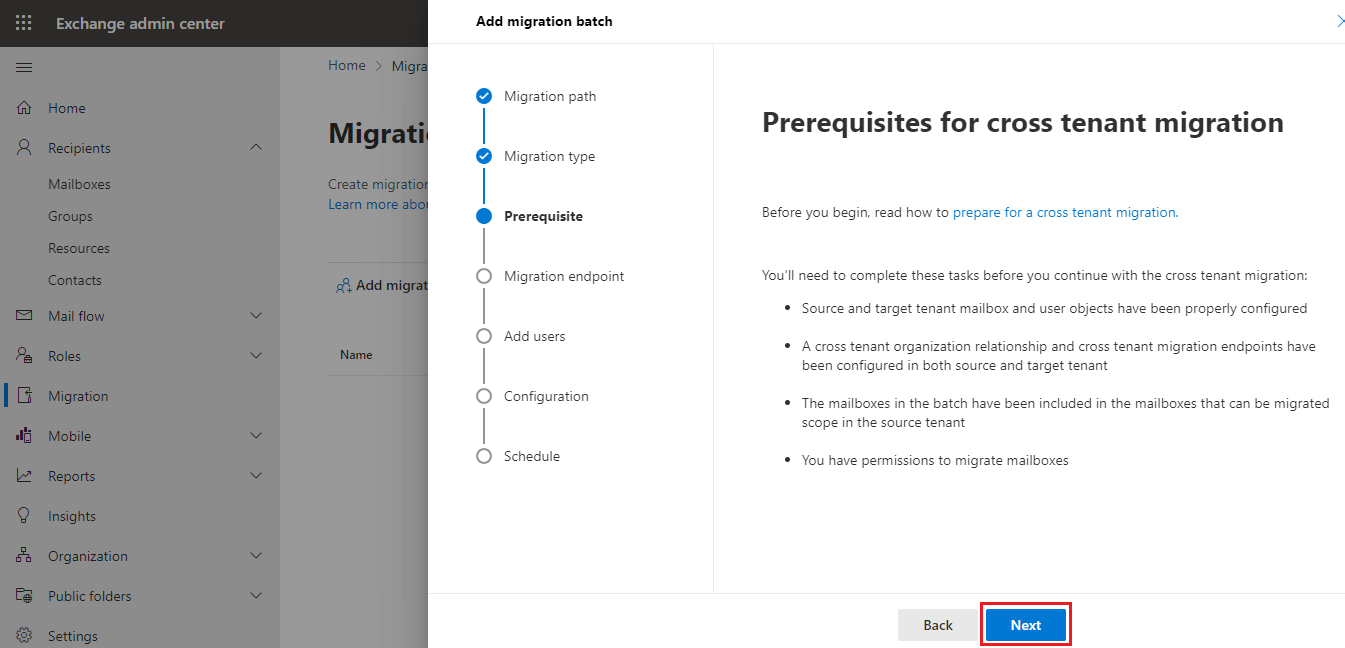
* It will show some prerequisites for the cross-tenant migration. As we have completed all these steps earlier. Click **next** to move further.
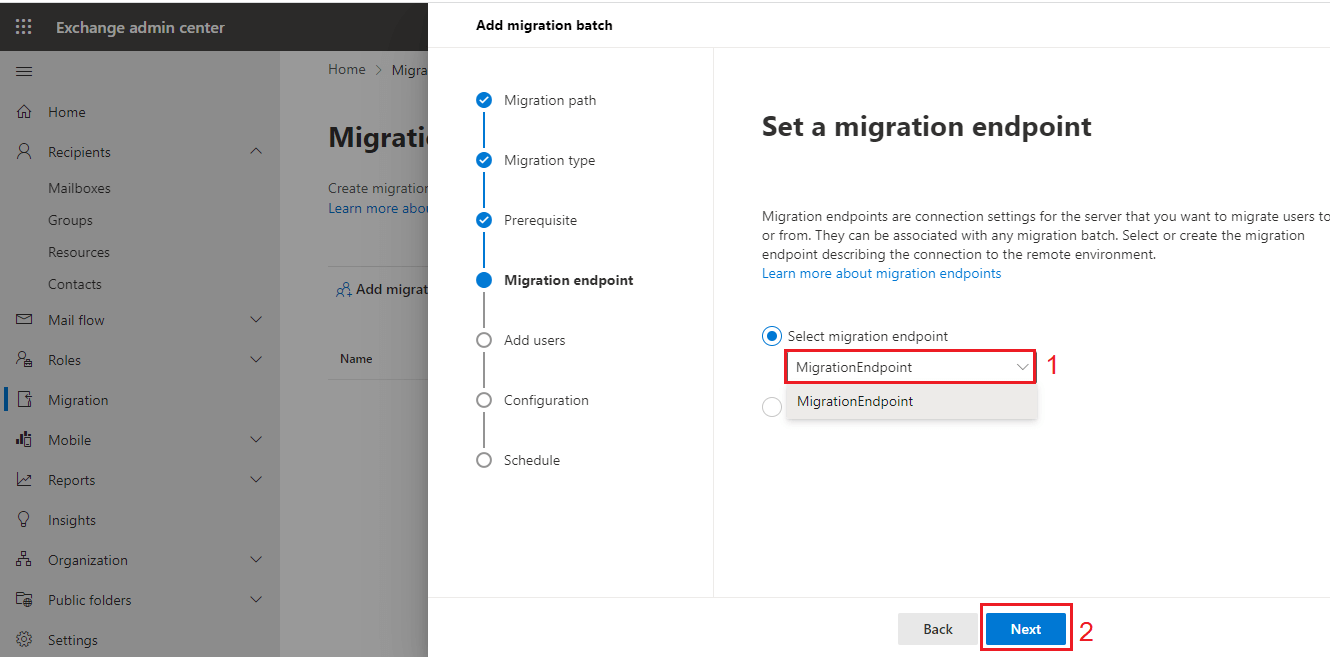
* Now it will ask you to select migration endpoint. Select the **migration endpoint** which we have created earlier through PowerShell.
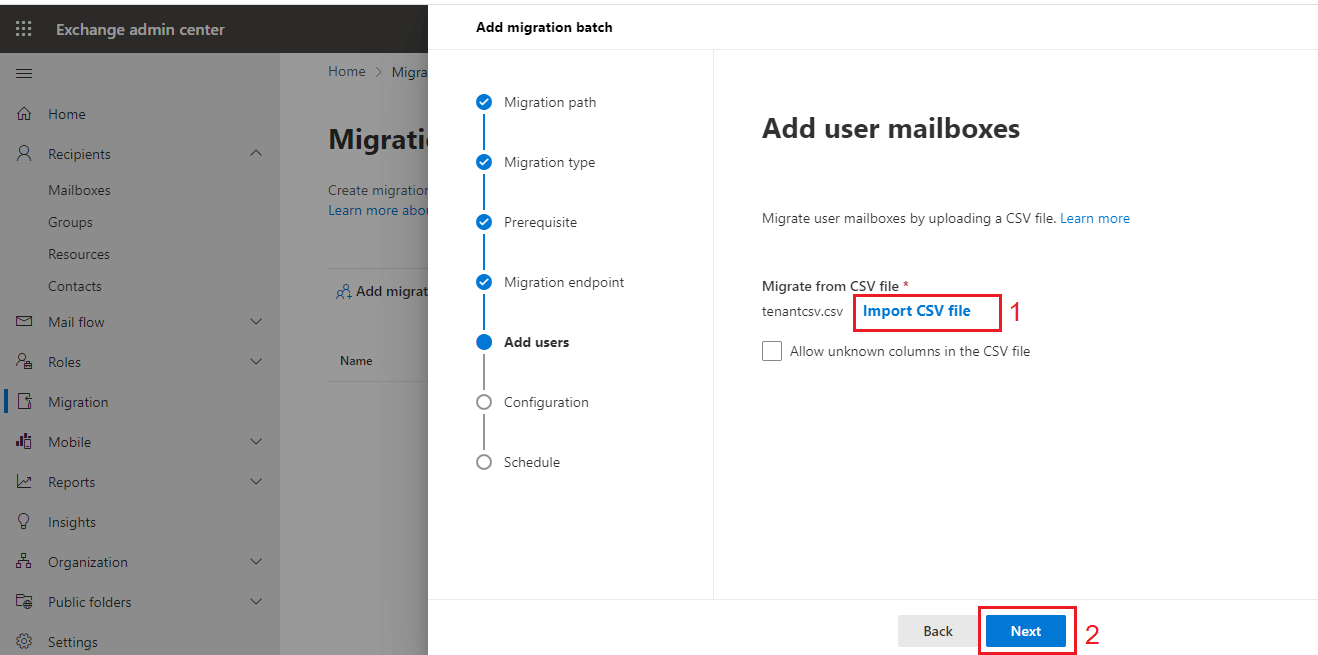
* Now it will ask you to **import CSV file**. Create a excel file and enter the details like shown in the image and save it as csv file.
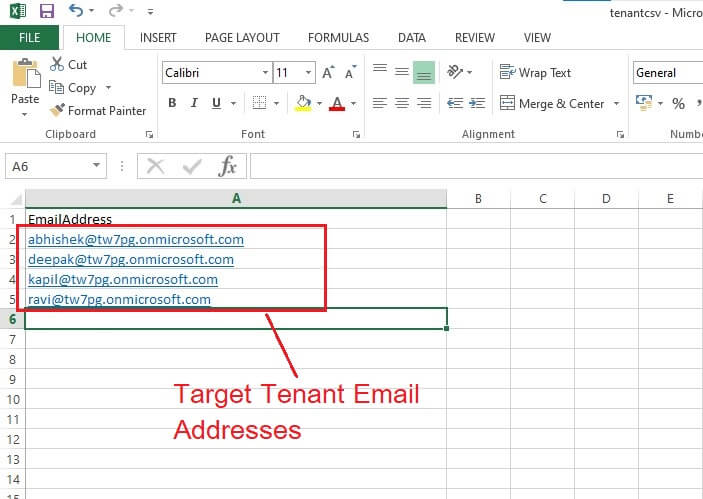
* Import this **csv file** and click **next**.
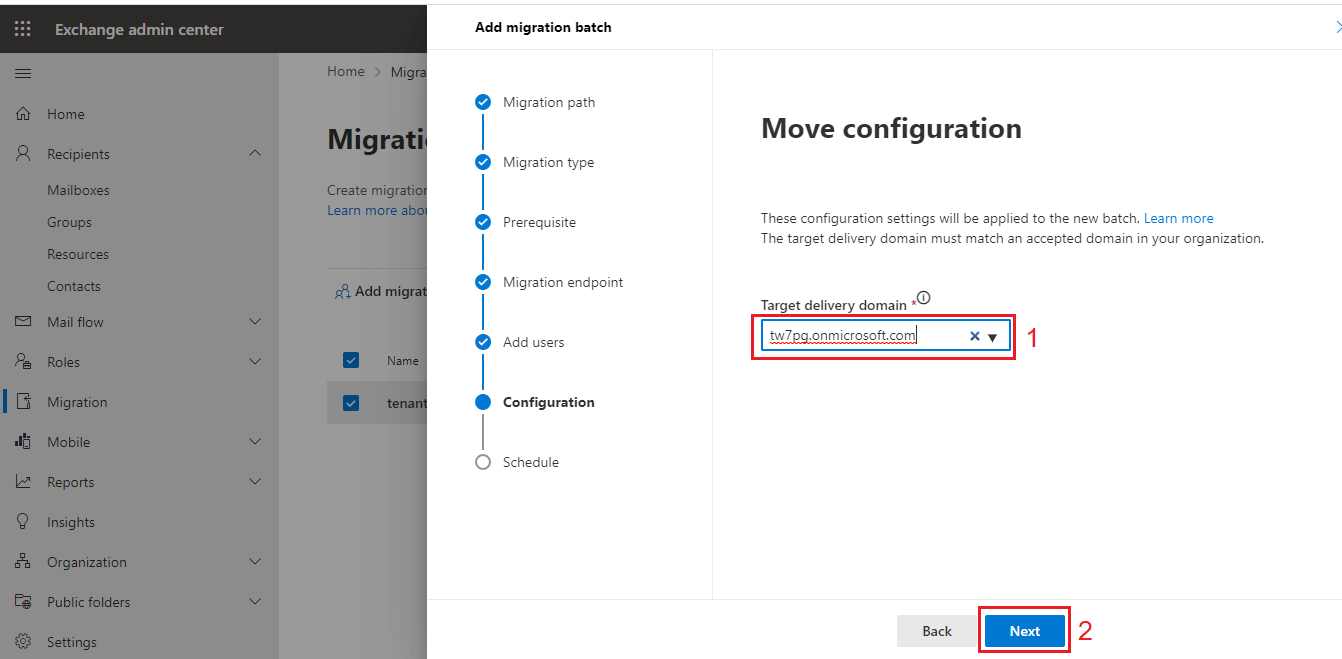
* Now you need to **enter target delivery domain**. Enter the domain of the target tenant and click next.
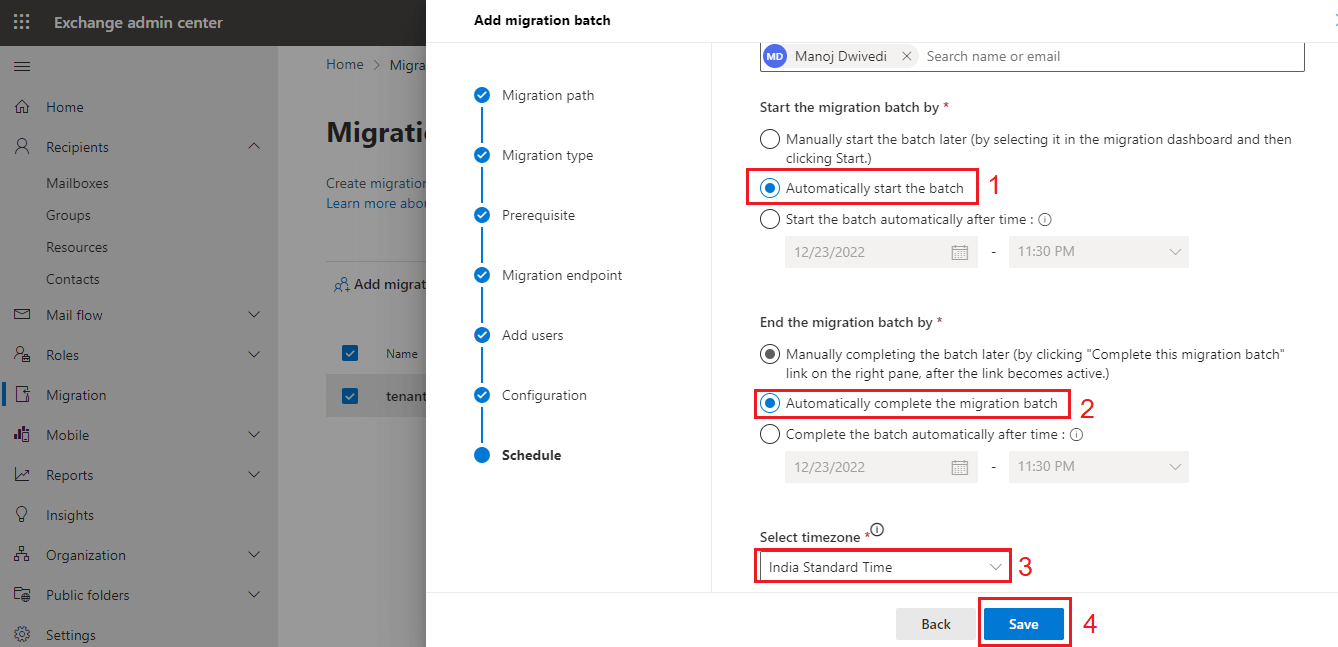
* Now Schedule Migration Batch window will open. In start the migration batch choose **automatically start the batch**. In End the migration batch choose **automatically complete the migration batch**. Select your **timezone** and click on the **save** button.
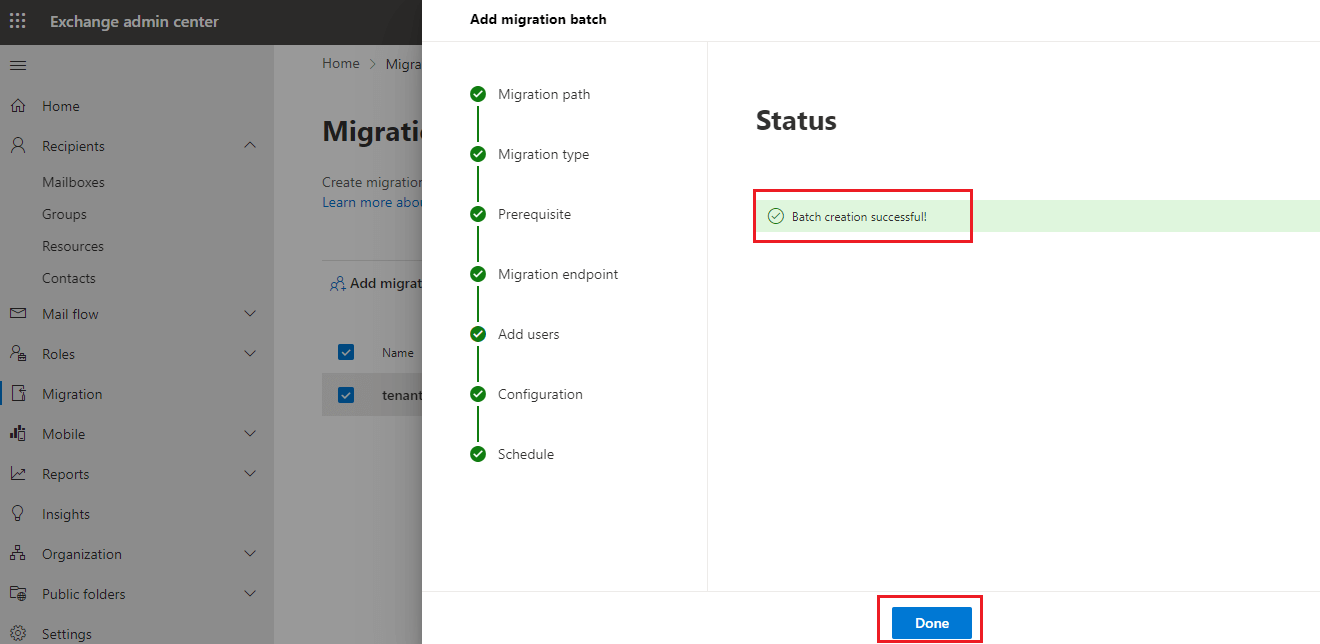
* Now in the next window it will show the status as **batch creation successful**. Click on the **done** button.
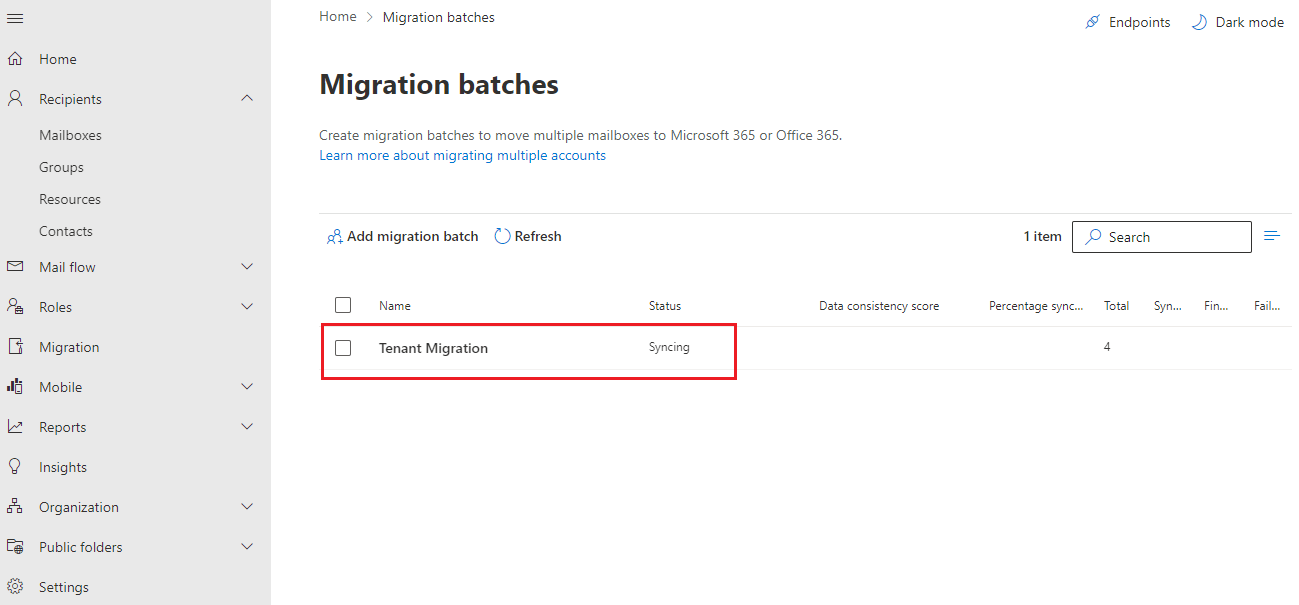
* In the **Migration Batches window**, you can see your migration batch is created and will show the **status as syncing**.
* It will take time depending on the users and their data size. Once completed it will show the **status as completed**.
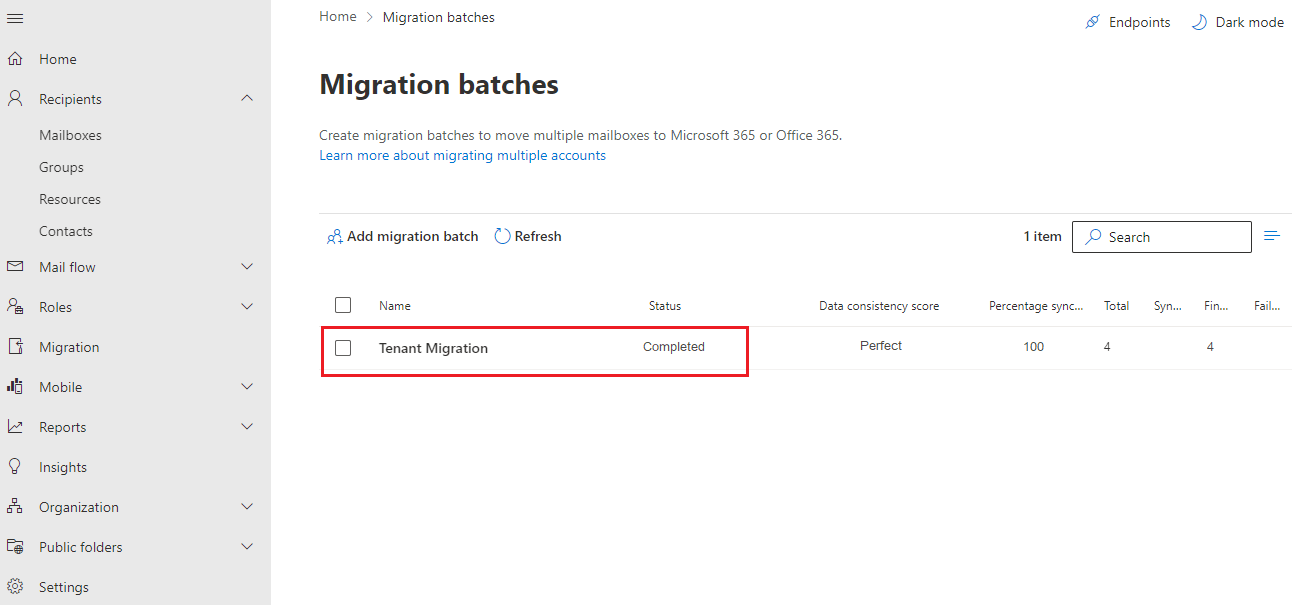
All your user mailboxes have now moved to the target tenant, and you will also receive an email upon completion of the cross-tenant migration process.
In the above steps I showed you how to perform cross-tenant migration step by step. The process is quite lengthy and requires user to perform multiple manual tasks. I hope this guide helped you in performing cross tenant migration or tenant to tenant migration. I hope Microsoft will automate some steps in the future so that users do not face much trouble in performing cross-tenant migration in Microsoft Office 365.
**Conclusion:**
This article shows steps to perform cross-tenant migration in Office 365. Users can move mailboxes from one tenant to another tenant with the help of this guide. As we can see that process for performing the cross-tenant migration is quite lengthy and typical. Also, users do need to have knowledge of the Windows PowerShell and there is no scope for mistakes in this process. Maybe you need to perform every task from scratch if you do any mistake. I hope this guide helped you. You can ask any queries if you have in the comment section.
Read more: [**Enable-OrganizationCustomization with or without PowerShell**](https://www.cloudbik.com/resources/blog/enable-organizationcustomization/)
***
## REFERENCES
*
*
*
*