SYSTEM ADMIN BOOK
  • Hardware/Physical Machines
    • Physical Networking
      • Patch Panel
    • Hardware Devices
    • PC Build
    • RAID Configs
  • System Configuration
    • Windows
      • OneDrive for Business, Map as Network Drive in Windows
      • PDF Printer
      • Reset Windows Password
    • Linux
    • Mac
      • Factory Reset Mac Mini
      • Install FortiClient VPN
      • Remove FortiClient VPN for Macs
      • Setting Microsoft Teams Notifications in MacOS
      • Download and Install Whatsapp
  • Windows Server
    • Troubleshooting
      • 100% Disk Usage Issue
      • Maximum Path Length Limitation
    • Basic Configurations
      • Change Hostname
      • Change Default RDP Port
      • Create a User
      • Add user to Administrator group
      • Add user to Remote Desktop Users group
      • Allow log on locally - security policy setting
      • Allow Multiple Remote Desktop Connections
      • Enable Insure Guest Authentication
      • Shrink Partition
      • Extend Partition
    • FTP Server
      • Install FTP Server (IIS)
      • Create User Group
      • Add FTP Site (IIS)
      • User Isolation
      • Allow Firewall
      • FTP Client (FileZilla)
      • FTP Server (FileZilla)
      • Configure Passive Mode in FileZilla Server
      • Configuring Windows Firewall for FileZilla Server
      • FileZilla: Password reset
      • Generate a New Self-Signed Certificate
    • Group Policy
      • Block Access to the Control Panel for All Users
      • Create a Logon Banner (Legal Notice)
      • Enable / Disable Copy-Paste Policy
      • Disable Shutdown, Restart Options
      • Disable Multiple Session for Single User
      • Disable Automatic Lock Screen in Windows Server
    • Services
      • NSSM - the Non-Sucking Service Manager
      • Node-windows Library
    • Task Scheduler
      • Automate Program Execution
      • Restart Windows Server Daily
    • Auditing and Diagnostincs
      • Enabling the System Event Audit Log
      • Audit RDP Port Change Event
      • Check the read/write speed of your hard drive
      • Clear temp file and .trc file
    • Event Viewer
      • Restart / Shutdown Event
  • Control Panels
    • Plesk
      • Set Hard Quota on disk space for subscription(s)
      • Changing MX, A, and CNAME Records
      • Host Node.js Application
      • Add FTP account
      • Remove FTP account
      • Download a folder using Plesk File Manager
      • Install WordPress on domain using WP Toolkit
      • Change the name of a Subscription system user
      • Exporting and Importing Database Dumps
    • OVI Panel
      • DNS Zone Editor
    • SolidCP
      • Add a MS SQL database in SolidCP
    • cPanel
  • Virtualization
    • Proxmox VE
      • Introduction
      • Download Proxmox ISO
      • Prepare Installation Media
      • Launch Proxmox Installer
      • Create a VM
  • Web Servers
    • IIS
      • Install IIS
      • Configure Default Site
      • Application Pool
      • Installing PHP
      • Deploy a PHP Application
      • Deploying a Laravel app on Windows using IIS
      • Update PHP Version in IIS
      • Host a Node.js /w Next.js Application
    • JBoss
  • VPNs and Proxy Servers
    • Reverse Proxy
      • IIS - Node.js Application
  • Database Servers
    • MS SQL
      • Download and Install
      • Install SSMS
      • Uninstall an Instance of SQL Server
      • Enable SA Account
      • Change SA Account Password
      • Enable Network Access to SQL Express
      • Create and configure a user in MSSQL
      • Clear SQL Server Cache
      • Setting Infinite Timeout in SQL Server Contexts
      • Take SQL Server Database Offline
      • Memory configuration
  • Web Dev Stacks
    • MERN (w/ Next)
      • Build and Run Node.js Project with Next.js
  • IT Ticketing Systems
    • Jira Ticketing System
  • Linux Servers
  • AWS Environment
  • Azure Environment
  • Backup and Security
    • SSL Certificates
      • Types of SSL Certificates
      • IIS 10: Create CSR and Install SSL Certificate
      • IIS 7: Generate CSR for Wildcard SSL
      • IIS: Generate CSR for Multi-Domain SSL
      • OpenSSL: Generate CSR
      • IIS 10: How to Install and Configure Your SSL Certificate on Windows Server
      • IIS: Export Pfx using MMC
      • IIS: Import Pfx using MMC
      • IIS: Export Pfx using IIS Manager
      • IIS: Import Pfx using IIS Manager
      • cPanel: Export PFX
      • Godaddy-CPanel: Generate a CSR
      • Godaddy-CPanel: Install SSL Certificate
      • cPanel: Generate CSR
      • cPanel: Install SSL Certificate
      • cPanel: Install Let's Encrypt SSL
      • Plesk: Generate CSR
      • Plesk: Let's Encrypt SSL Installation
      • Plesk: Installing the SSL certificate
      • Plesk: Export Public & Private Key
      • Win-ACME Let's Encrypt SSL
      • Certbot - Install SSL
      • Export Leaf, Root, and Intermediate Files
      • XAMPP - Let's Encrypt SSL Installation
      • JBoss Web Server: CSR Generation
      • JBoss: Install SSL Certificate
    • Backup
      • Database
        • MS SQL DB Backup
        • MS SQL Restore Backup
    • Microsoft Defender for Endpoint
      • Introduction & Licenses
    • Microsoft Intune - Endpoint Management
      • Product Introduction
      • Intune Policies for MacOS
      • Enroll your macOS device using the Company Portal app
    • Vulnerability Scanning
      • OpenVAS Quick Guide
      • Nessus Quick Guide
    • Acronis
      • Download and Install the Acronis Cyber Protection Agent
      • Performing a file-level backup
      • Creating a disk-level backup
      • Performing a file-level recovery
      • Enabling Active Protection and Vulnerability Assessment
  • Email and Office 365
    • Troubleshooting
      • Run a message trace in the Exchange admin center
      • Not receiving email
      • Office 365 Apps Activation Error
      • Gmail Issue: Clearing Cache and Cookies
      • Excel worksheet, right click insert not functioning
      • Microsoft 365 Apps activation error: “Your organization has disabled this device”
    • Hybrid Mail Setup
      • Set Up Connectors Between Microsoft 365 and SmarterMail
    • Email Authentication
      • Protocols
    • Mail Clients
      • Outlook
        • Maximum number of Exchange accounts in an Outlook profile
        • Enable automatic forwarding in new Outlook
        • Add Email Signature
        • Create Email Singature
        • Gmail Account Login in Outlook
        • Enable desktop notifications for Outlook on the Web (OWA) in Windows
        • Move Mails to Specific Folders
      • Apple Mail
        • Add email accounts in Mail on Mac
        • Add Mail Signatures
      • Gmail
        • Mail Forwarding to Another Account
        • Set Up an Auto-Reply (Vacation Responder) in Gmail
    • Office 365
      • Intro & Subscriptions
      • How to Create a Trial Account
      • How to Access the Office 365 Admin Center
      • Creating a Tenant
      • Create Users
      • Add several users at the same time to Microsoft 365
      • Creating & Managing Roles
      • Add a Domain
      • Manage MFA
      • Let users reset their own passwords
      • Assign Global Admin Roles
      • Create APP Password
      • Change a user name and email address
      • Reset MFA for Microsoft 365 User
      • Configure email forwarding
      • Add email aliases to a user
      • Change Username or Email Address
      • Export Mailbox to PST From Office 365
      • Import PST to Exchange Online (Microsoft O365)
      • Enable archive mailboxes for Microsoft 365
      • Grant Export Permission in M365 Compliance Center
      • Generate Transfer Token
    • Google Workspace
      • Intro & Plans
      • Create your Google Workspace trial account
      • Review your DNS records
      • Adding Users
      • Create organizational units
      • Restrict access to a Google Workspace service
      • Edit user attributes
      • Manage user accounts
      • Suspend a User
      • Generate a Transfer Token
      • Reduce Licenses in Google Workspace
      • Auto-forward From Google Workspace Using Routing
      • Recovering administrator access to your account
    • MailEnable
    • SmarterMail
      • SmarterMail Installation
      • SmarterMail Server Setup
      • Installation and Configuration (Practical)
      • Enable / Disable Domain in SmarterMail
      • Enable / Disable MFA for User Accounts
      • Create an Administrator User in SmarterMail
    • Microsoft Teams
      • Guest Access vs. External Access
      • Adding Guests To Microsoft Teams Team
      • Teams Chat DIfferent Domain: Enable External Access
      • Setup Teams Time Zone and Work Hours
      • Add Contact Numbers in Profile Page
    • Microsoft Defender for Office 365
      • Remove blocked users from the Restricted entities page
    • Microsoft Purview
      • Create a Retention Policy for Archiving in M365
  • DevOps
  • Firewalls and Access Points
    • Windows Firewall
      • Allow Ports on Windows Firewall
    • Sophos Firewall
      • Set up a new firewall with Sophos Central
      • Enable Sophos Central management of Sophos Firewall
  • Networking
    • Troubleshooting
    • Cisco Router Config
    • Cisco Switch Config
      • Basic Data and Voice VLAN Setup Homelab
  • Migration
    • Drive Migration
      • Google Drive to One Drive
      • One Drive to One Drive [SharePoint Migration Tool]
      • Migrate Google files to Microsoft 365 for business
    • Mail Migration
      • Google Workspace to Office 365 (Manual Method)
      • Google Workspace to Office 365 (Automatic Method)
      • IMAP to Office 365
      • Migration Using PST File Method
      • Office 365 to Google Workspace Migration
      • G-Suite to G-Suite Migration
    • VM Migration
    • Website Migration
      • Migrating IIS Sites Using Web Deploy
      • Plesk to Plesk Migration
    • Database Migration
  • Monitoring
    • Prometheus
      • Monitoring Windows Servers Using Prometheus
    • Grafana
      • Visualize Data in Grafana
    • Loki
  • Data Center
    • HPE ProLiant ILO Configuration
  • Other Technologies
    • Some R&Ds
      • Active vs. Passive Mode in FTP
      • IIS Recycling and Virtual Memory Limit
      • IIS Application Pool
Powered by GitBook
On this page
  • How to Install Nessus in Windows?
  • Steps to Install Nessus in Windows
  • REFERENCES

Was this helpful?

  1. Backup and Security
  2. Vulnerability Scanning

Nessus Quick Guide

PreviousOpenVAS Quick GuideNextAcronis

Last updated 1 month ago

Was this helpful?

How to Install Nessus in Windows?

Nessus is a security scanner tool, provided by Tenable Incorporation. Nessus is among the best tools for remote vulnerability scanning, presently available. It provides many features such as port scanning, vulnerability scanning, visualization of scan results, etc. Before understanding how to install Nessus on Windows, let's take a look at the prerequisites for the installation of Nessus.

Prerequisites

  1. A computer with Windows operating system installed and running.

  2. 4 GB of RAM (minimum). Recommended 8 GB RAM.

  3. At least four 2 GHz CPU cores.

  4. 30 GB of disk space.

Steps to Install Nessus in Windows

Step 1: Downloading Nessus Installer.

Firstly, download the Nessus windows installer from its official website. On the download page, select the Nessus version you want to install and your Windows architecture; for most users, it will be 'Windows - x86_64'. You will be prompted to accept the user agreement. Read it, accept it, and continue. It would look like this after downloading.

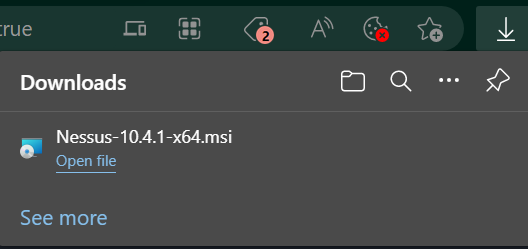
Step 2: Installing the Nessus Tool.

  • After the downloading is done, go to your download folder and run the installer file as administrator. Doing this will take you to the installation wizard.

  • Click Next and continue to the user agreement widget.

  • Agree to the license agreement and click Next.

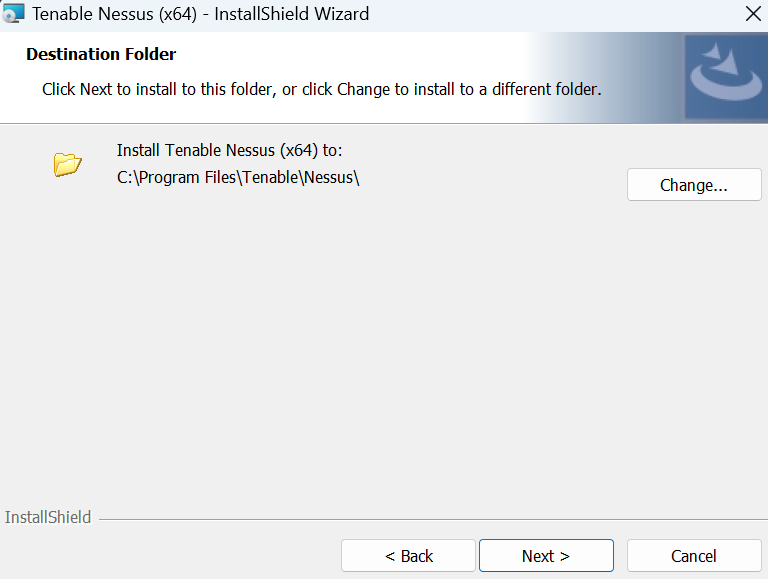
  • Now, the installation wizard will install it in C drive by default. If you want to change the installation location, click Next else you can change it to your desired location.

  • Now, you will be asked to install it. Click on install and also allow the wizard when a UAC permission is prompted.

Once the installation is done, click Finish.

Step 3: Setting Up Nessus in Browser.

When you click on Finish in the installation wizard, it will open the Nessus interface in your default browser on the URL: http://localhost:8834/WelcomeToNessus-Install/welcome. It would look like this:

Now we shall proceed to set up Nessus in Browser. Click on 'Connect via SSL' in your browser window. After this, you'll be prompted that the connection is not safe. Ignore it and continue. A page like this will open.

Click on Nessus Essentials as it is the only free version of Nessus, and it is best suited for beginners. Then, continue.

Here, you will be asked for an activation code; Enter your name and E-mail address, and the code will be sent to that E-mail address. If you are an existing Nessus user, you can skip this step and continue to log in.

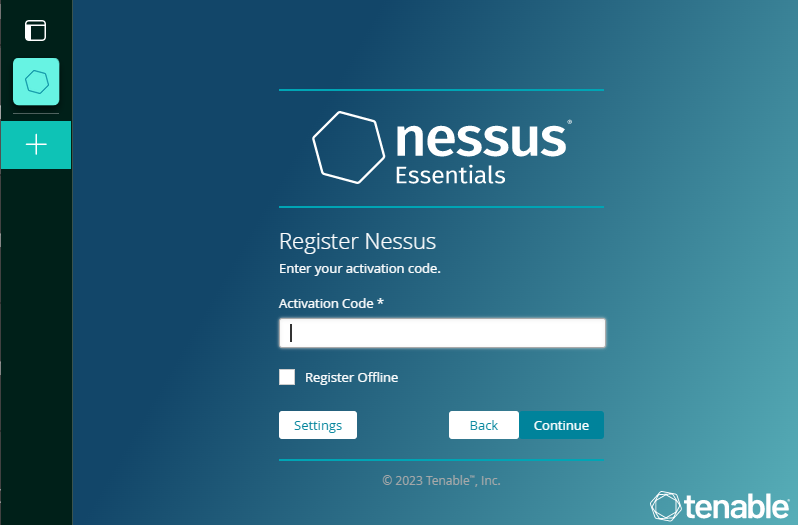
Enter the activation code received in your E-mail. Keep in mind that this is a one-time activation code, if you uninstall Nessus or your browser, you'll need to verify it again with a new code. After entering the code, you will be asked to create a new Administration account. Enter the new credentials and create the account.

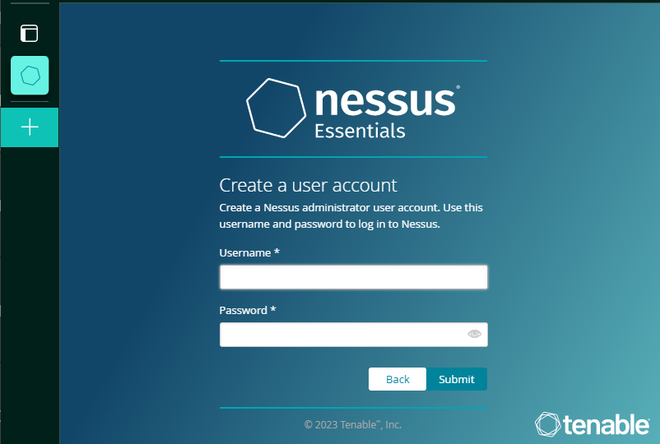
Once the administrator account is created, Nessus will install all the required plugins and essential tools. Let the process complete; make sure that the internet connection is not interrupted.

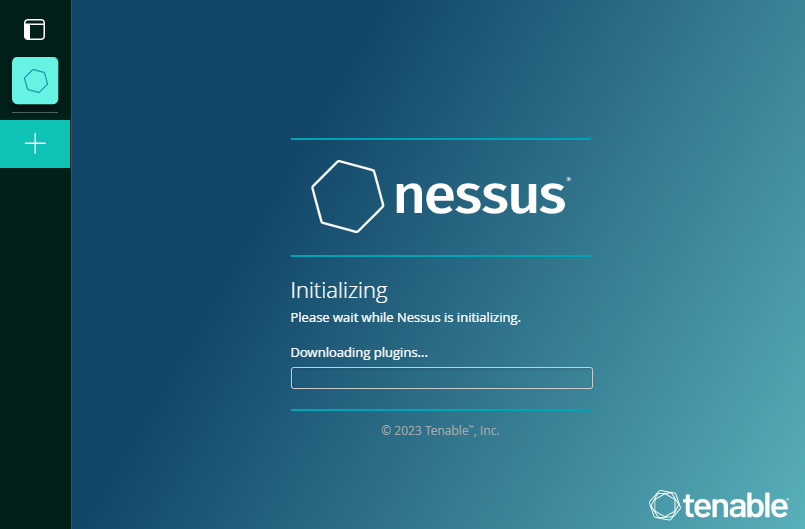
After the installation of the plugins is completed, you will be taken to your dashboard. However, the functionality of Nessus will be limited until all the plugins are compiled.

Now Nessus's Essentials version is completely installed on your computer. You can perform various scans after the plugins are compiled.


REFERENCES

  • https://www.tenable.com/downloads/nessus?loginAttempted=true

  • https://www.tenable.com/tenable-for-education

  • https://www.geeksforgeeks.org/how-to-install-nessus-in-windows/

  • https://medium.com/@redfanatic7/the-nessus-installation-guide-on-linux-and-windows-c1bc1c12d08d

installshield-wizard-completed
accepting-license-agreement
installation-location
running-installer-file
downloading-official-nessus-file
setting-up-nessus
nessus-essentials
clicking-continue
creating-administration-account
installing-required-pluggins
dashboard
user-agreement-widget
entering-activation-code