SQL Server database migration
To migrate the contents of your on-premises SQL Server database, we suggest you follow the steps of the respective solutions below.
Two tools are available: you can choose between the Data Migration Assistant (DMA) from Microsoft or the Microsoft SQL Server Management Studio (SSMS).
We highly recommend cleaning up your database before proceeding with the migration.
Solution 1
Download and install the Data Migration Assistant (DMA) from Microsoft.
Launch the DMA application.
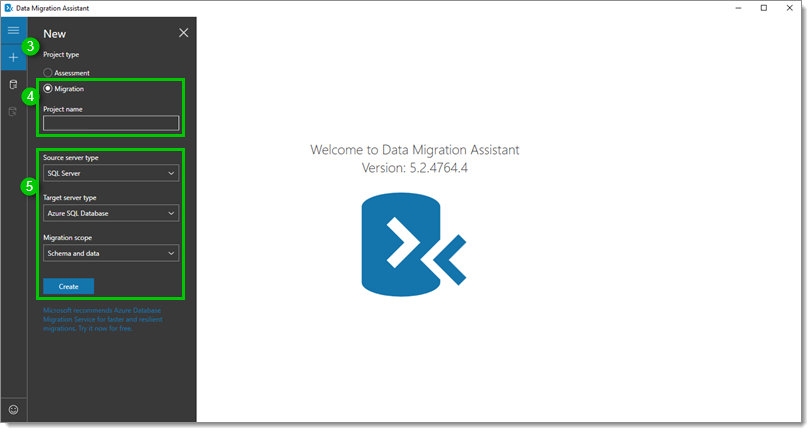
Click on the plus "+" sign to create a new migration.
Select Migration and name the Project.
Select the Source of your server type and the Target of your server type from the drop-down menu and leave the Migration scope to Schema and data. Click Create.
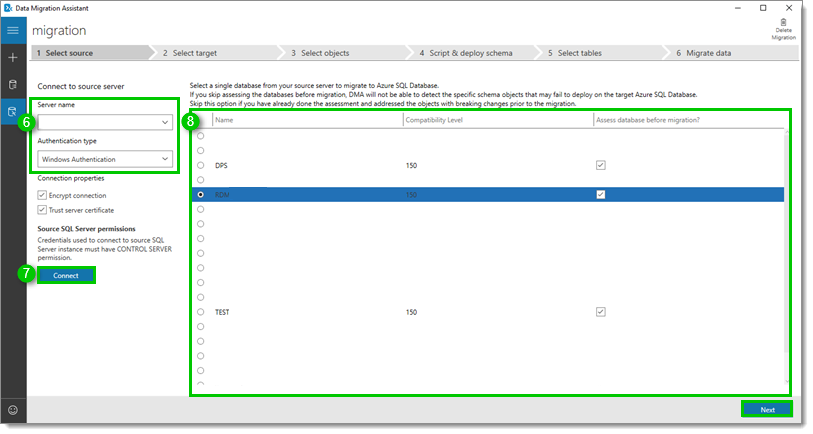
Enter the local Server name and choose an Authentication type.
Make sure you have sufficient rights and permission to perform this action.
Click Connect.
Choose your database in the selection loaded and click Next.
Enter the target Server name and choose an Authentication type.
Make sure you have sufficient rights and permission to perform this action.
Click Connect.
Choose your database in the selection loaded and click Next.
Your new database must have already been created to appear in this list.

Validate if you have issues by scrolling down the schema objects list on the left. You can click on an item for more detail on the specific issue and if a fix is available.
The user accounts with the error Windows users can be converted to external users in Azure SQL Database needs to be deselected from the list for the migration to work.
Those specific users will need to export their user vault and configuration prior to the migration. Failing to do so will loose the data saved under those sections: My account settings, User-specific settings, and any entry made in their user vault.
After exporting the user data, you will need to create a new user in your list and reimport the data.
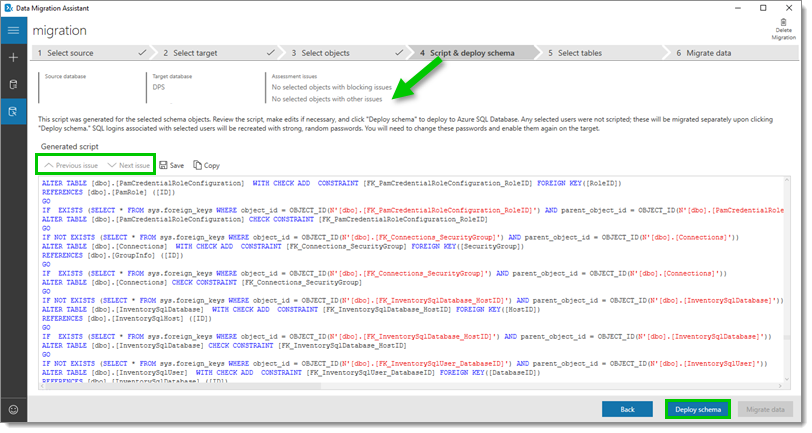
When all the issues are fixed or deselected, click Generate SQL script.

Once the script has been generated, validate if there are any issues, then click Deploy schema.
This may take some time to execute depending on how many connection history you have in your database.
Once the Deployment results is done executing, validate if there are any issues, then click Migrate data.

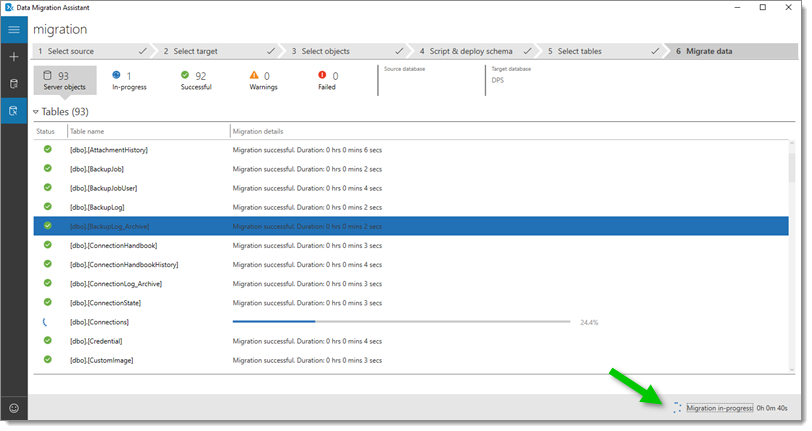
Click Start data migration. Note that the number of tables might be different depending on your version.

Wait for the migration to complete. When done, you can close the Data Migration Assistant.
You are now ready to create the new data source in Remote Desktop Manager or update the Devolutions Server Console.
Solution 2 (BACPAC)
Using Microsoft SQL Server Management Studio (SSMS).
Connect to your source SQL Server database.
Right-click on the database name (node) – Tasks – Export Data-tier Application….
Follow the wizard steps.
Using SSMS, connect to the destination SQL Server.
Right-click on the Databases (node) – Import Data-tier Application….
Follow the wizard steps.
Only for Devolutions Server: In the case of a SQL data source, automatic detection already exists when exporting and the query is launched automatically, but not in Devolutions Server. Therefore, if you are migrating a Devolutions Server, you also need to run this query after the import:
UPDATE dbo.ConnectionHistory SET Version = 0x0000000000000000; UPDATE dbo.DatabaseInfo SET ConnectionCacheID = NEWID(), IntelligentCacheID = NEWID();You are now ready to create the new data source in Remote Desktop Manager or update the Devolutions Server Console.
Solution 3
This solution is not supported for a local to local migration. Here is the error message from SSMS when trying to:
You cannot use this Wizard to move databases between local instances of SQL Server. Supported operations include deploying a local instance of SQL Server to Microsoft Azure SQL Database, from Microsoft Azure SQL Database to a local instance of SQL Server, or from one Microsoft Azure SQL Database to another Microsoft Azure SQL Database.
Using Microsoft SQL Server Management Studio (SSMS).
Right-click on the database name (node) – Tasks – Deploy Database to Microsoft Azure SQL Database.
Follow the wizard steps.
You are now ready to create the new data source in Remote Desktop Manager or update the Devolutions Server Console.
Connect to Remote Desktop Manager
Create a new data source in File – Data sources – Add a new data source.
On first connect, you may receive the following error message. If so, click on Fix It.

This may take some time to execute depending on how many connection history you have in your database.
Connect to Devolutions Server
Update the Host and Database name for the Devolutions Server Console in Server – Edit – Database.

REFERENCES
Last updated