# How to Add Domain and Create New Email Account in MailEnable
### Steps to Add Domain and Email
#### Step 1: Open Messaging Manager
To start, log in to your MailEnable server.
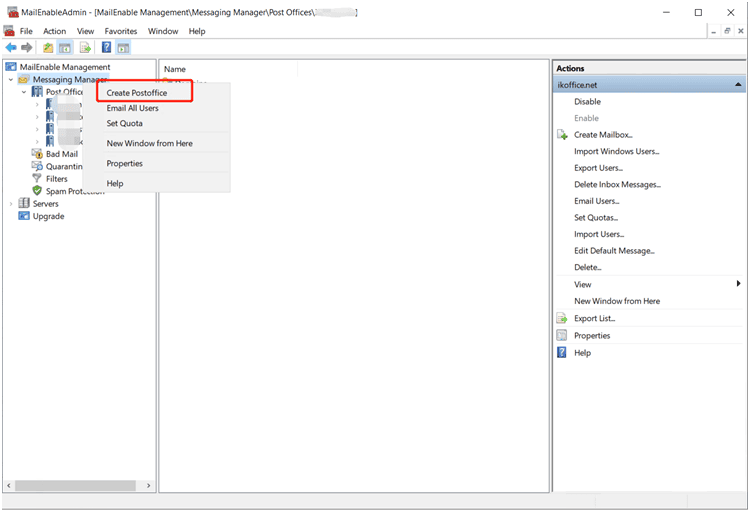
* Locate the Messaging Manager in the left-hand navigation panel.
* Right-click on the Messaging Manager to open the available options.
\
This is the starting point for adding a new PostOffice (mail domain).
#### Step 2: Create a New PostOffice (Mail Domain)
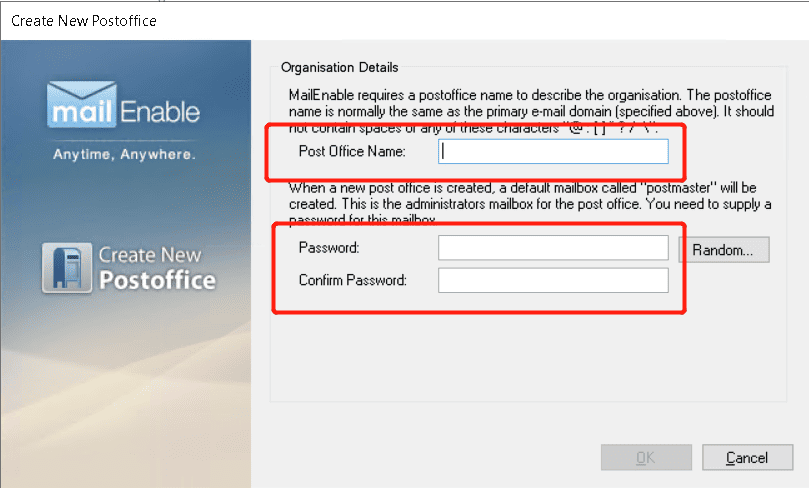
* Select **Create PostOffice** from the right-click menu.
* A dialog box will appear asking you to enter a **PostOffice Name**.
* Example: If your domain is `example.com`, you can enter `example`.
* Click **OK** to confirm.
This step is important because the PostOffice is essentially the **email domain** where your new email accounts will be created.
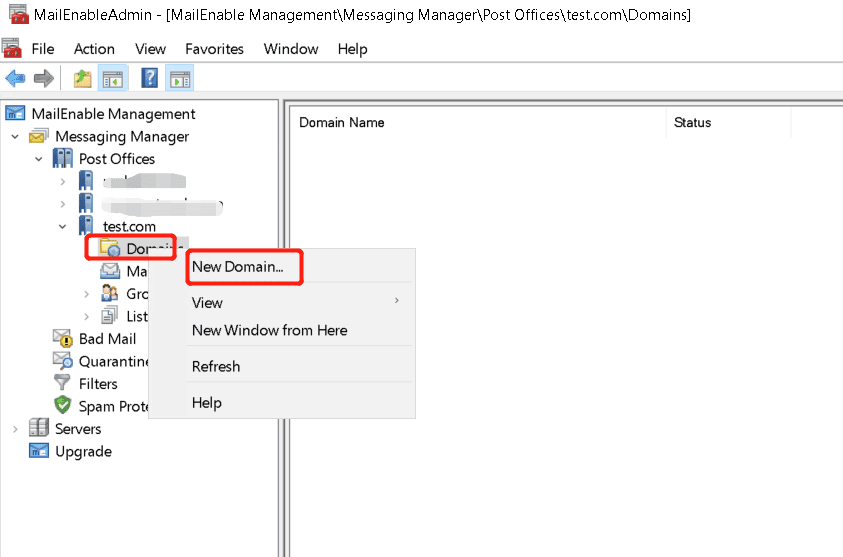
#### Step 3: Add a New Domain to the PostOffice
* After creating the PostOffice, **right-click** on it.
* Select **New Domain**.
* Enter the **full domain name** (e.g., `example.com`).
* Click **OK**.
Now, your email domain is successfully added and ready to host mailboxes.
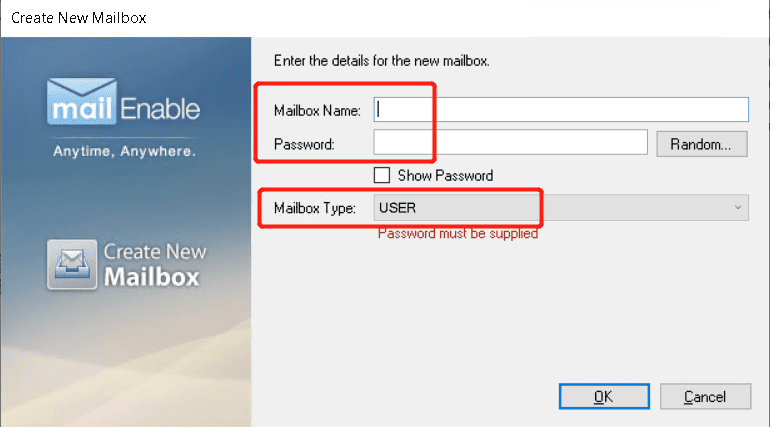
#### Step 4: Create a New Mailbox (Email Account)
To **make a new email account**, follow these steps:
* Select the domain you just created.
* Right-click on **Mailboxes** under the domain.
* Click **New Mailbox**.
#### Step 5: Enter Email Account Information
In the new mailbox dialog, enter the following:
* **Mailbox Name**: This will be the username before the “@” (e.g., `john`).
* **Password**: Enter a secure password for the mailbox.
* **Mailbox Type**: Choose the type of mailbox you need (e.g., Standard Mailbox).
\
Click **OK** to save the new mailbox.
#### Step 6: Verify the New Email Account
To confirm the setup:
* Try logging in with the newly created email address (e.g., `john@example.com`).
* Use the password you assigned in the previous step.
If login is successful, your new email account is ready to use.