Create a VM
Now that you logged in to the Proxmox web console, follow these steps to create a virtual machine.
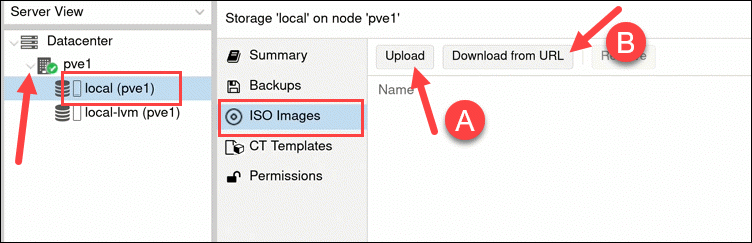
1. Make sure you have ISO images for installation mediums. Move to the resource tree on the left side of your GUI.
Select the server you are running and click on local (pve1). Select ISO Images from the menu and choose between uploading an image or downloading it from a URL.
2. Once you have added an ISO image, spin up a virtual machine. Click the Create VM button.

3. Provide general information about the VM:
Start by selecting the Node. If you are starting and have no nodes yet, Proxmox automatically selects node 1 (pve1).
Provide a VM ID. Each resource has to have a unique ID.
Finally, specify a name for the VM.

3. Next, switch to the OS tab and select the ISO image you want for your VM. Define the OS Type and kernel Version. Click Next to continue.

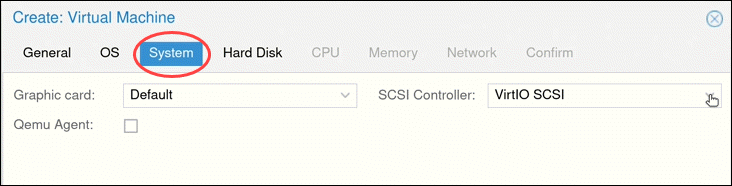
4. Modify system options (such as the Graphic card and SCSI controller) or leave the default settings.
5. Configure any Hard Disk options you want the VM to have. You can leave all the default settings. However, if the physical server uses an SSD, enable the Discard option.

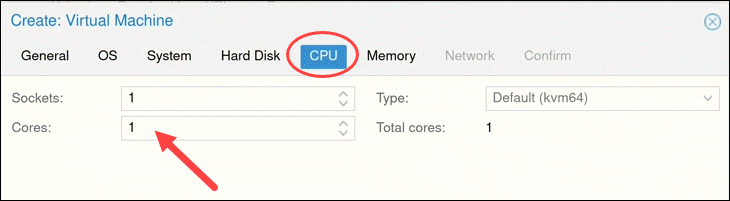
6. The number of Cores the physical server has determines how many cores you can provide to the VM. The number of cores allocated also depends on the predicted workload.
7. Next, choose how much RAM Memory (MiB) you want to assign to the VM.

8. Move on to the Network tab. It is recommended to separate the management interface from the VM network. For now, leave the default setting and click Next.

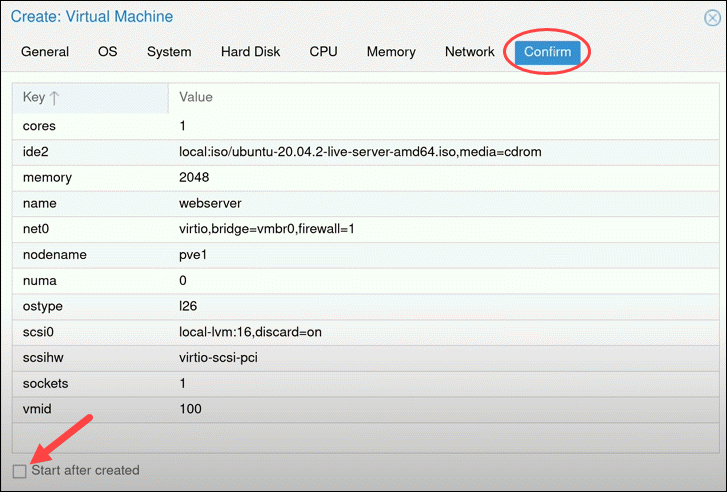
9. Proxmox loads the Confirm tab that summarizes the selected VM options. To start the VM immediately, check the box under the listed information or start the VM manually later. Click Finish to create the VM.
10. The newly created VM appears in the resource tree on the left side of the screen. Click the VM to see its specifications and options.

Note: Learn how to delete a VM in Proxmox. The guide includes both the command line and GUI methods for deleting VM, VM disks, and VM snapshots.
Last updated