# Move Proxmox VM Disk to Another Storage
### Why need to move Proxmox VM disk to another storage?
There could be several reasons why you might need to move a disk to another storage.
**Storage upgrade:** If you’re upgrading your storage infrastructure, moving disks to new storage devices can provide better performance, increased capacity, or improved reliability.
**Storage optimization:** Moving disks between different storage devices allows you to optimize the allocation of resources. You can distribute storage workloads more evenly, balance I/O operations, or allocate specific storage types for different VMs or containers based on their requirements. This can help improve overall system performance and resource utilization.
**Storage maintenance:** If you encounter issues with a particular storage device, such as disk failures or performance degradation, moving the disks to a different storage location can help isolate the problem. By moving the disks to a known working storage device, you can continue operating your VMs or containers while addressing the storage issues separately.
### Method 1. Moving Proxmox VM disk using GUI
Proxmox VE enables the addition of various storage types, such as NFS, iSCSI-LVM, and so forth. This raises the question: is it possible to move the virtual hard disk of a VM, previously created and running on local-lvm, to the newly added NFS or iSCSI-LVM storage?
The answer is “Yes”.
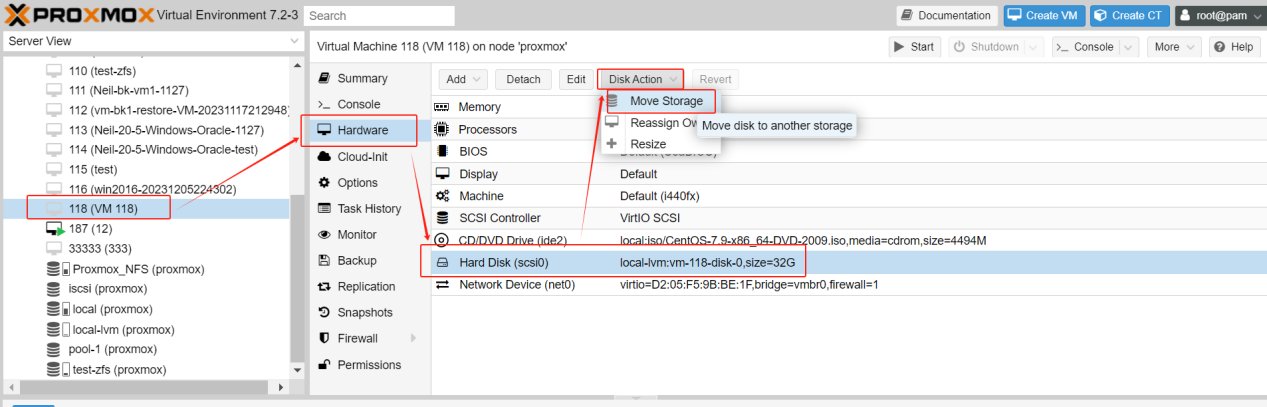
1.Select the VM where the virtual disk needs to be moved, stop the VM, and click **Hardware > Hard Disk > Disk Action > Move Storage.**
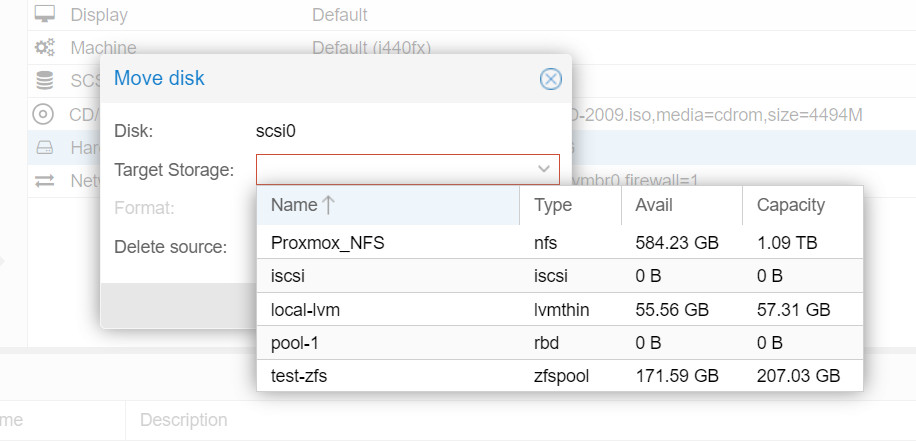
2.Select target storage and format.
If the Target Storage is on file level, the Format supports three types of virtual disk image formats: [**Raw**](https://www.vinchin.com/vm-tips/raw-vs-qcow2.html) disk image, QEMU image format ([**QCOW2**](https://www.vinchin.com/vm-backup/import-qcow2-proxmox.html)), and VMware image format ([**VMDK**](https://www.vinchin.com/vm-migration/convert-vmdk-to-qcow2.html)). Proxmox VE suggests using the QEMU image format.
**Delete Source:** This is the option to delete the original disk. For safety, if you are concerned about potential issues when migrating to new storage or if there’s a need to keep an extra copy for backup purposes, do not check this option.
3.Click on Move Disk and wait for the completion of the disk migration.
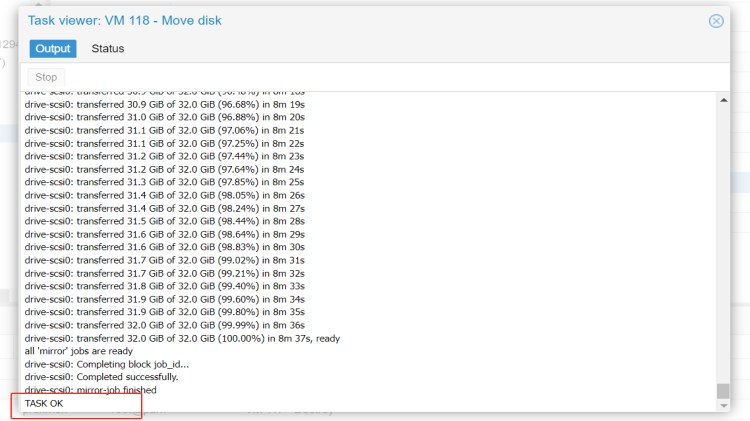
4\. Check the Hard Disk again.
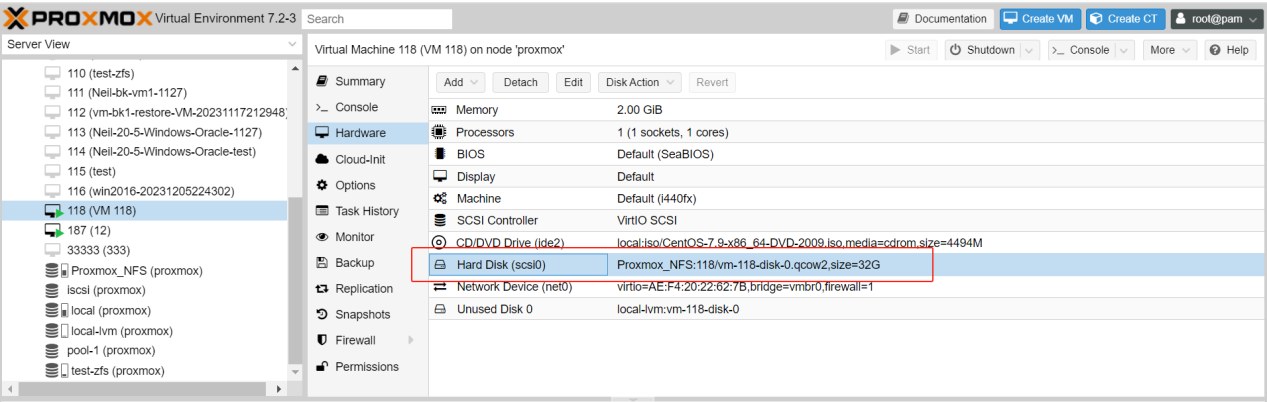
You can find that it has been moved to a new disk, whereas the initial “local-lvm:vm-118-disk-0” has now transformed into “Unused Disk 0”. After confirming that the move was successful, you could proceed with the deletion of the original “Unused Disk”.
Method 2. Moving Proxmox VM disk using CLI
**1.Identify the source and target storages**
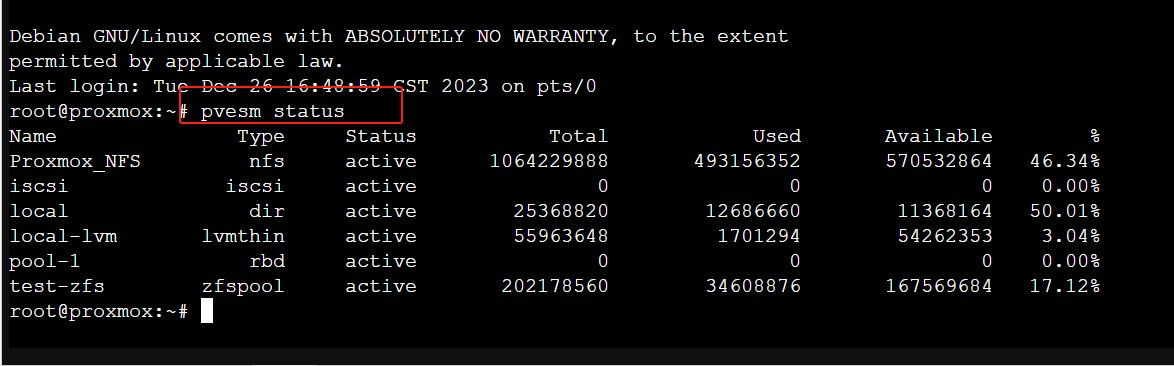
First, you need to identify the source and target storages. You can do this by using the following command:
```
pvesm status
```
This command will list all available storage on your Proxmox server. Note down the IDs of the source and target storages.
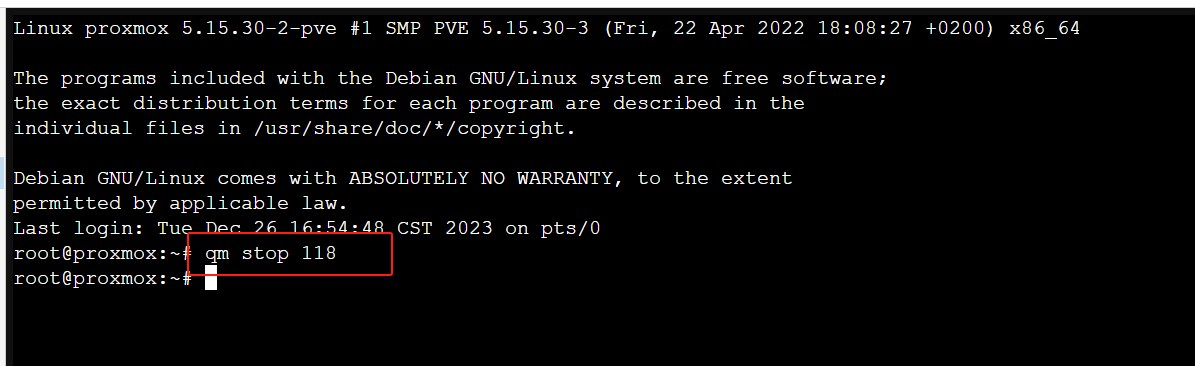
**2.Shut down the virtual machine**
Using the following command, replacing “VMID” with your virtual machine’s ID:
```
qm stop VMID
```
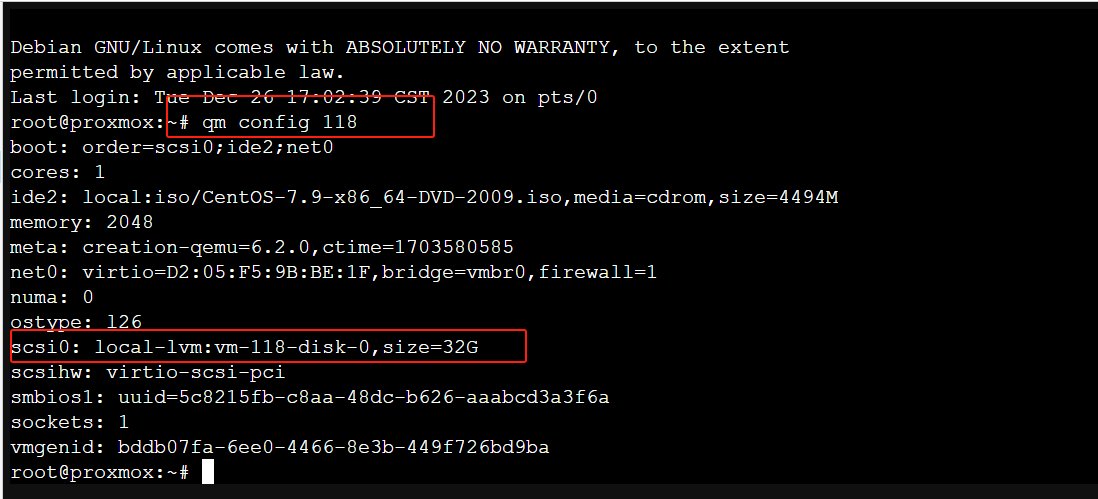
**3.Check the configuration of the VM to see a list of its disks and their IDs. You can do this with the following command:**
```
qm config VMID
```
You should see a line for each disk that looks something like this:
```
scsi0: local-lvm:vm-118-disk-0
```
In this example, “scsi0” is the disk ID.
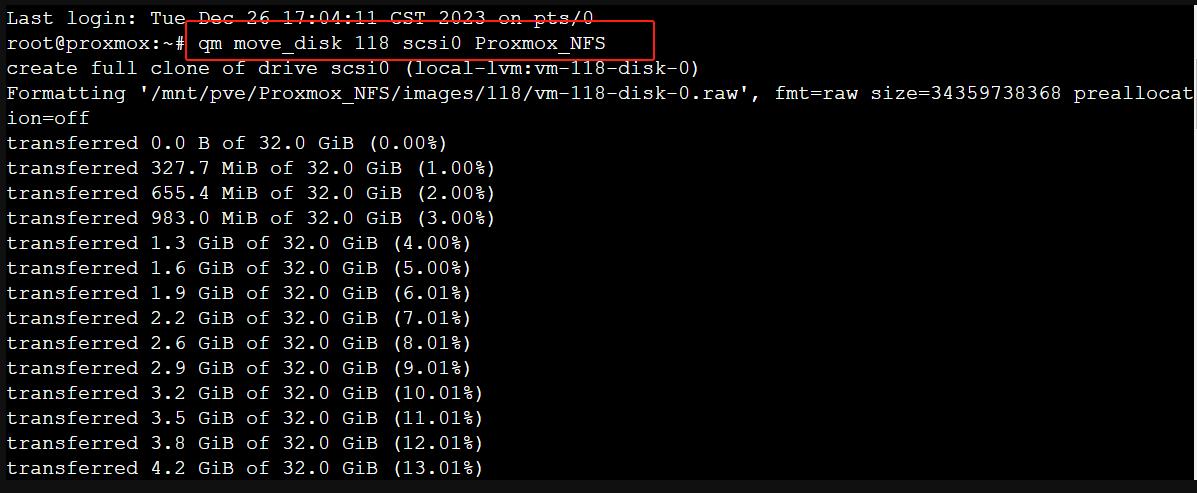
**4.Move the disk**
Using the following command:
```
qm move_disk VMID source_disk target_storage
```
Replace “VMID” with your virtual machine’s ID, “source\_disk” with the disk you want to move, and “target\_storage” with the ID of the storage you want to move the disk to.
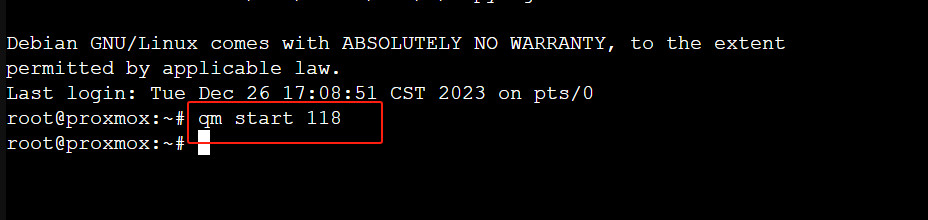
**5.Start the virtual machine**
After the disk has been moved, you can start the VM again using the following command:
```
qm start VMID
```
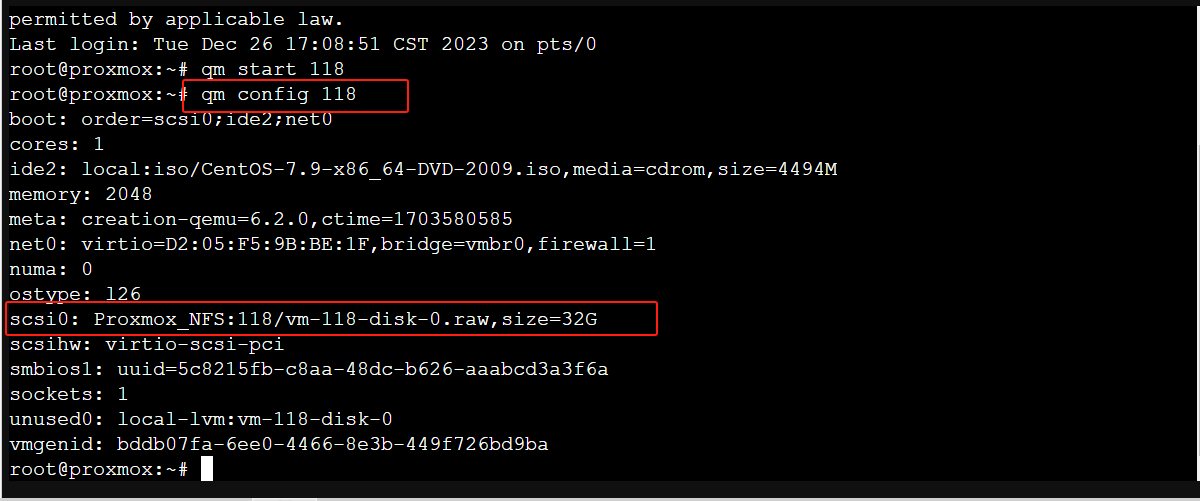
**6.Verify the migration**
Verify that the disk has been moved successfully. You can do this by checking the VM’s hardware. Use the following command again:
```
qm config VMID
```
The disk should now be listed under the new storage.