# Shrink Partition
### Shrink Partition on Server 2022/2019/2016 with Disk Management
Shrinking volume varies in Disk Management. Here are some can and can't tips.
* Shrinking NTFS volumes with Disk Management: YES
* Shrinking FAT32 volumes with Disk Management: NO ( Shrink fat32 drive with Partition Resizer)
* Add unallocated space to other drives wth Disk Management: NO (Move in-between partitions with Partition Resizer to move unallocated spaces safely)
Shrinking an NTFS volume is possible in Disk Management, and it only allows creating a new drive with the produced unallocated space after shrinking NTFS volume with Windows built-in tools (Disk Management or Diskpart, same story.)
Here are the steps for shrinking a volume in Disk Management when it's ntfs. (For shrinking fat32 partitions, be free to use tool **Partition Resizer Server**.)
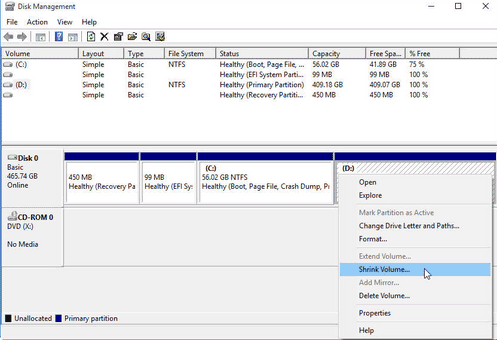
Step 1 - Open Disk Management in your computer, you may click the Start icon -> Run, and type **Diskmgmt.msc**
Step 2 - Right click the drive, click **Shrink Volume** option in the pop up box to go ahead.
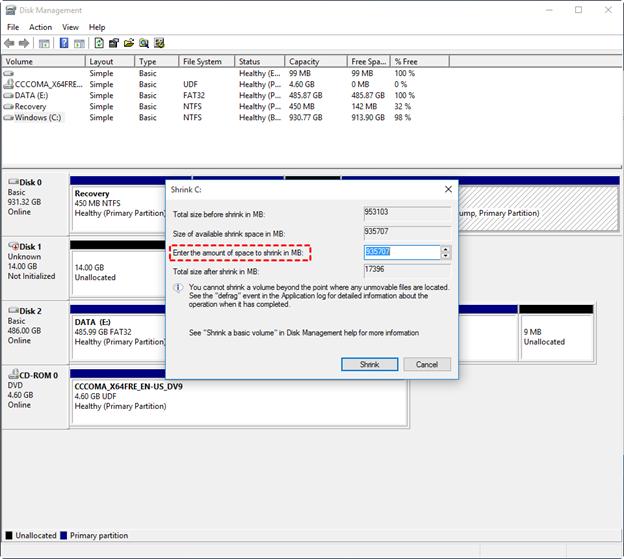
Step 3 - Enter the size that you want to shrink, eg, if you want to shrink 10GB, you may enter 10240, which is the result of 1024\*10, if you want to shrink 100GB, you may enter 102400, which is 1024\*100.
Step 4 - Click Shrink button in the box and confirm the changes.
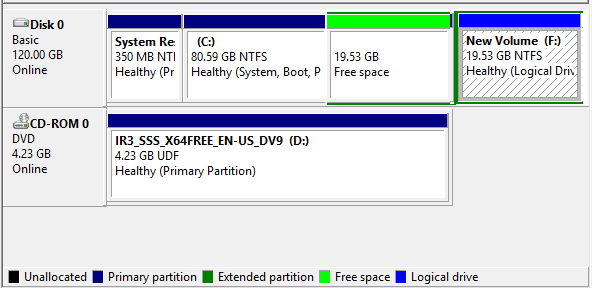
And then the disk partitions will have some **Free space** available on the disk map like this.
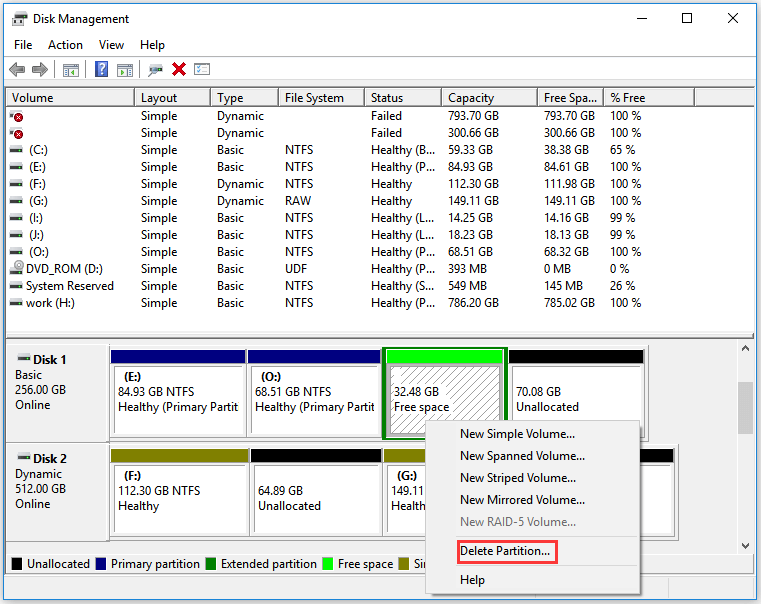
**Step 5 - Right click the Free space to delete volume since deleting free space will make it unallocated space in Disk Management**.
What can you do with the free space or unallocated space?
* 1, Add the unallocated space to closeby partition
* 2, Copy partition to unallocated space as bakcup
* 3, Create a new drive
* 4, Move unallocated space to other drives (Partition Resizer Server can do the job when Disk Management or Diskpart couldn't)
* 5, Other partition functions...