Add Email Signature
How to add a signature in Outlook.com (Now outlook.live.com)
Step 1
Click on the 'Settings' gear icon
Click on the 'Settings' gear icon in the top right corner of the page and then click on "View all settings"

Step 2
In the settings window that opens, click on 'Compose and reply'

Step 3
Navigate to the section labeled 'Email signature'
Under 'Email signature', you will see a text box where you can type your signature. You can format your text using the options above the box – you can change the font, size, color, and more. You can also add links, pictures, and even your business card.

Step 4
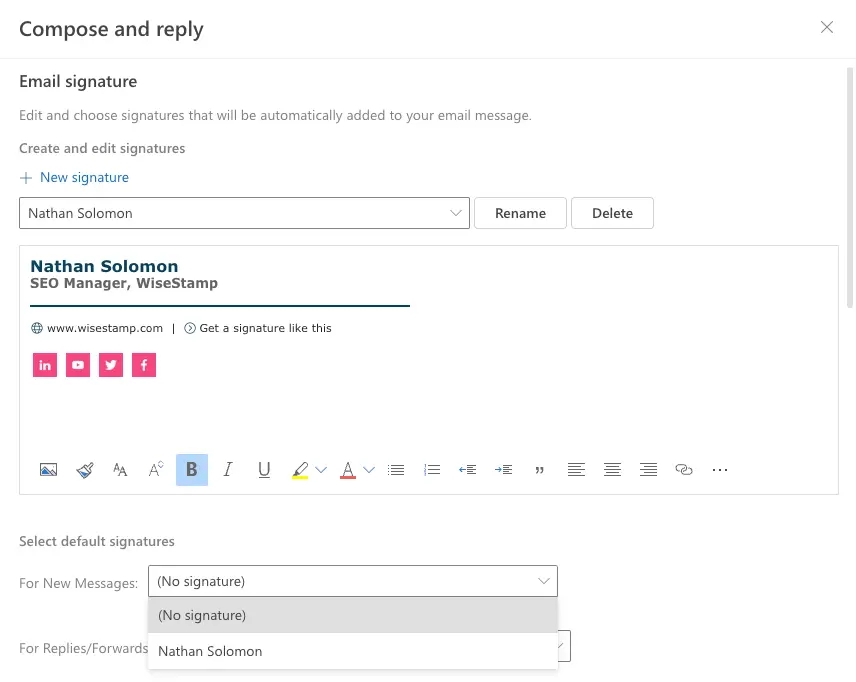
Set the signature as the default and more options to consider
Once you're satisfied with your signature, select the checkbox that applies to you (See screen shot below). You can choose to automatically include your signature on new messages, on forwarded or replied-to messages, both, or neither.

Don’t forget to click ‘Save’ at the bottom of the page when you’re done. Close the settings window, and now your new signature should appear at the bottom of every email you send.
Last updated
Was this helpful?