Configure email forwarding
Configure email forwarding
In the admin center, go to the Users > Active users page.
Select the name of the user whose email you want to forward and select the Mail tab.
Select Manage email forwarding.
On the email forwarding page, select Forward all emails sent to this mailbox. Enter the forwarding address, and choose whether you want to keep a copy of forwarded emails. If you don't see this option, make sure a license is assigned to the user account. Select Save changes.
Don't delete the account of the user who's email you're forwarding or remove their license! If you do, email forwarding will stop.
To forward to multiple email addresses, you can ask this user to set up a rule in Outlook to forward to the addresses. For more info, check out Turn on automatic forwarding in Outlook. For Outlook on the web, see Use rules to automatically forward messages.
Set up forwarding in the Microsoft365 admin center
The recommended way to set up forwarding is from the Microsoft365 Admin Center. These are the steps you need to take to set up forwarding on your Office 365 account:
1. Login to your Office 365 portal using your administrator account. From the menu on top, click Admin > Exchange to open Exchange Admin Center.

2. From the menu on the left, click Mail Flow to create the forwarding rule.
3. In the Rules tab, click the ‘+’ (plus) button and select Create a new rule.

4. Enter a name for this rule. We’ve given Rule Name as ‘Desk365 forwarding rule’ for this example.

5. Under “Apply this rule if…” option, choose: The recipient is.
6. From the next page, select your company’s support email address (support@yourdomain.com) and click save.

7. In “Do the following”… option, choose ‘Redirect the message to’.
8. In the select members search tab type in the email address or select it from the list and click save.
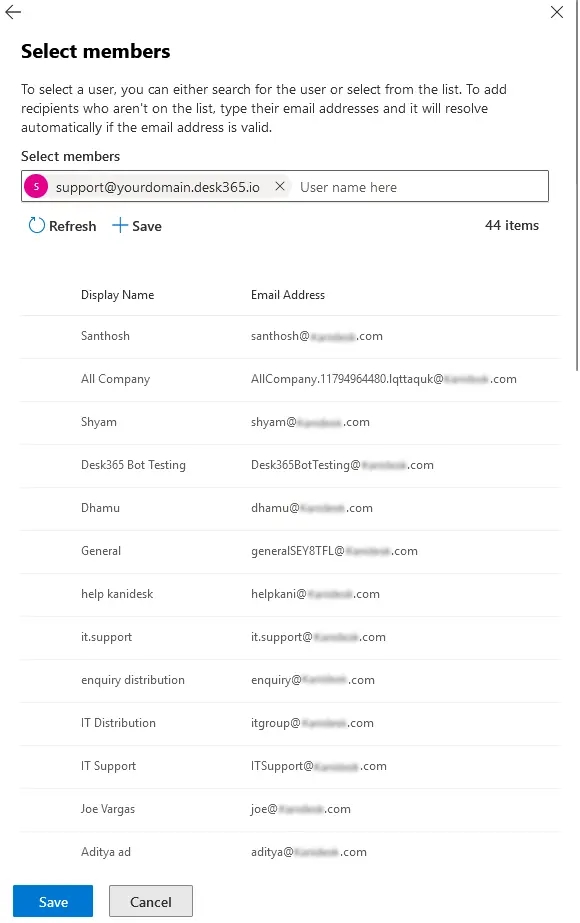
9. Configure the forwarding rule and click Next. Finally, review the created rule and click Finish. The rule is turned off by default, navigate to the rules page to turn it on.

Set up forwarding in Outlook
These are the steps you need to follow to set up the forwarding rules correctly in Outlook
1. Login to your Outlook account.
2. At the top of the menu, choose Settings. A Setting dialog box appears on the screen.
3. Navigate to Mail > Forwarding.
4. Toggle the ‘Enable Forwarding’ button and enter your support email address (support@yourdomain.desk365.io) for activating email forwarding for your account.

5. Click Save.
Now that you’re done with forwarding, you can refer to our previous article in which we’ve explained the steps needed to configure your custom support email in Desk365.
1. Avoid setting up forwarding using the ”Rules” option under settings. This results in emails being forwarded with a “FW:” prefix and the Contact not getting set up properly within your helpdesk.
2. If you haven’t done already, we suggest enabling external email forwarding in Microsoft 365.
If a user has set up an automatic forwarding rule to an external address in their Microsoft 365 mailbox using Outlook, the message will not be forwarded when the rule is triggered. Instead, the user will receive a non-delivery report (NDR) indicating that the message was not delivered.
‘Remote Server returned ‘550 5.7.520 Access denied, Your organization does not allow external forwarding. Please contact your administrator for further assistance. AS(7555)’.
Even though a user sets up forwarding, a Global Admin has to first enable external forwarding. The outbound spam protection settings and automatic external forwarding can be enabled for any mailboxes by a Microsoft 365 administrator.
External Forwarding
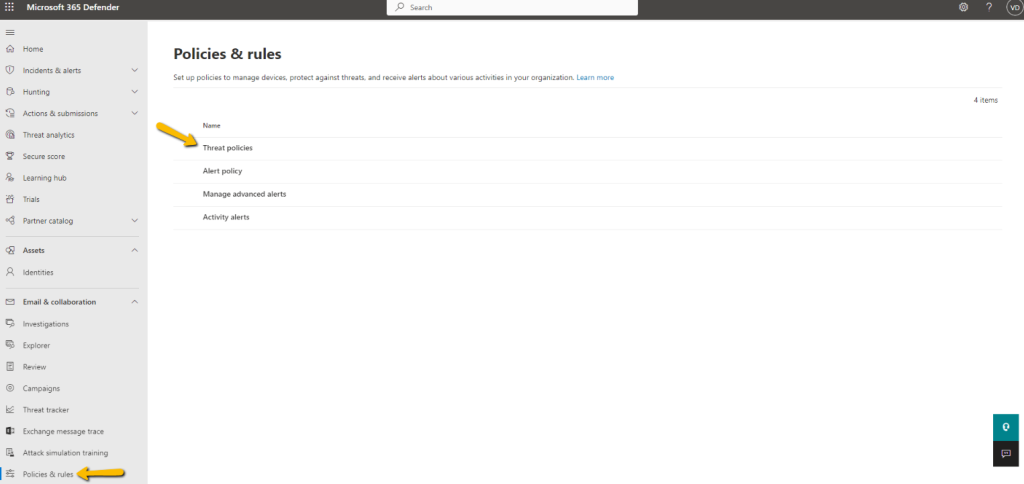
(i) Log in to the Microsoft 365 Defender Portal as a global admin.
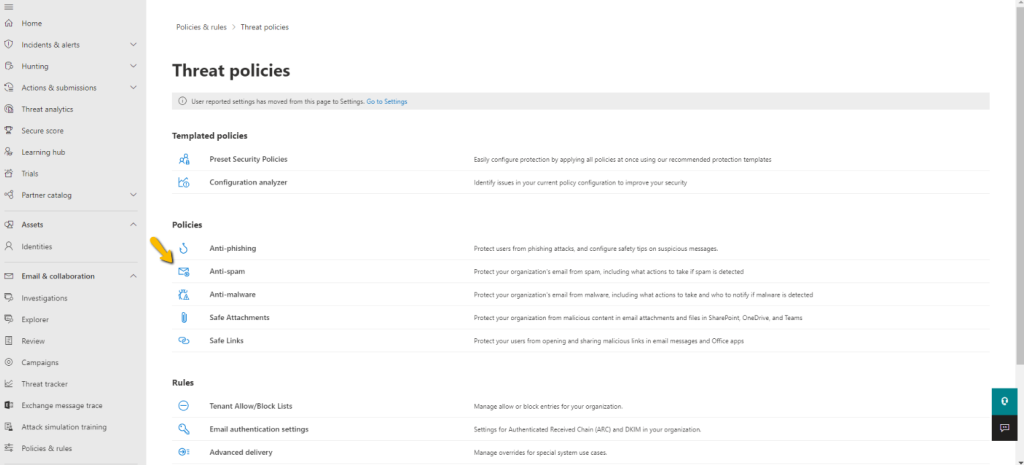
(ii) Navigate to Policies & rules -> Threat policies.
(iii) Choose ‘Anti-spam policies’ option here.
(iv) Locate the ‘Anti-spam outbound policy’ in the list and select ‘Edit protection settings’.

(v) Look for the ‘Forwarding rules’ section and select the ‘On-Forwarding is enabled’ option from the dropdown menu under Automatic forwarding rules to allow email forwarding.

(vi) Save your changes.
All your Microsoft 365 users can now configure automatic email forwarding to external mailboxes in Outlook.
3. We also recommend you to set up DKIM records for your domain.
This article explains in detail about the importance of setting up DKIM for your domain.
REFERENCES
Last updated