# Install and Configure MySQL
{% hint style="warning" %}
MySQL is a well-established relational database management system ([RDBMS](https://phoenixnap.com/glossary/relational-database-management-system-rdbms)). It is fully compatible with Windows operating systems, including desktop and server editions.
{% endhint %}
## Prerequisites
* Windows operating system.
* Administrator privileges on the Windows server.
## How to Install MySQL on Windows
{% hint style="success" %}
Instead of downloading and installing MySQL manually, you can use the **MSI Installer** to streamline the process.
{% endhint %}
### Step 1: Download MySQL MSI Installer for Windows
To download a free Community MySQL Server for Windows:
1\. [Connect to your Windows server](https://phoenixnap.com/kb/rdp-windows) and navigate to the [official MySQL downloads page](https://dev.mysql.com/downloads/mysql/).
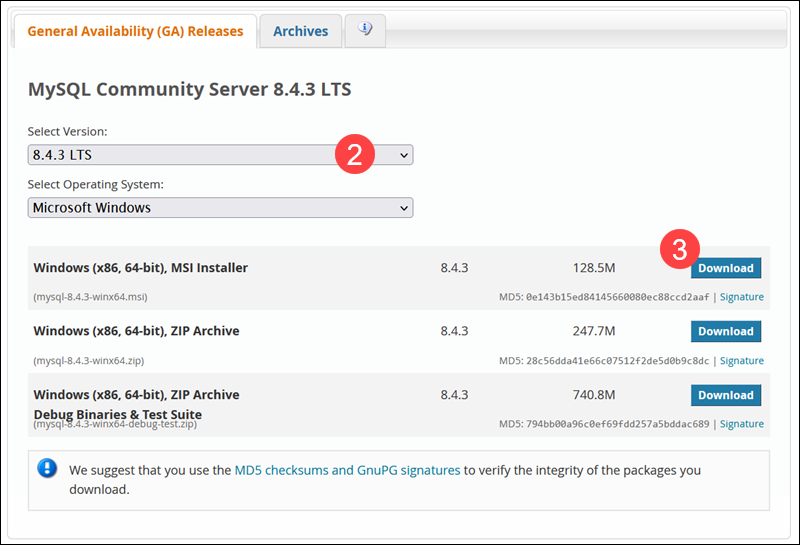
2\. Use the dropdown menu to select the latest MySQL Server version. At the time of writing, the latest **stable** MySQL Community Server version is **8.4.3 LTS**.
3\. **Download** the MSI Installer.
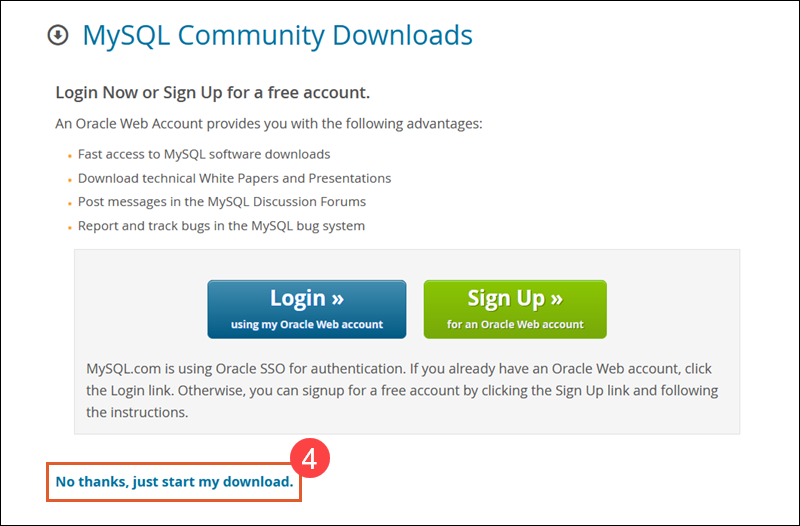
4\. If you do not want to sign up for an *Oracle Web Account*, click **No thanks, just start my download**.
Once the download is complete, run the MySQL Installer file from the download folder. It can take a few moments while Windows prepares the installation and configuration process.
***
### Step 2: Install MySQL Server on Windows
To install MySQL Server on Windows:
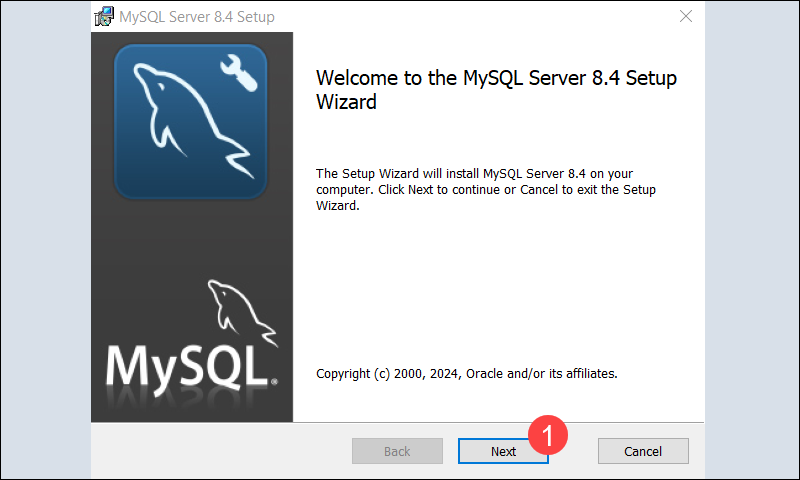
1\. Click **Next** to start the MySQL installation process in the Setup Wizard.
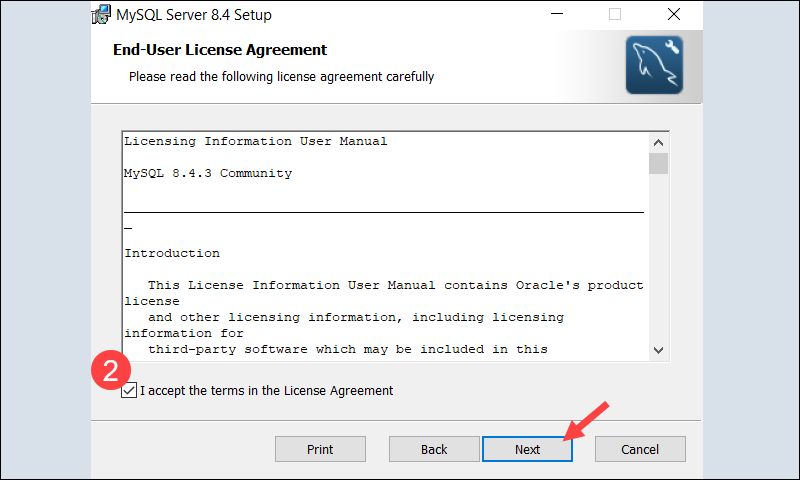
2\. Review and accept the *License Agreement* terms and click **Next**.
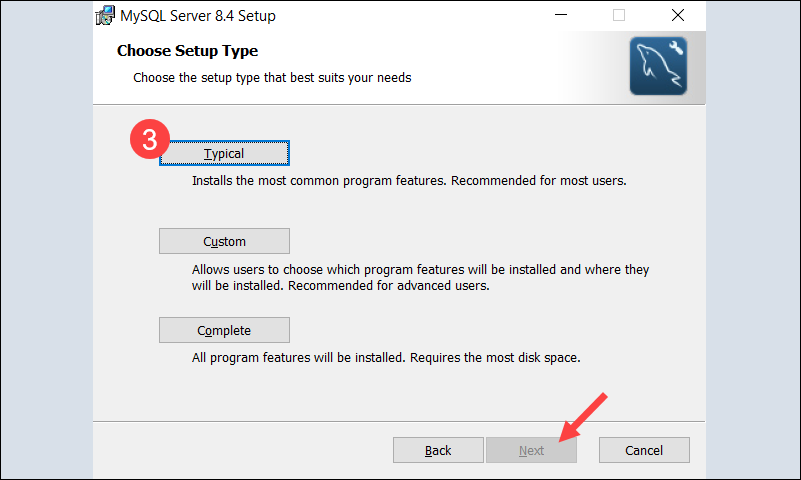
3\. Before proceeding with the installation, define which features to install by selecting a *Setup Type*. Select one of the predefined options or create your custom setup:
* **Typical**. Deploy an instance of the MySQL Server and skip most other features. Typically used for deploying servers in a [production environment](https://phoenixnap.com/glossary/production-environment).
* **Custom**. Manually select the elements to be installed and modify default settings.
* **Complete**. Install MySQL Server and all available features, including sample [databases](https://phoenixnap.com/kb/what-is-a-database) and examples. Provides a complete environment for development and [server management](https://phoenixnap.com/blog/server-management).
For this tutorial, we selected the **Typical** setup type. After making your selection, click **Next** to proceed.
{% hint style="warning" %}
**Note:** The setups are tailored for specific use cases, primarily to streamline the installation. You can always customize the preconfigured setups post-installation.
{% endhint %}
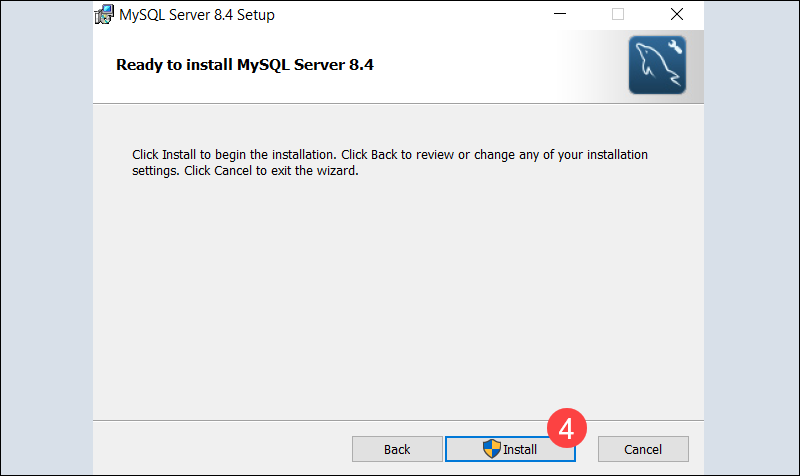
4\. Click **Install** to initiate the MySQL Server installation.
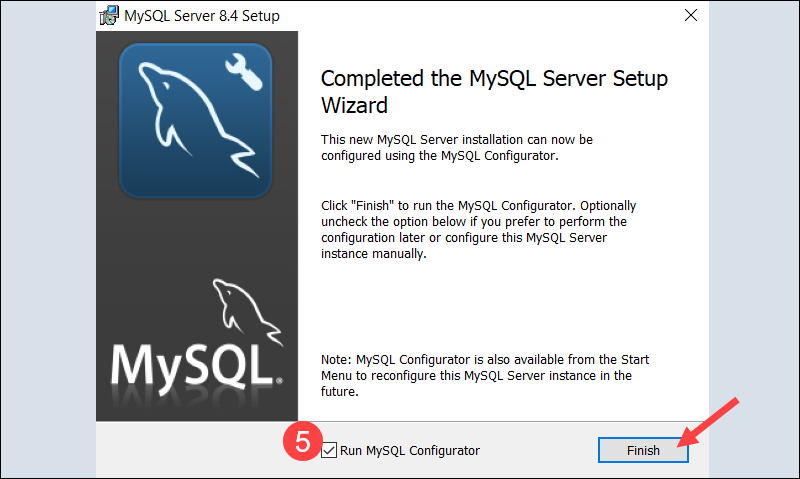
5\. Confirm the **Run MySQL Configurator** option is checked and click **Finish**.
This launches the **MySQL Configurator** app to assist you in configuring **MySQL Server 8.4.3**.
***
### Step 3: Configure MySQL Server on Windows
The following section explains how to set up MySQL Server on Windows using the **MySQL Configurator**.
{% hint style="warning" %}
**Note:** The MySQL Configurator is part of the MySQL bundle and does not need to be installed separately. It automates the MySQL Server setup, provides a consistent interface across all supported Windows platforms, and resolves [software dependencies](https://phoenixnap.com/blog/software-dependencies).
{% endhint %}
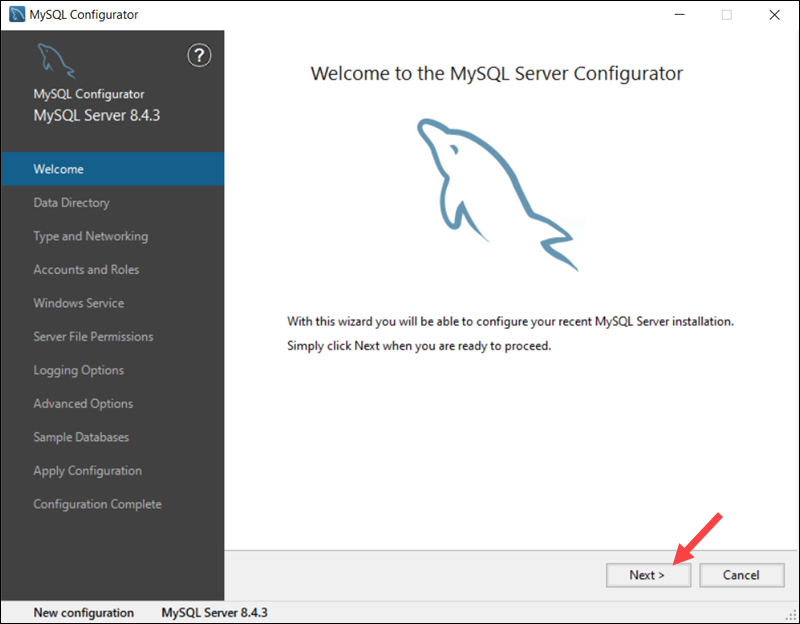
The tool starts automatically if the **Run MySQL Configurator** option is selected during installation. If it does not launch, open the tool manually from the Windows Start menu.
Once the tool is launched, click **Next** to begin the configuration process.
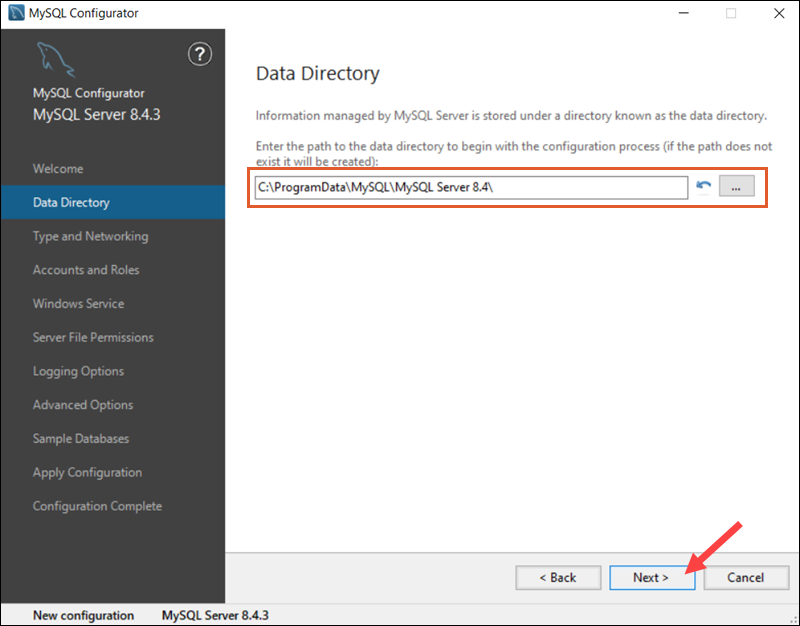
#### **Data Directory**
Select the directory where MySQL Server will store its data.
Use the default path, *C:\ProgramData\MySQL\MySQL Server 8.4\\,* or specify a custom directory and click **Next**.
{% hint style="warning" %}
**Note:** To avoid path conflicts during the installation, remove previous MySQL versions from the system or select a new installation directory.
{% endhint %}
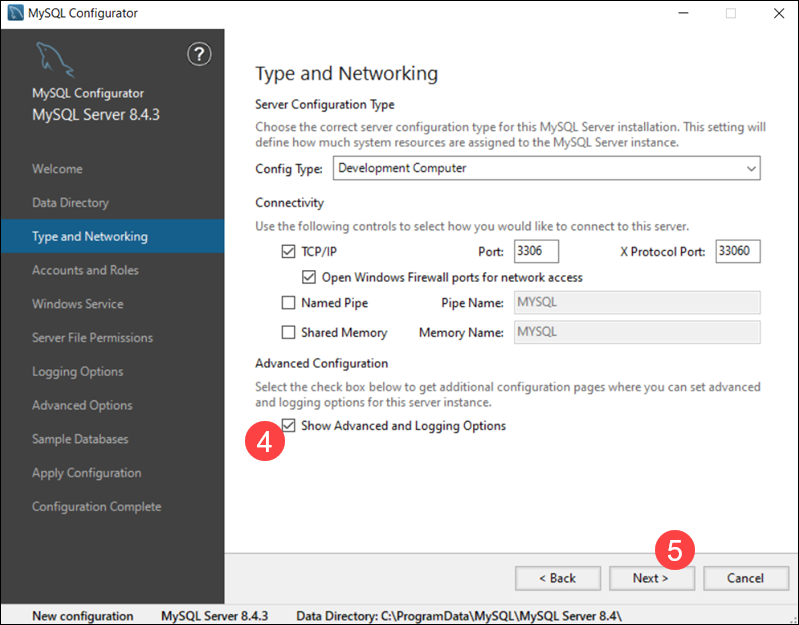
#### **Type and Networking**
In the *Type and Networking* section:
1\. Choose one of three server configuration types in the **Config Type** dropdown:
* **Development Computer**. Select this option if the Windows server is a testing and [development environment](https://phoenixnap.com/glossary/development-environment) where MySQL needs to share resources with other [applications](https://phoenixnap.com/glossary/what-is-an-application).
* **Server Computer**. This configuration balances resource sharing and server performance. The Windows server can host multiple applications, including MySQL, as part of a multi-purpose server setup.
* **Dedicated Computer**. MySQL utilizes all system resources with minimal resource sharing. This option is best used for dedicated MySQL servers and is optimized for production environments.
2\. (Optional) Define the MySQL server port. The default port is **3306**, but it can be changed if, for example, another application already uses this [port number](https://phoenixnap.com/glossary/port-number).
3\. Ensure the **Open Windows Firewall ports for network access** option is checked to allow MySQL traffic through the [firewall](https://phoenixnap.com/glossary/what-is-a-firewall).
4\. (Optional) Check the **Show Advanced and Logging Option** box to configure additional logging options later.
5\. Click **Next** to continue.
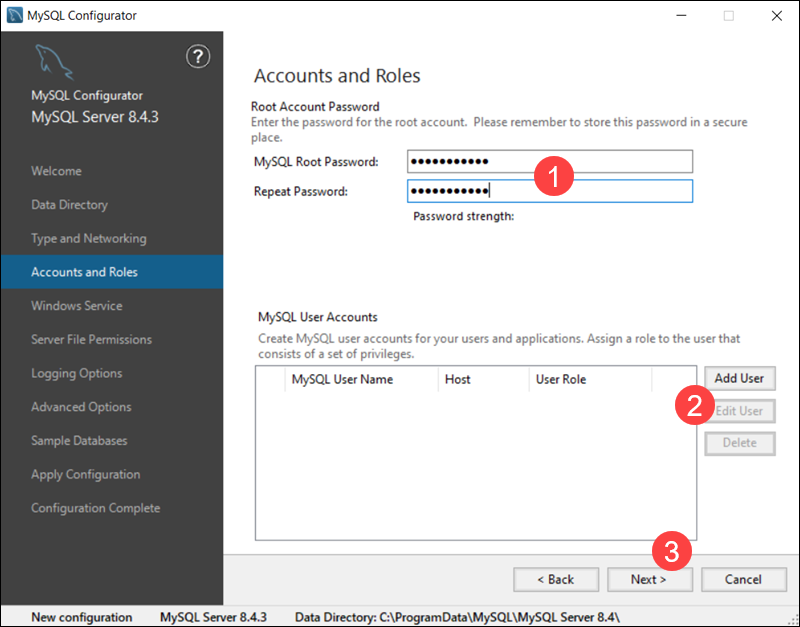
#### **Accounts and Roles**
The *Accounts and Roles* section allows you to configure MySQL user accounts. This is only an initial setup, and you can [change the MySQL root password](https://phoenixnap.com/kb/how-to-reset-mysql-root-password-windows-linux) after the installation.
1\. Enter and confirm a [strong password](https://phoenixnap.com/blog/strong-great-password-ideas) for the MySQL root user.
2\. (Optional) Click **Add User** to create additional roles and set privileges for various users and purposes.
3\. Select **Next** to continue with the server configuration.
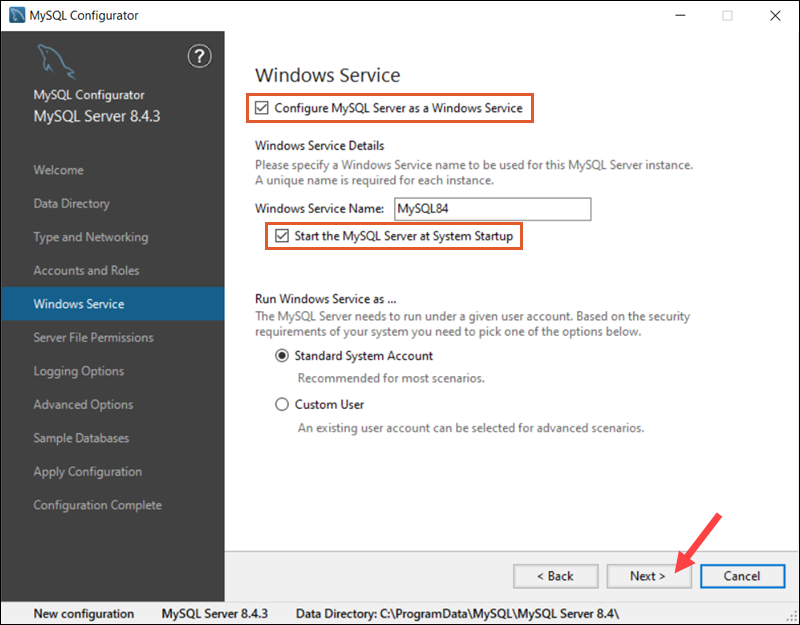
#### **Windows Service**
A Windows Service is registered with the operating system and starts automatically when Windows boots. Configuring MySQL Server as a Windows Service ensures it runs continuously in the background and is available for applications.
Confirm the **Configure MySQL Server as a Windows Service** and **Start the MySQL Server as System Startup** options are checked, then click **Next** to proceed.
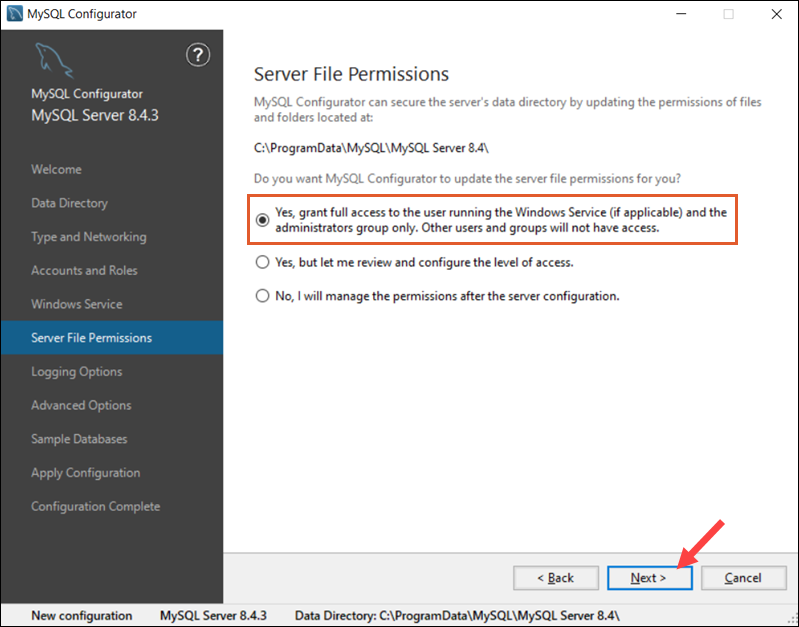
#### **Server File Permissions**
File permissions determine how users access and interact with MySQL server files. To define file permissions for previously created MySQL users, you can:
* Allow the MySQL Installer to configure user permissions automatically.
* Manually set specific file access levels for each user (recommended).
* Modify the server permissions manually after the installation is complete.
The recommended option is the safe choice for most setups. When ready, click **Next** to continue.
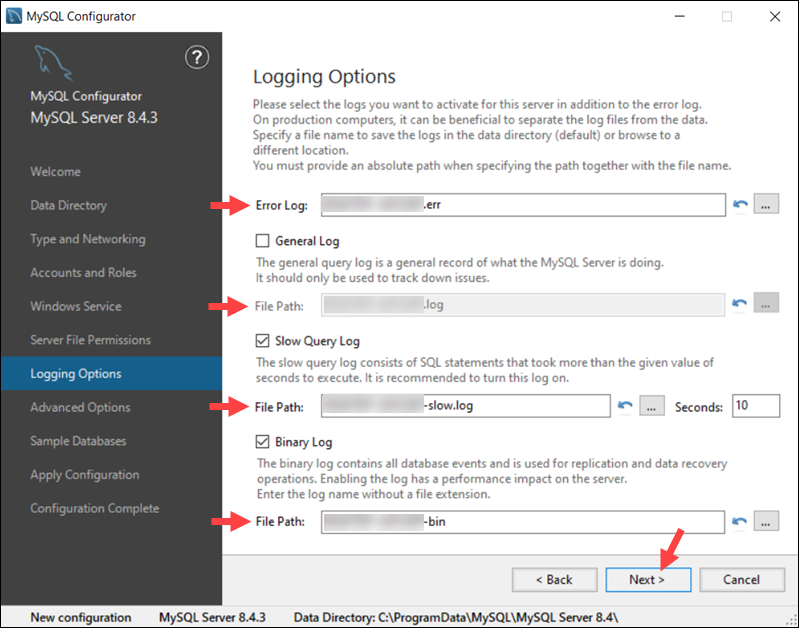
#### **Logging Options (Optional)**
If you have selected the **Show Advanced Logging** option in the *Type and Networking* tab, you can set up MySQL log preferences.
Select the types of logs you want to activate and define the log directories for:
* **Error Log**. Logs critical errors and warnings encountered by the MySQL server.
* **General Log**. Tracks server activity and connections.
* **Slow Query Log**. Identifies queries that take longer than expected to execute.
* **Bin Log**. Records all changes to the database data.
Click **Next** to proceed to the *Advanced Options* section.
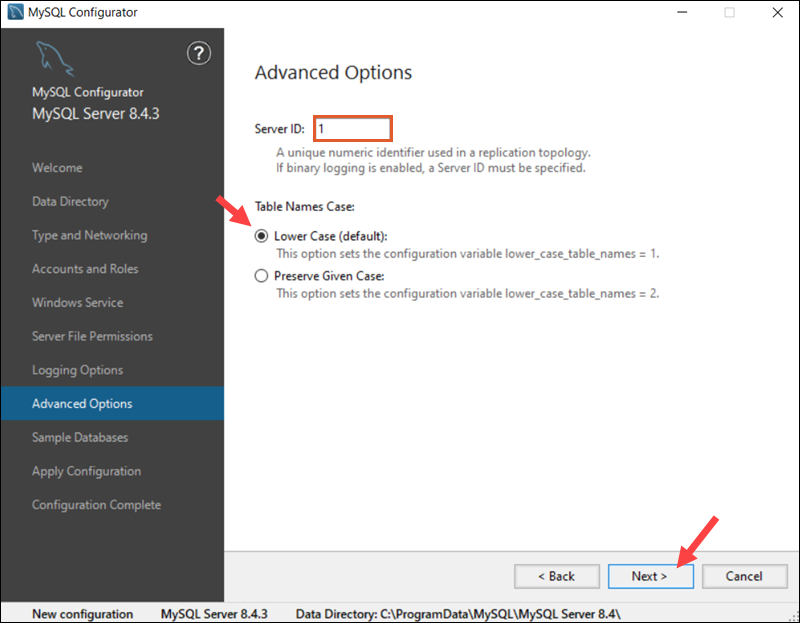
#### **Advanced Options (Optional)**
The *Advanced Options* are available only if you have checked **Show Advanced Options** in the *Type and Networking* tab.
The **Server ID** setting allows you to set a unique server identifier, which is useful for distinguishing servers in multi-server environments.
You can also configure **Table Names Case** sensitivity. In Windows, MySQL treats table names as lowercase (case-insensitive) by default. Uppercase names are rarely used but can be set to align with specific cross-platform requirements.
Click **Next** to finalize the MySQL Server configuration.
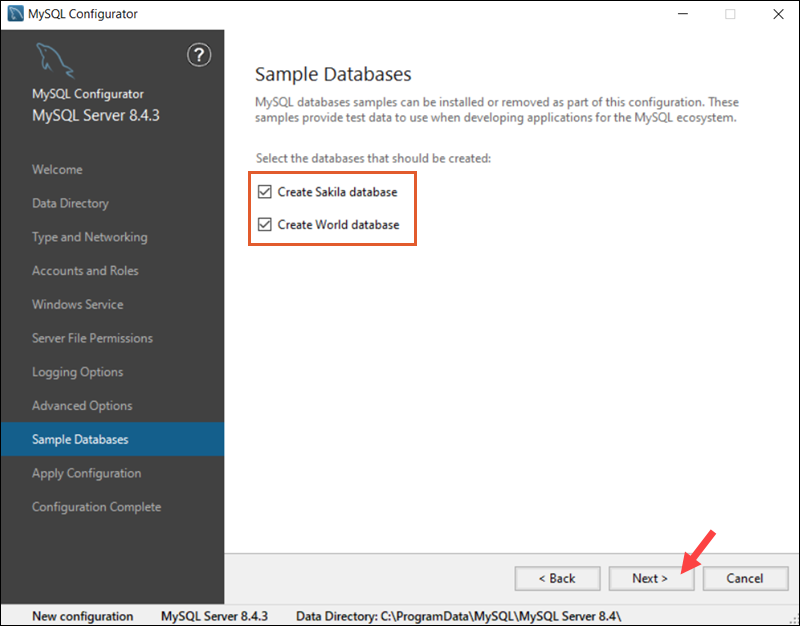
#### **Sample Databases**
The *Sample Databases* tab allows you to create predefined sample databases and example code, which are useful for learning, testing, and development purposes.
Select the **Sakila** or **World** database (or both) and click **Next**.
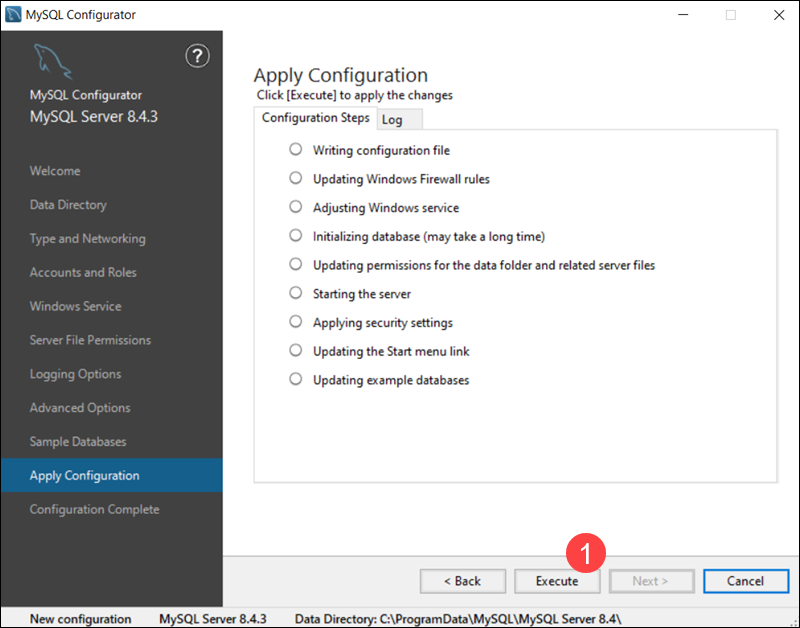
#### **Apply Server Configuration**
To complete the MySQL Server configuration:
1\. Review the steps and click **Execute** to apply the configuration.
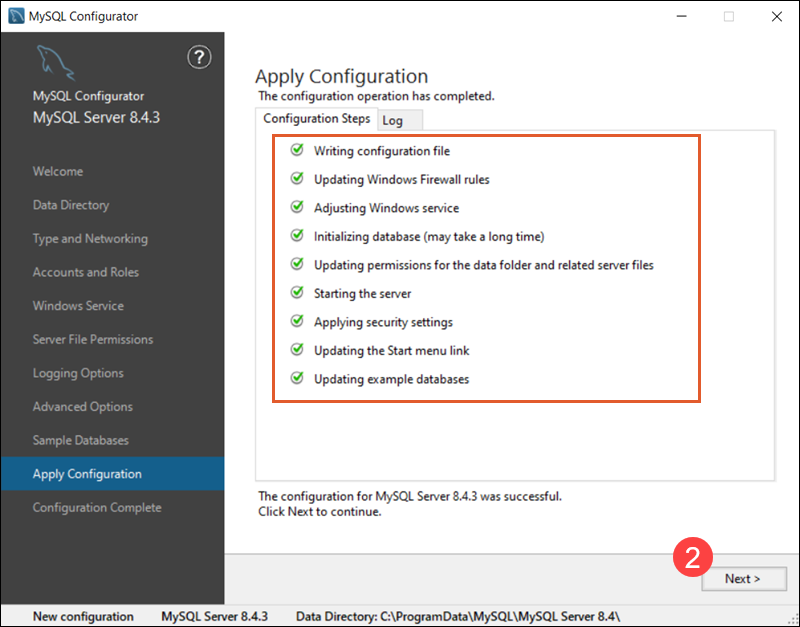
2\. The system informs you the MySQL Server configuration process is complete and displays a summary of the completed configuration steps. Select **Next** to continue the installation process.
3\. (Optional) Copy the installation process log to the Windows Clipboard.
4\. Click **Finish** to complete the MySQL server installation on Windows.
***
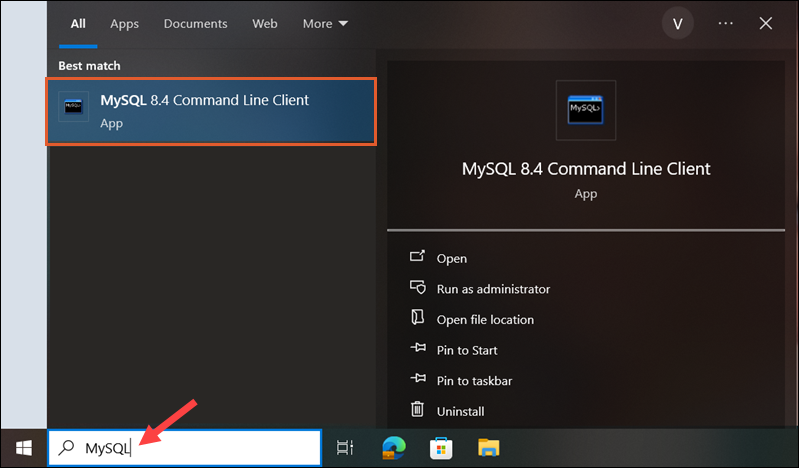
### Step 4: Verify MySQL Installation on Windows
f you configured MySQL as a Windows service, it starts automatically. To verify that the server is running:
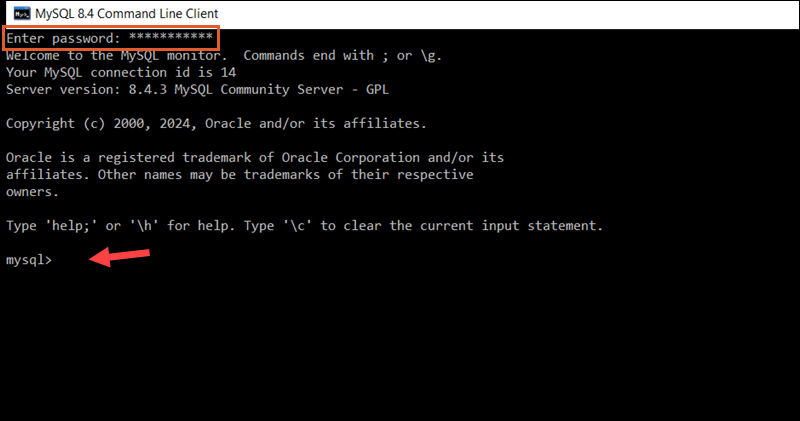
1\. Open the **MySQL Command Line Client** from the Windows Start menu.
2\. Enter the **root password** created during setup to access the MySQL server.
3\. Use the following command to list the current databases:
```
SHOW DATABASES;
```
The output shows that the example databases, *Sakila* and *World*, were successfully created during the setup process.
#### **Restart MySQL Service on Windows**
If MySQL does not start automatically on boot:
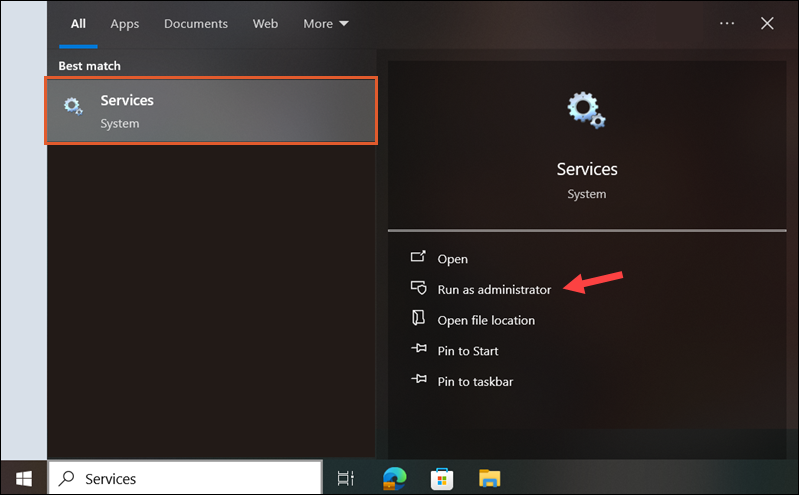
1\. Type **Services** in the Start menu and select **Run as administrator**.
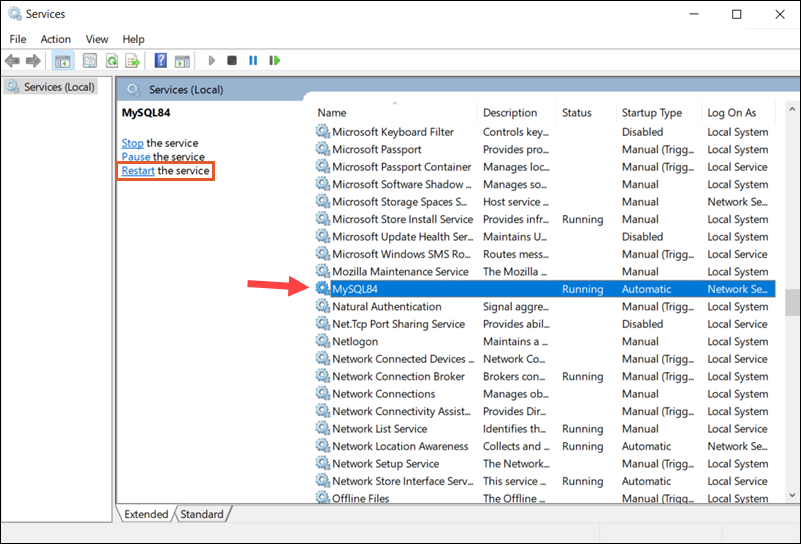
2\. Locate the MySQL service in the list. In this example, the service is listed as **MySQL84**.
3\. Select the service and click **Start** or **Restart**, depending on its status.
4\. To ensure the MySQL service always starts on boot, right-click the service and select **Properties**.
5\. In the *Startup Type* dropdown, select **Automatic** and click **OK** to save the changes.
The changes take effect immediately.
***
## REFERENCES
*